Want to remove part of your image background? Removing the background with a tool like remove.bg is one thing.
But sometimes there are people, products, or objects you also want to get rid of, or you might want to keep them.
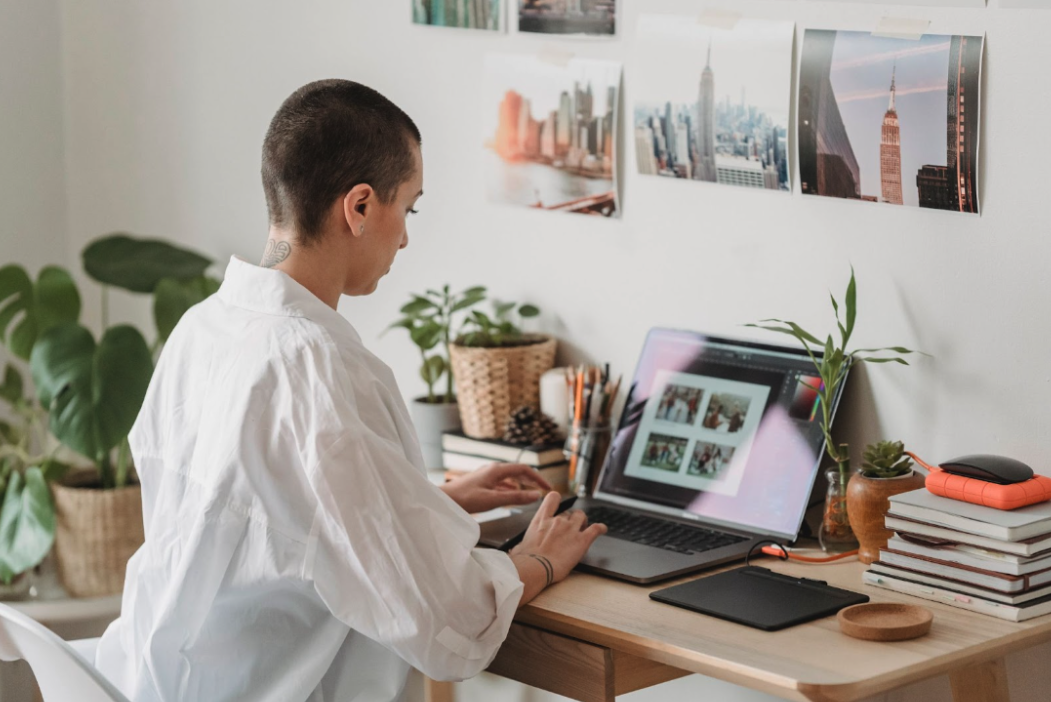
Whether you're working on portraits, product photos, interior design concepts, or creating content — we're going to show you different use cases on how to remove (or restore) parts of your background superfast.
Let's dive in.
Sadržaj
- Getting rid of unwanted strangers in the background
- Removing unwanted objects from photos
- How to clean up product photos and remove unwanted products in the background
- Partial background removal: interior design visualization
- Partial background removal for social media creators and influencers
- Remove selected backgrounds or objects from an image — in the most straightforward way
Getting rid of unwanted strangers in the background
Sometimes, you might have a photo where you want to get rid of not only the background, but also one person. Like this one:

We want to get rid of the girl on the left, simply for marketing purposes. After that, we can add a unique background — and create an entirely new image. To do this:
1. Go to remove.bg and drag and drop your image onto the platform. It will instantly remove the background of your image like this:
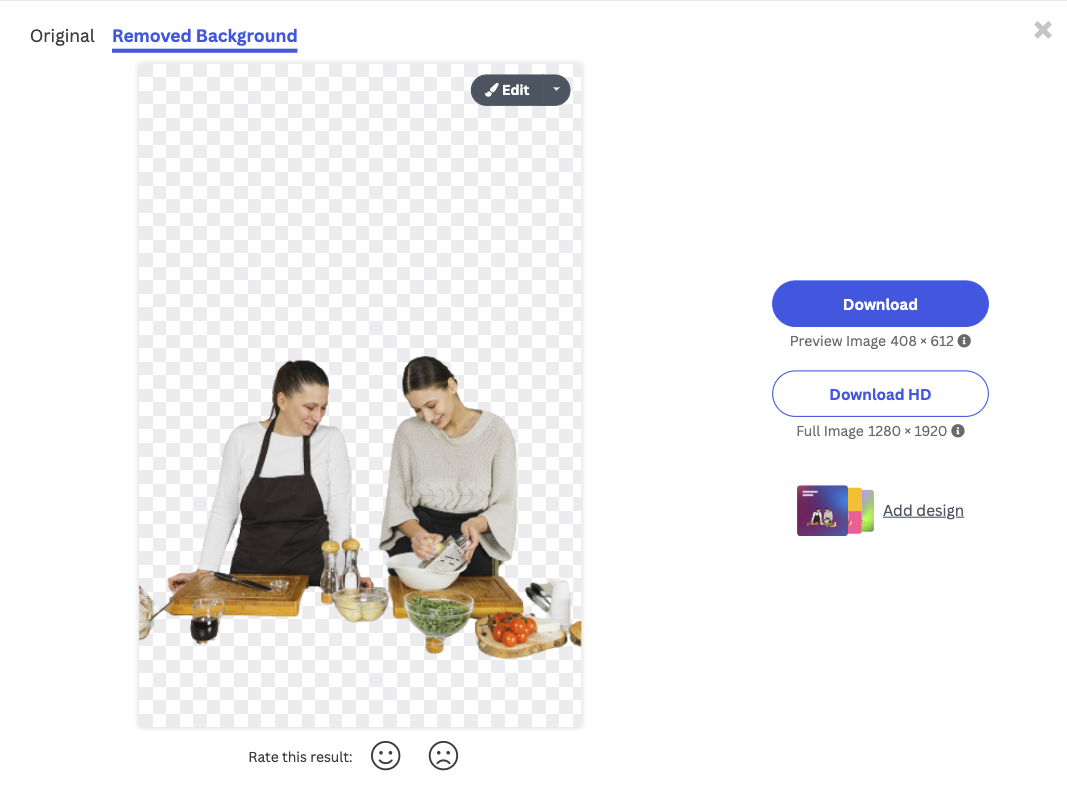
2. Then go ahead and select Edit > Erase/ Restore.

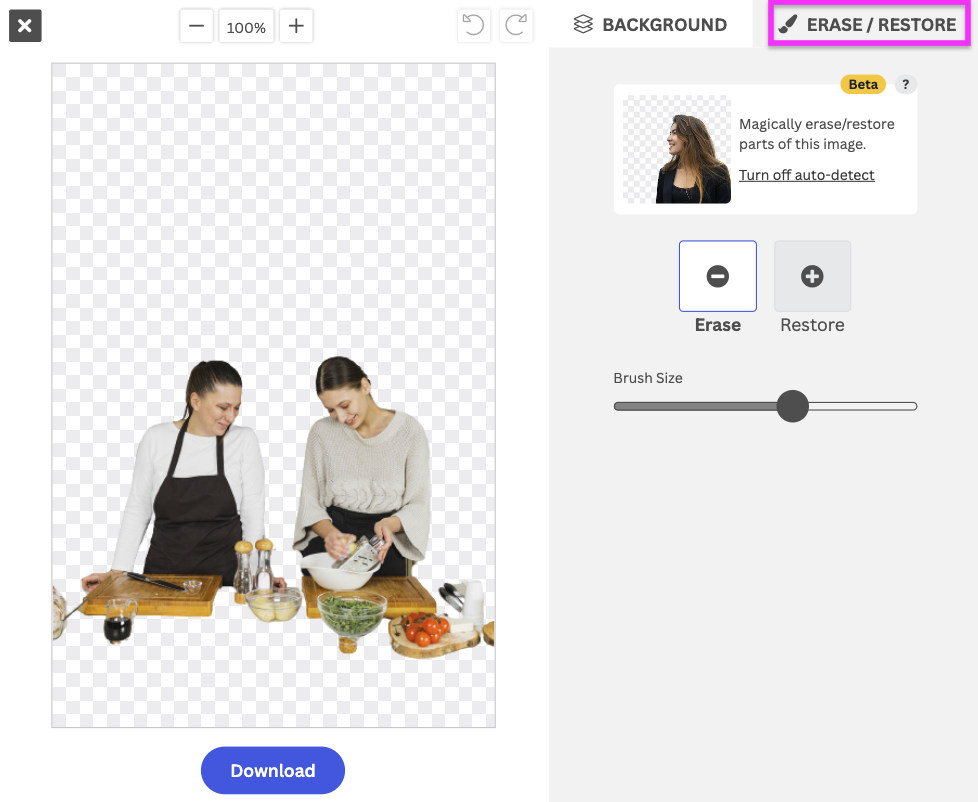
3. Next, you're going to want to make sure > Erase is selected and change the > Brush Size to a bit smaller; if you hover over the image, you can see its size.
It should be small enough for you to outline the person with precision.
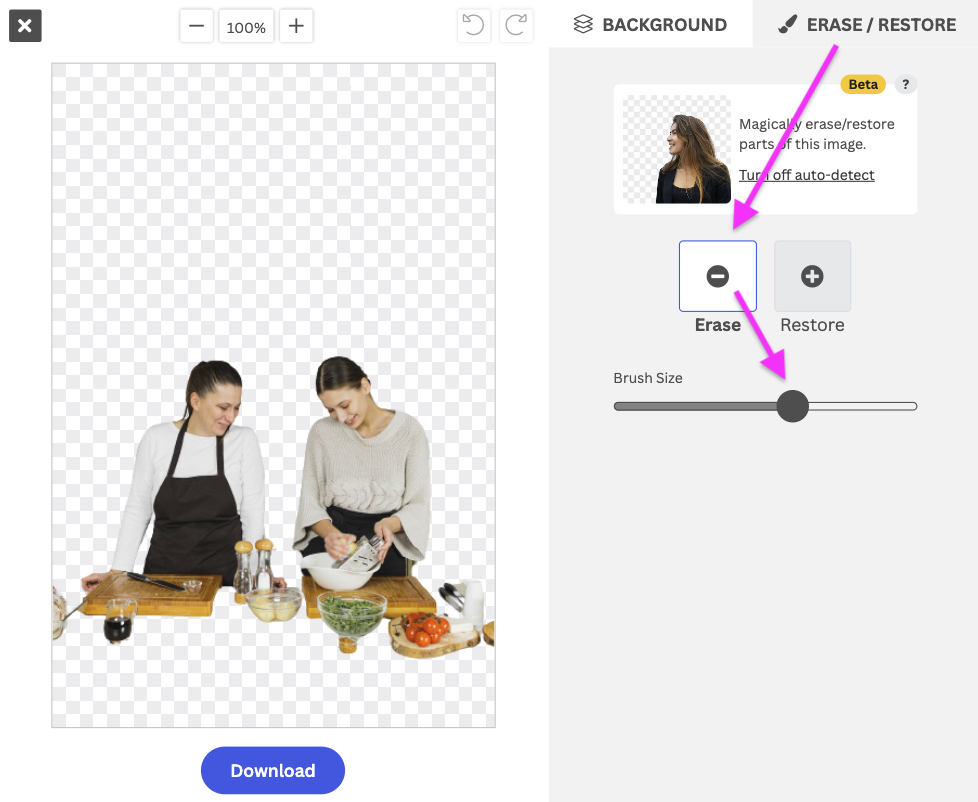
Now, color in the person you want to get rid of. You can also restore part of the image that the AI accidentally deleted, like the table in this example.
4. Once you're done, remove.bg's Magic Brush will work its magic. Like this:
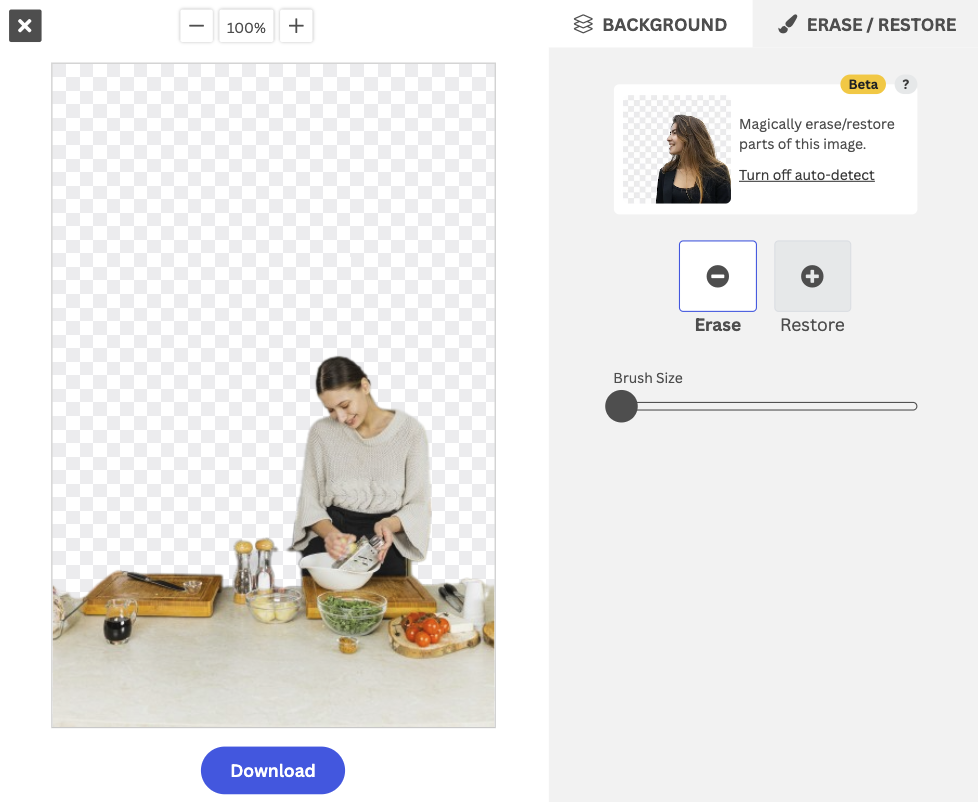
5. Now, you can even add a new and unique background by going to > Background and selecting whichever one you like best. We went for this one:
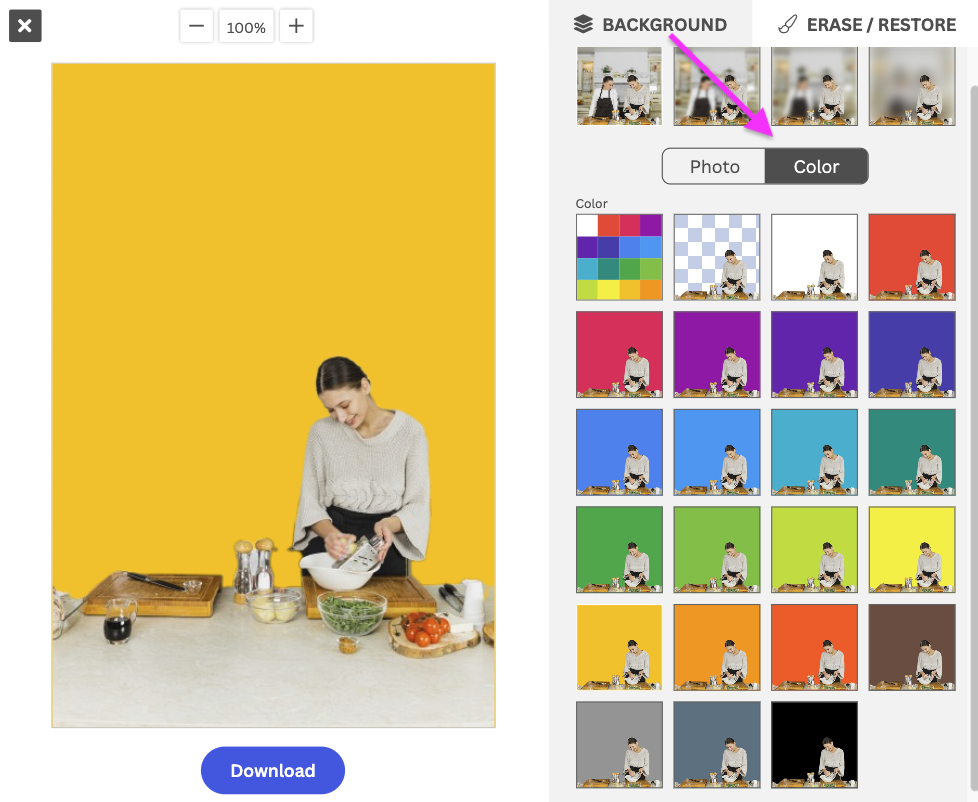
6. Once you're ready, you can go ahead and hit > Download.

Depending on what you need the photo for, you can always crop your image in order to better fit your needs, like this:

And there you have it, a simple step-by-step on removing any unwanted people or strangers from the background of your photo.
Removing unwanted objects from photos
Next up, we're going to show you how to remove any unwanted objects from a photo.
In our example, it's a seal — yes, we know you may not consider a seal an object, but in photography terms, it is. It could also be an apple, a lamp — whatever object you want it to be. If you have several objects in the foreground and only want to keep some of them, this is how to go about it:
1. First, you’re going to want to use remove.bg to remove the background of your image. To do this, grab your image and drag and drop it onto remove.bg. We’re gonna use this funny diving photo. Our goal is to replace the background and remove the seal.
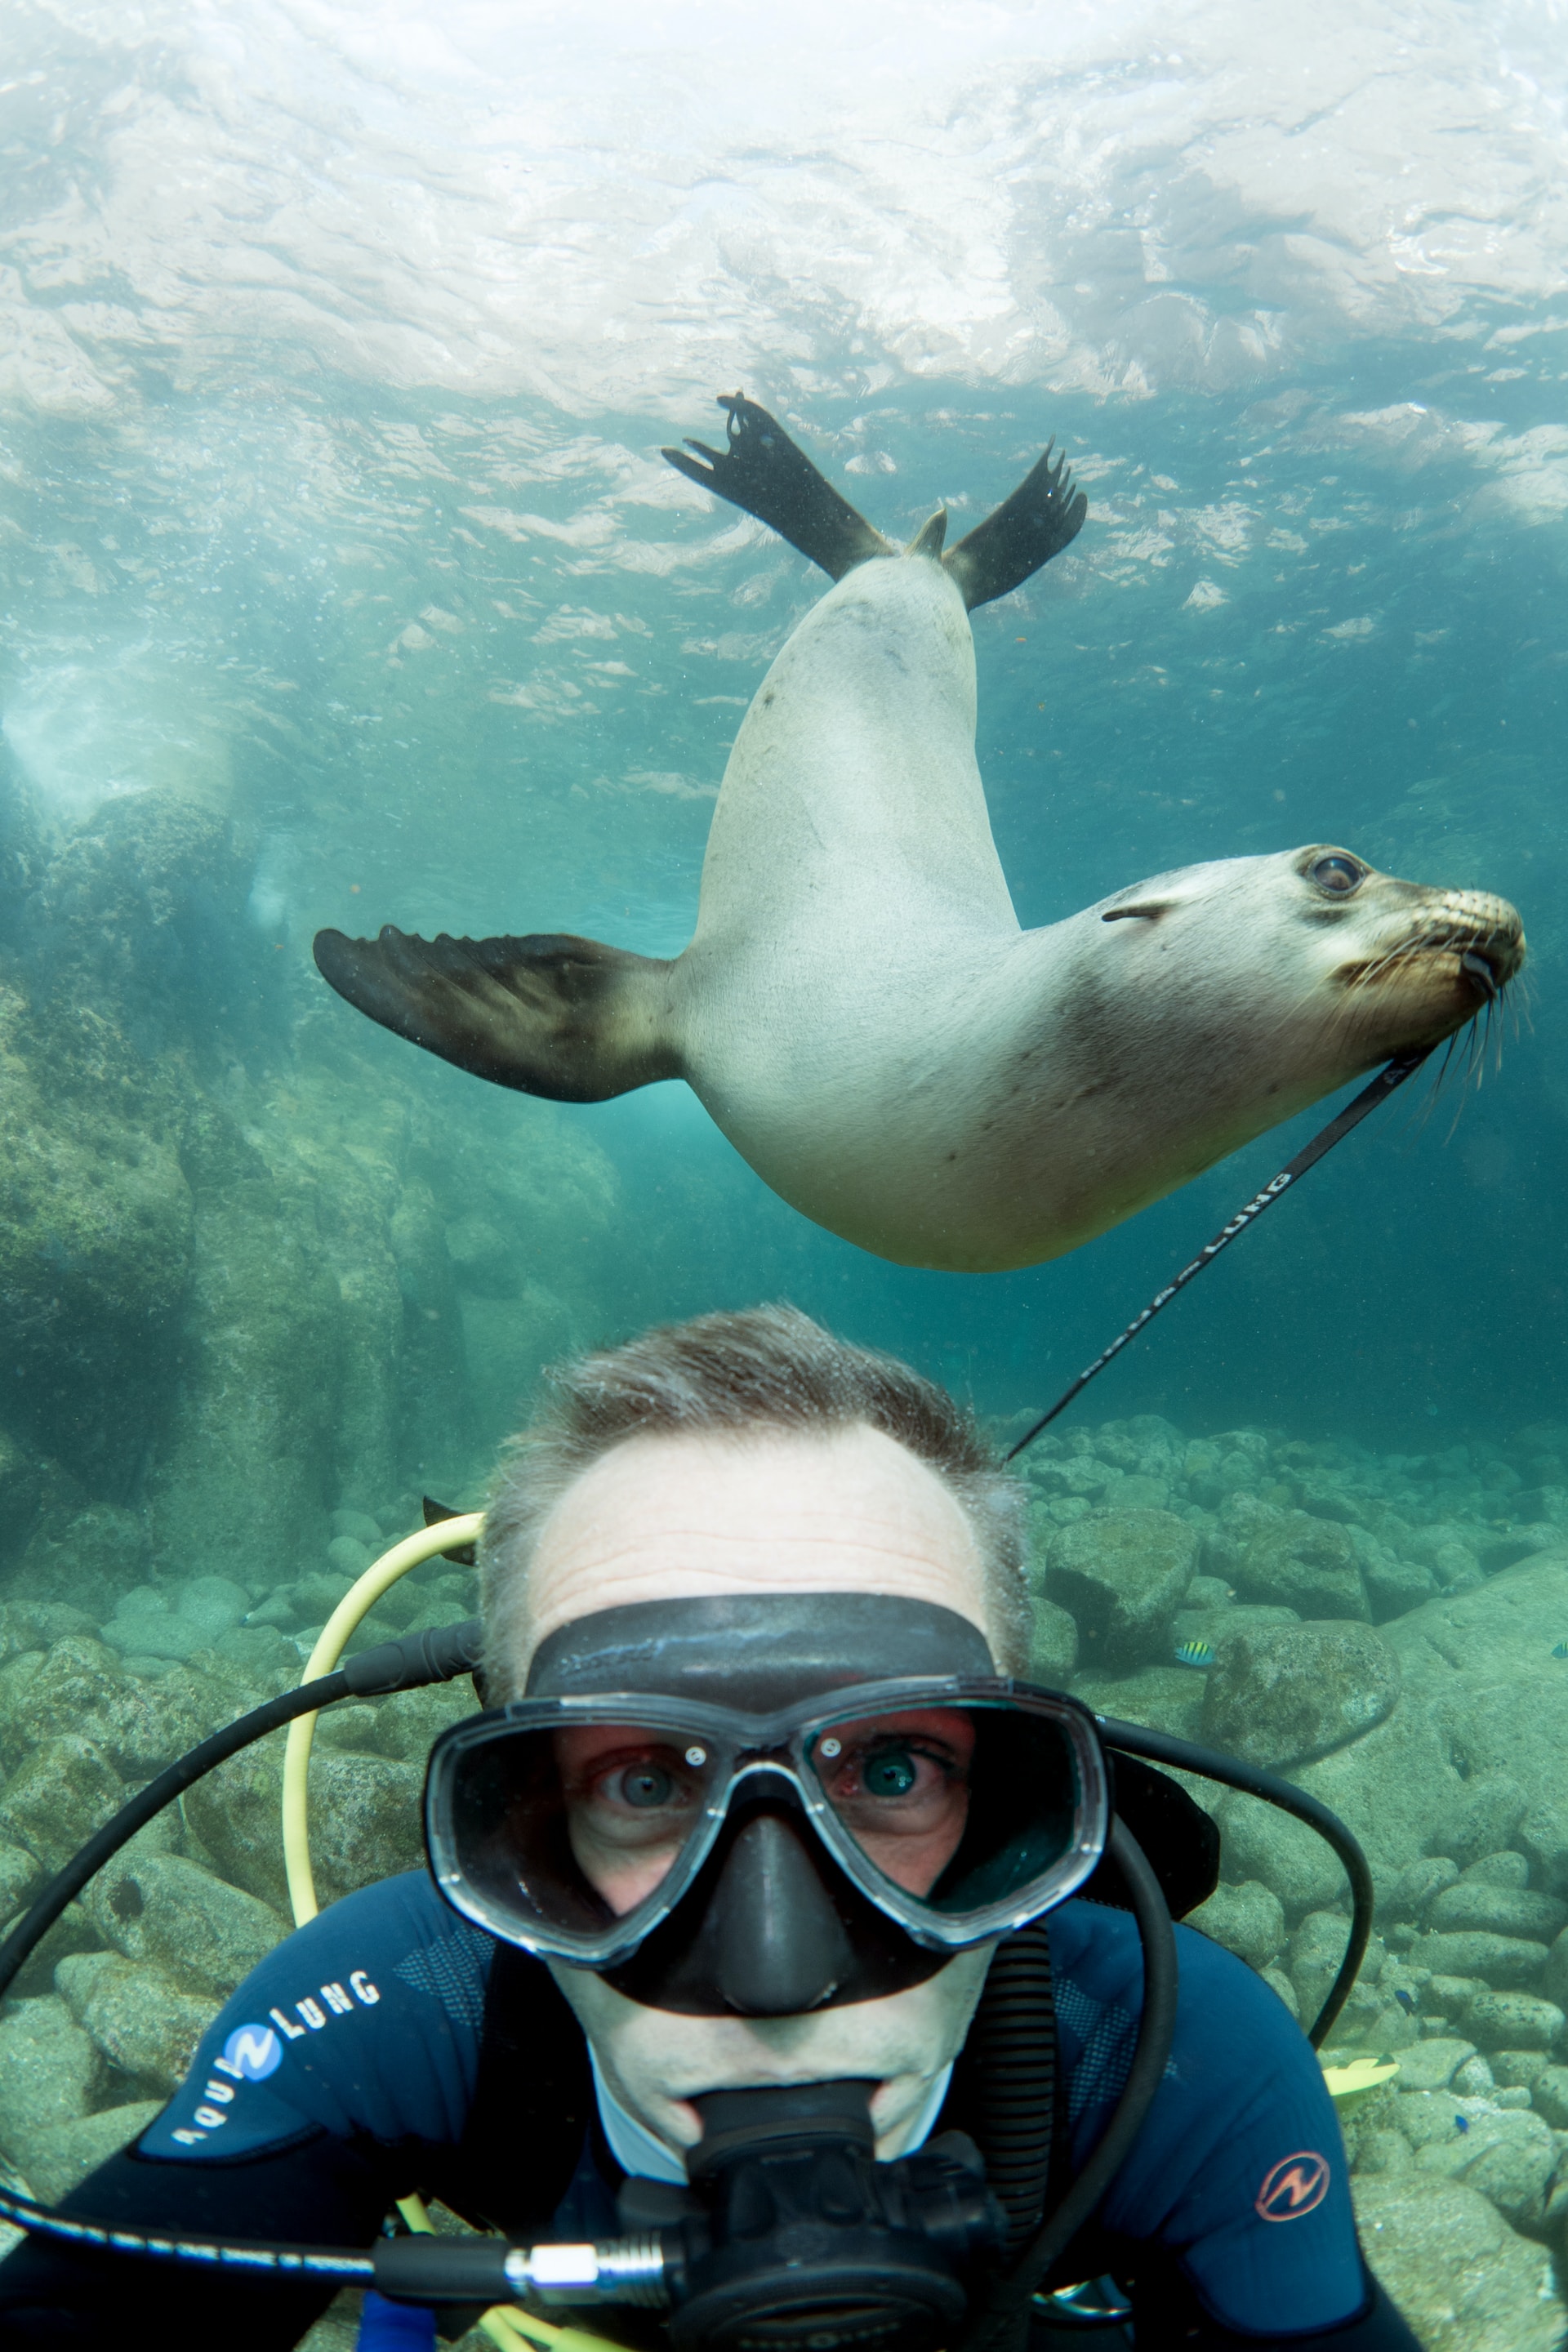
Within a few seconds, it will remove the background, like this.
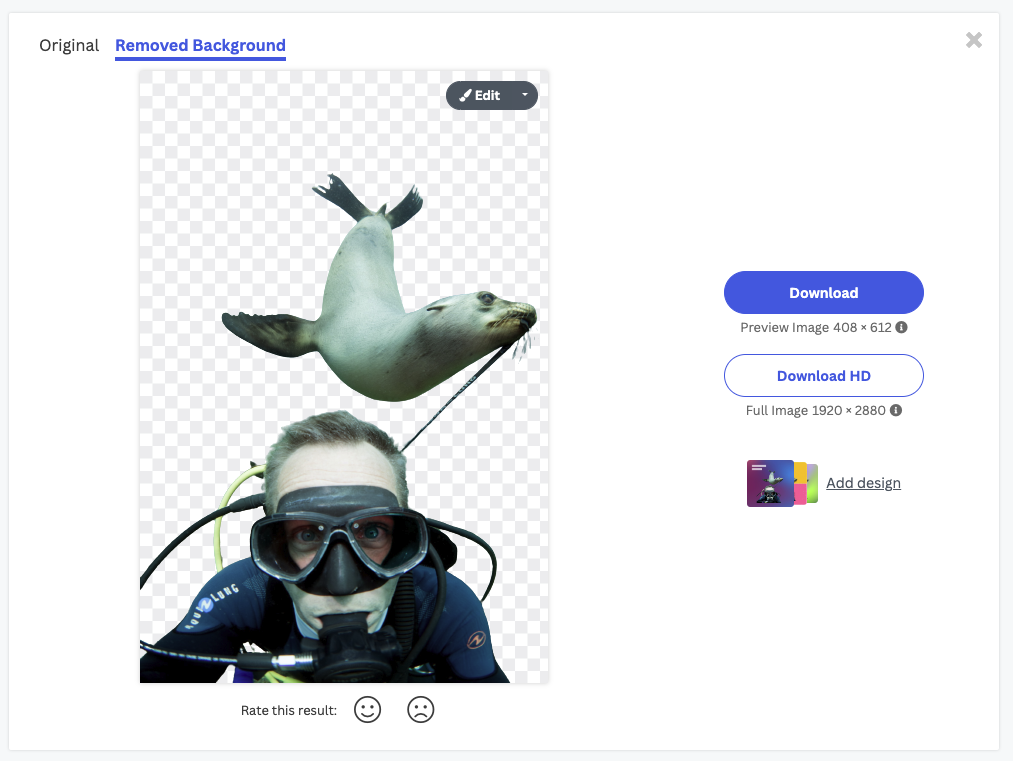
2. Now go ahead and hit > Edit. Here, you can make several adjustments and erase the top big guy in just a few clicks.

3. Then go to > Erase/Restore.
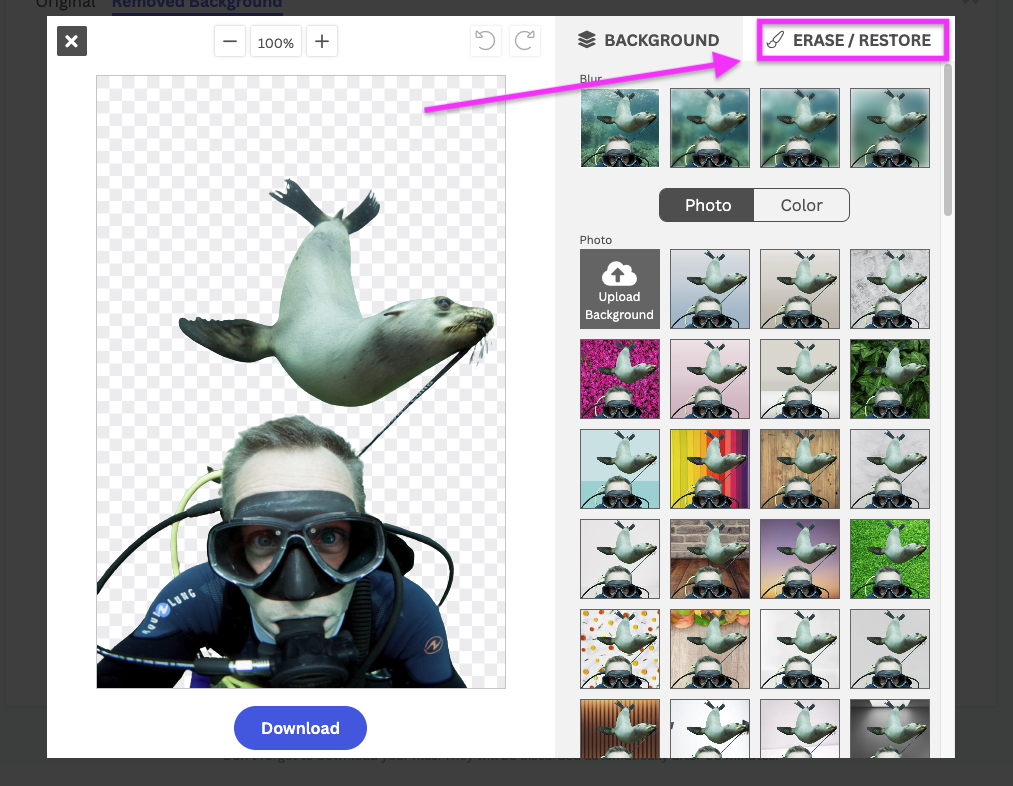
4. Make sure the Erase feature is selected, and adjust the Brush Size to match the item you’re looking to remove.
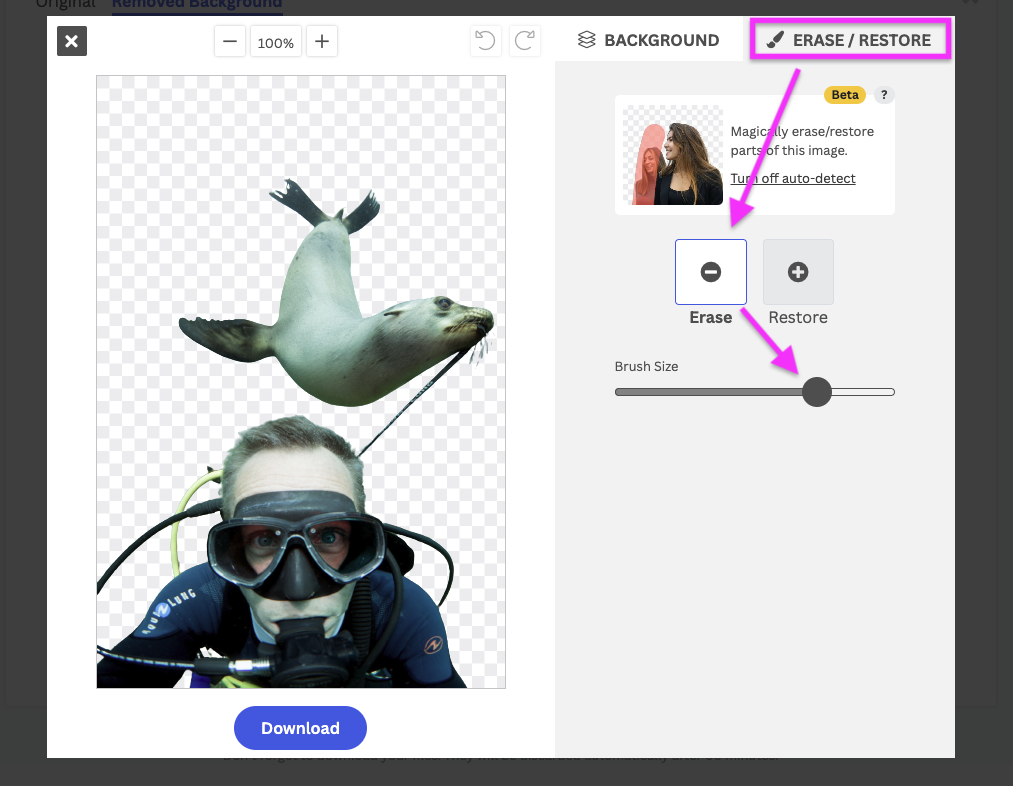
5. Next, go ahead and draw over the entire object you want to erase. Like this:
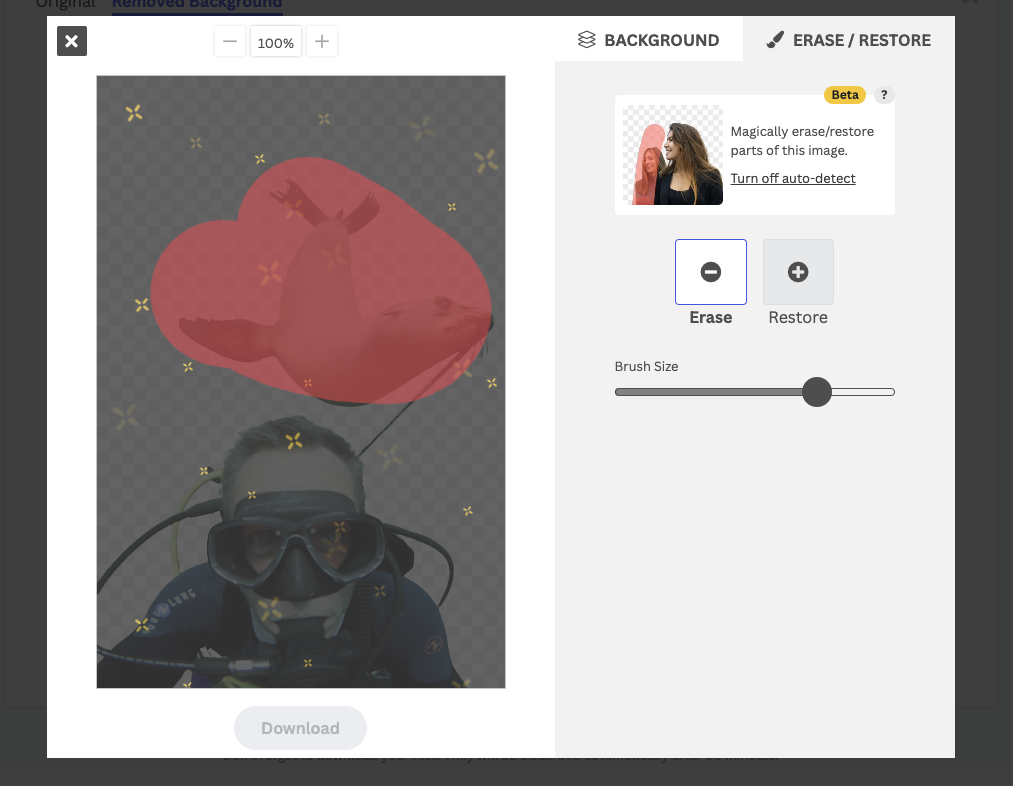
It doesn't need to be perfectly within the lines; the AI behind remove.bg is quite smart at detecting the item.
You could already use this image with a transparent background, but if you want to perfect it, you can switch up the background. Either choose one of the photos from the library, or upload your own. We decided to upload our own image of a coral reef.
7. Click on > Background and then > Upload Background.
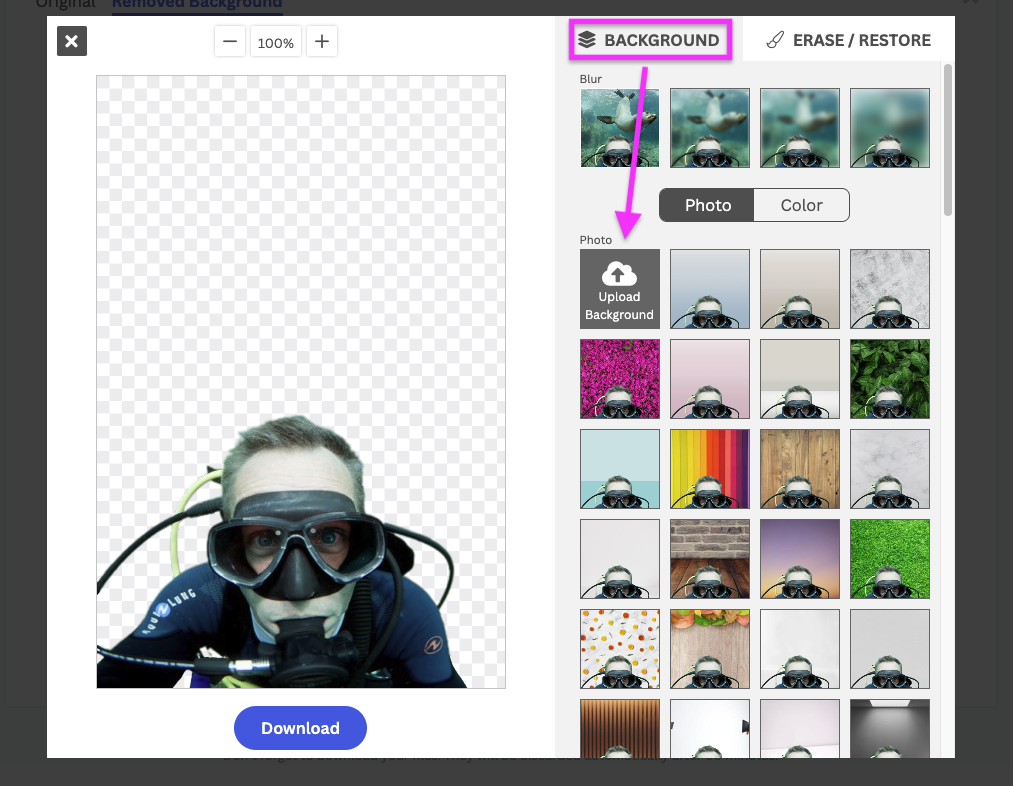
8. And voilà! Once you're ready and happy with the end results, select > Download or Download HD if you need a high resolution.

And that's it! A neat little trick to remove part of your background or the selected parts.
If you want to find out how to shoot photos so you can easily remove the background after, check out Product Photo Editing: How to Shoot & Edit to Speed up Your Workflow.
How to clean up product photos and remove unwanted products in the background
Another use case for the Magic Brush feature is when you have product photos — perhaps where you have a bunch of products in one shot but want to remove some of them. Like this one:
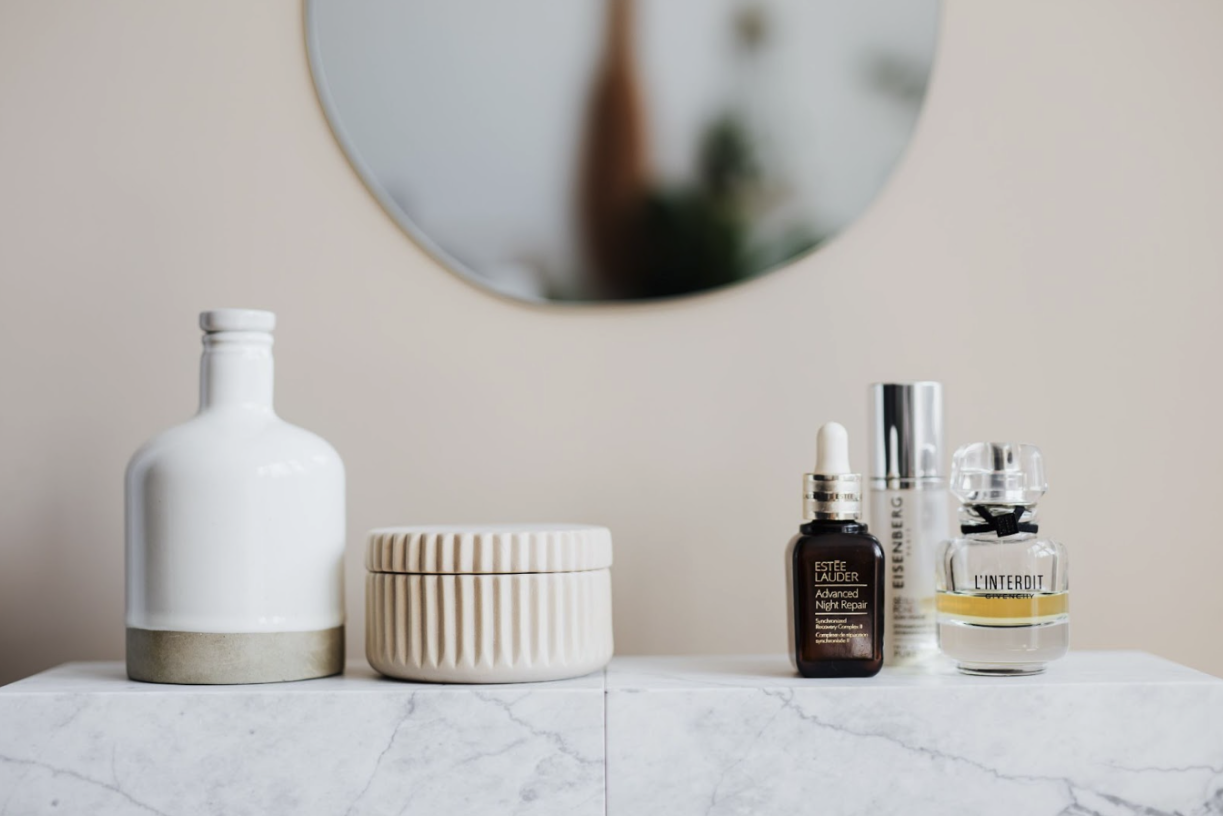
Let's say we want to remove the background, plus the vase and trinket box on the left — we want the cosmetics on the right-hand side to remain.
1. Open remove.bg, and drag and drop your image here. It will remove the background of your image in just a few seconds like this:
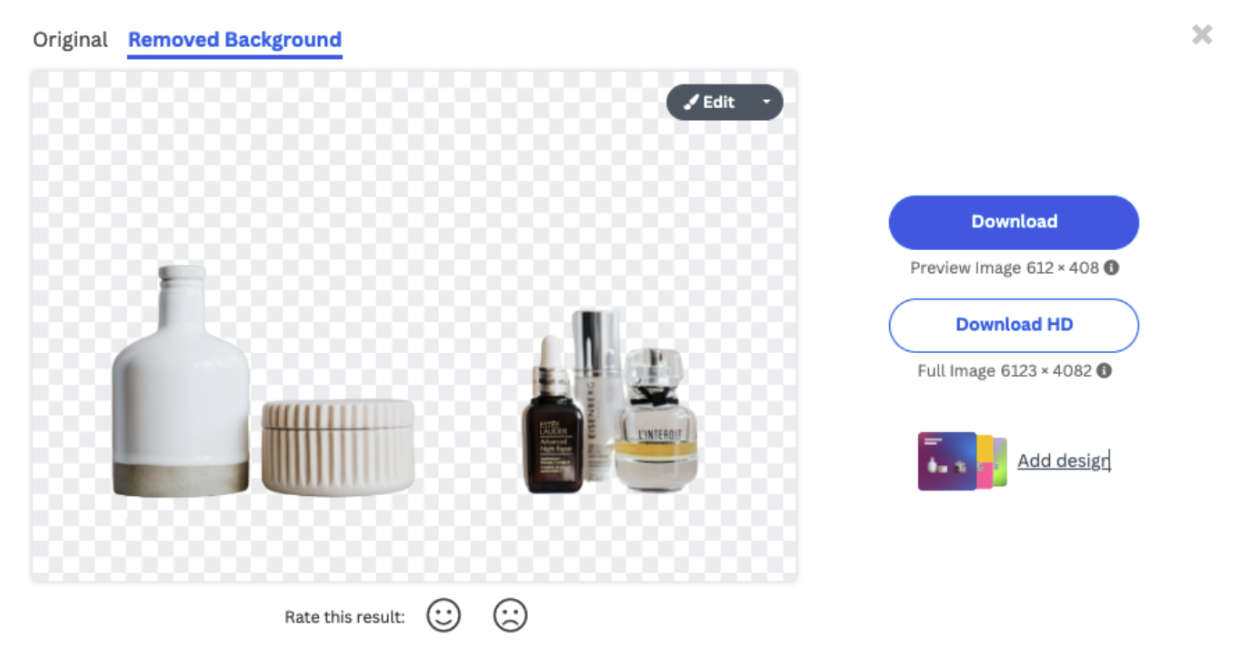
2. Now, let's remove the items on the left by going to > Edit > Erase/Restore.
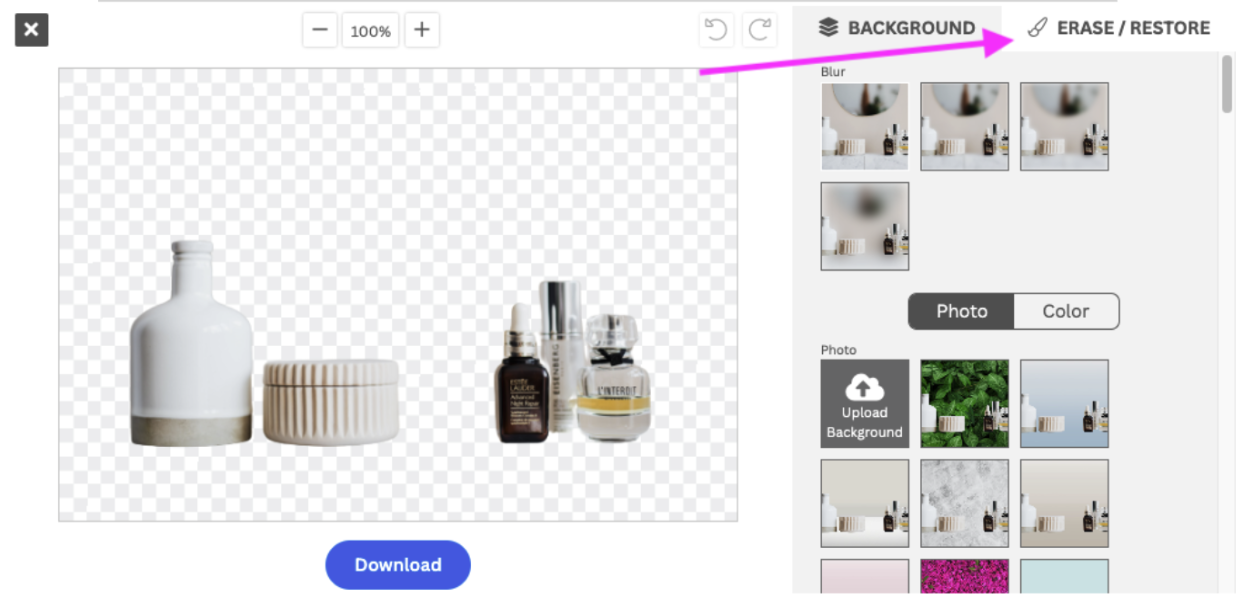
3. Now, go ahead and draw over the items you want to remove. Color all the items in red. Like this:
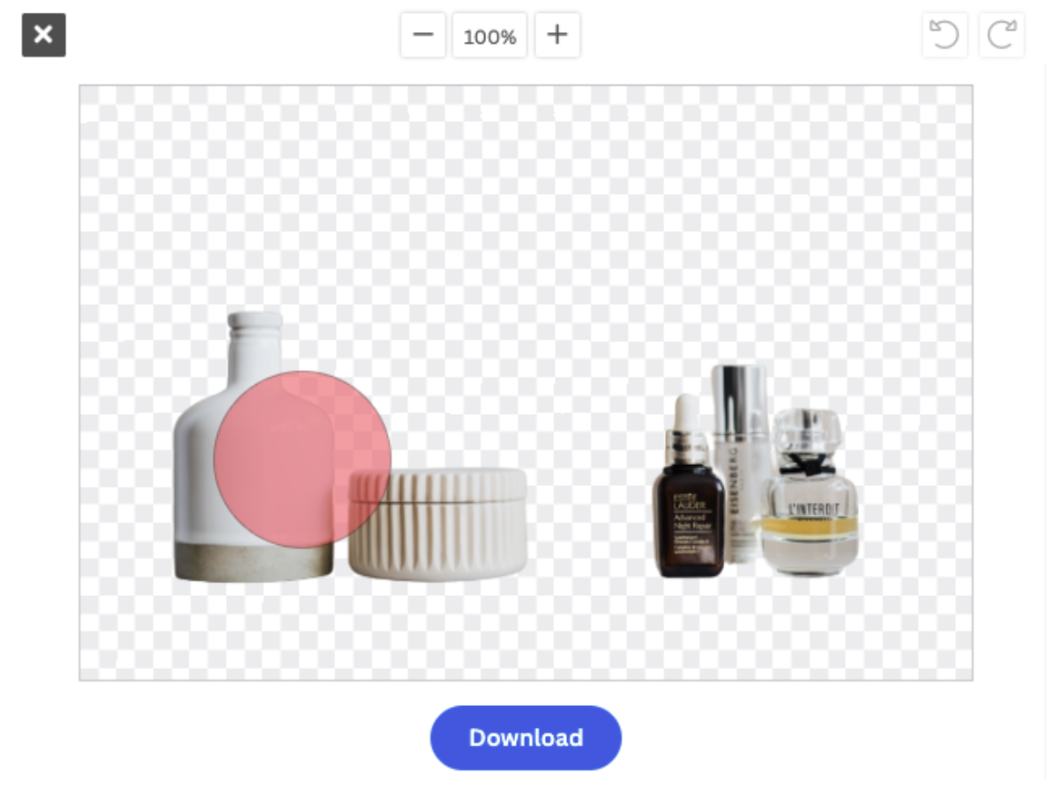
In just a few seconds, all the products you colored in will be removed. Like this:
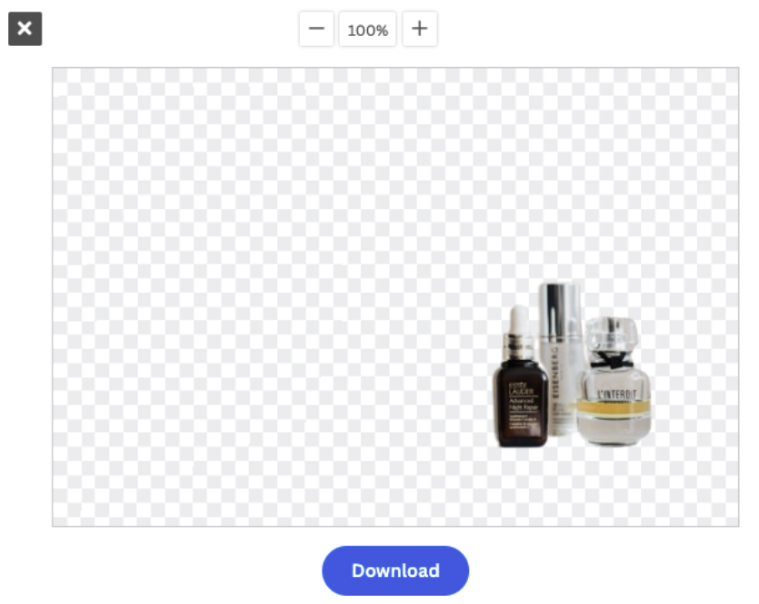
4. Changed your mind and want to add a product back in again? Go to > Erase/Restore and select > Restore. Everything you removed already will show up in a fainted version in the background. You can easily find what you want to restore.
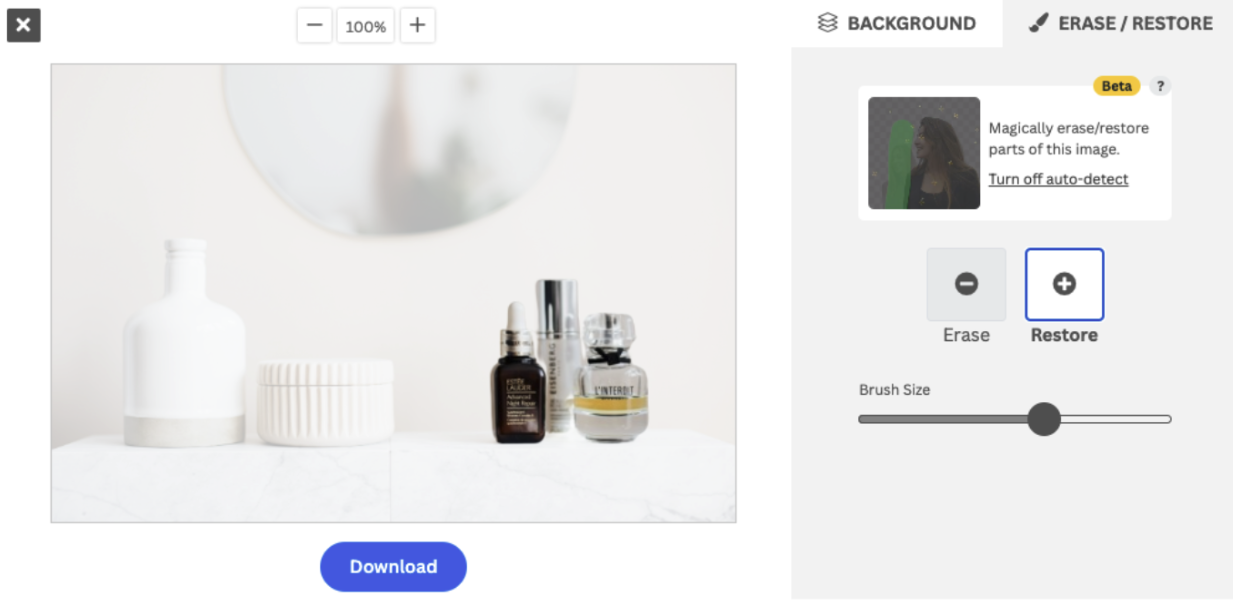
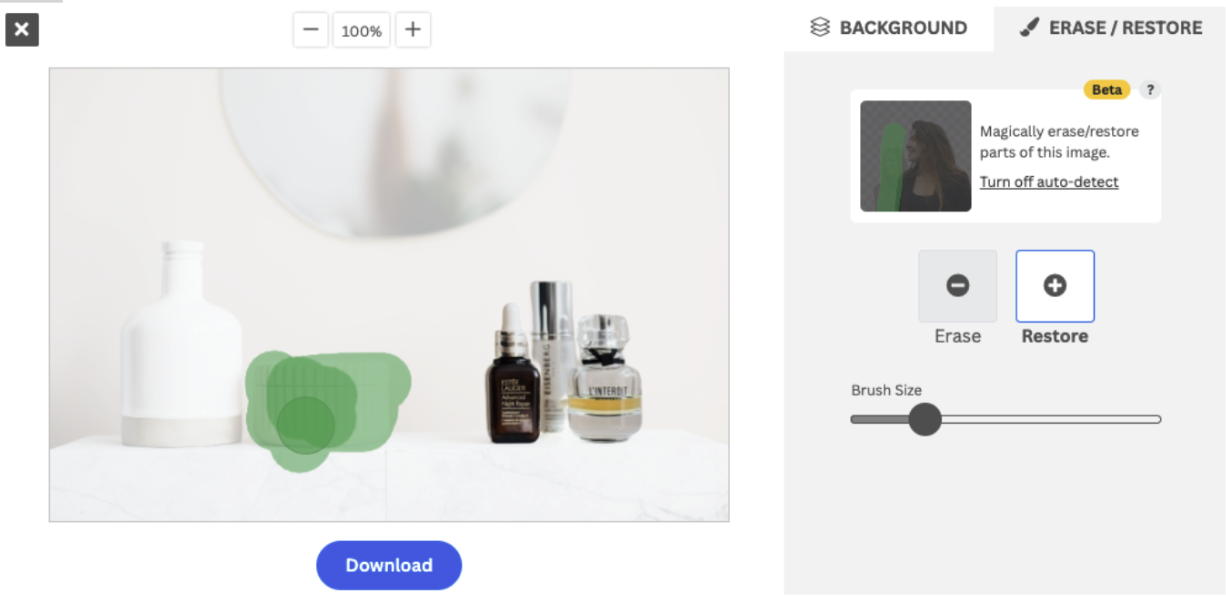
To restore the trinket box, simply adjust the brush size to smaller and brush over it like this:
5. Now, we're going to add another background by going to > Background and selecting the one you like.
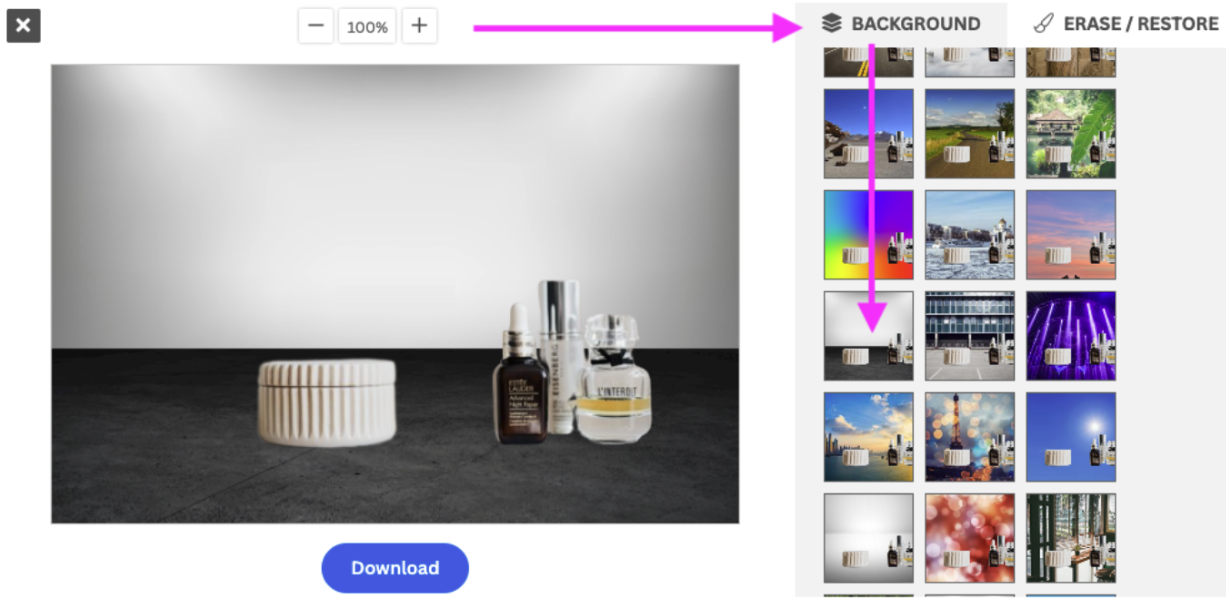
You can, of course, also choose the transparent background and download the file to continue working with it in a graphic design tool like Canva.
6. Ready and happy with the end result? Go ahead and hit > Download > Download image.
Partial background removal: interior design visualization
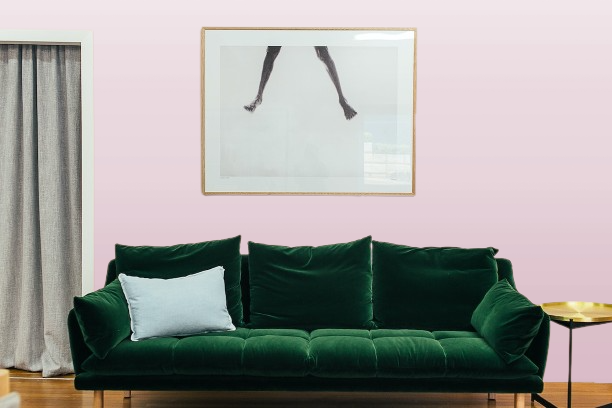
Another use case for partially removing some of the background of your image is if you're trying to isolate — for example, a piece of furniture. It can be for various reasons, in our case we want to visualize how our living room would look like with a different wallpaper.
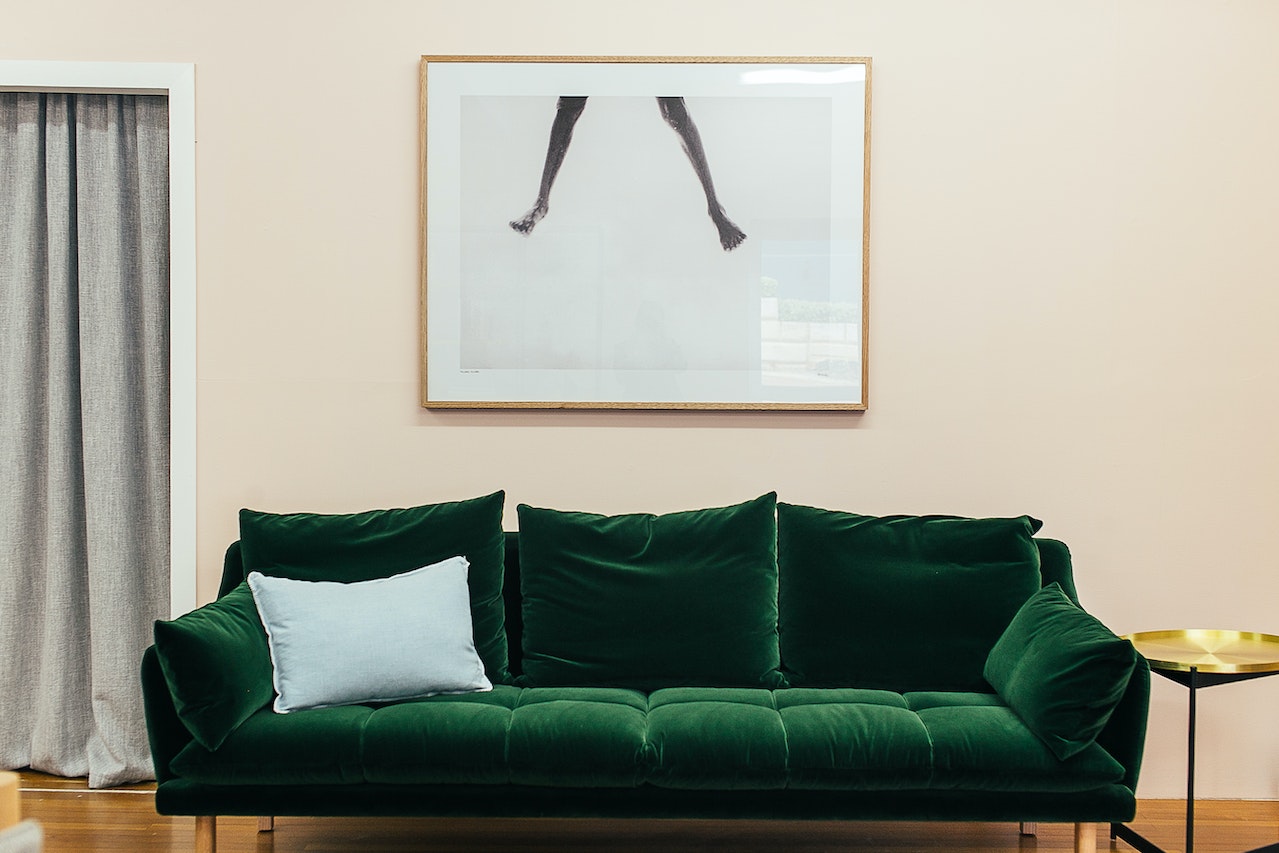
1. To remove the background, drag and drop it onto remove.bg. The AI will remove the background in just a few seconds.
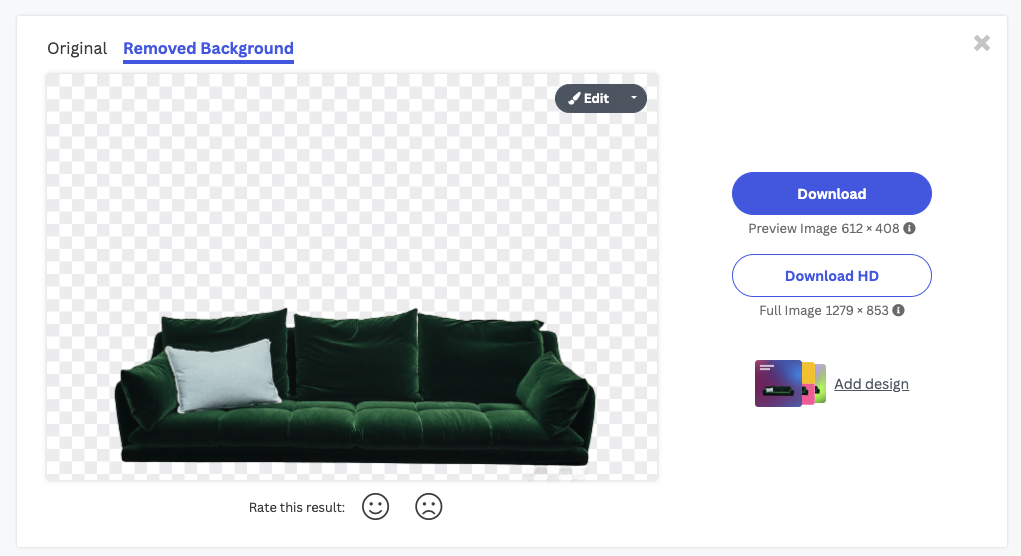
The AI removed the painting on the wall, the side table, the door, and the floor— but no worries, with the Magic Brush, we can fix that.
2. Go ahead and select > Erase/Restore and make sure > Restore is selected.
3. Then go ahead and color in everything you want to restore.
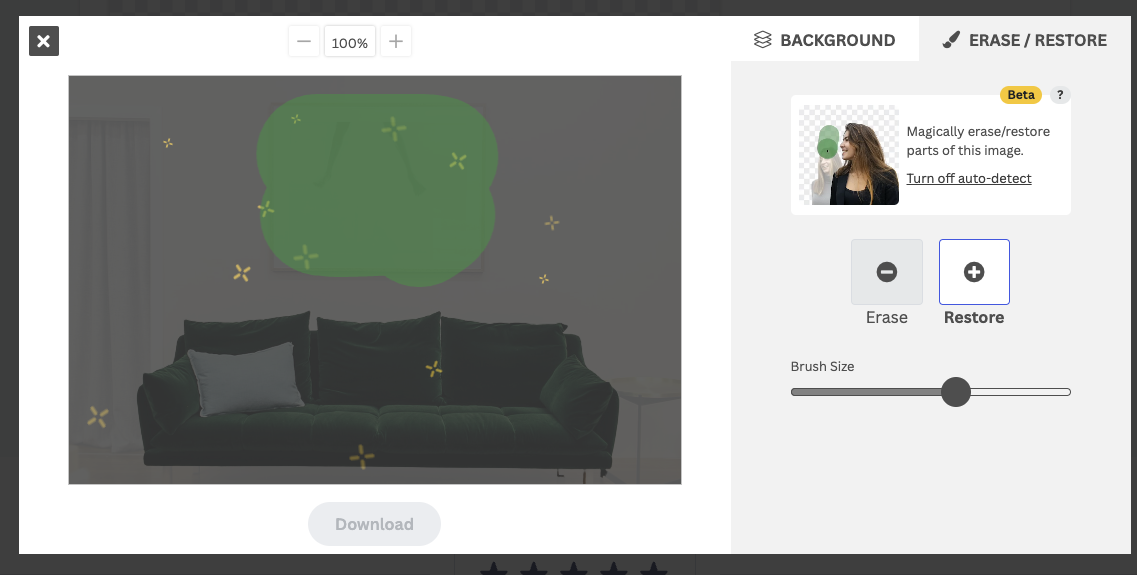
4. You can now click on > Background, and choose one of the images from the library, or upload your own.
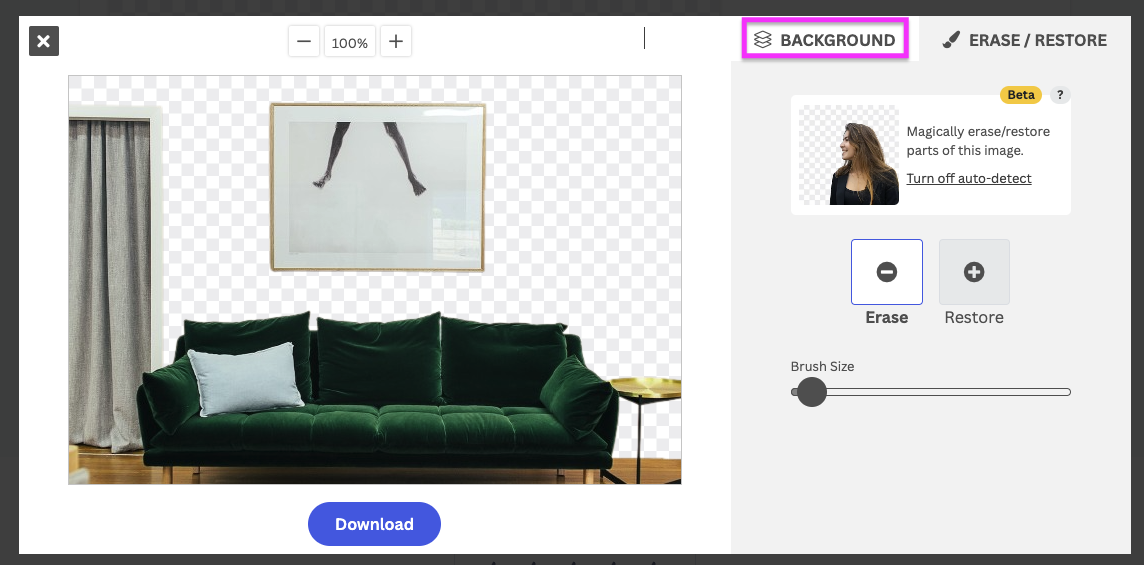
Say, for example, you want to see if your living room wall would look good in pink. You can select the first background and see the result.
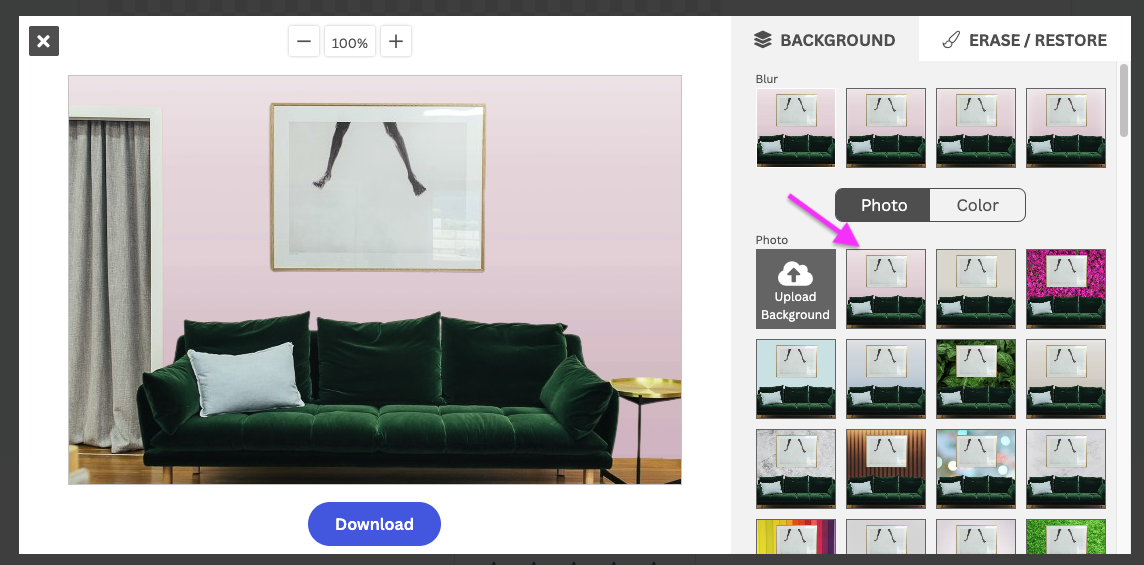
5. Happy? Go ahead and hit > Download > Download image, and it will be saved to your computer.
Partial background removal for social media creators and influencers
What to create a perfect thumbnail for your YouTube channel or an Instagram story — or want to use a pic of you but need to remove the rest of the background?
Being a creator isn't always as easy as it looks, but we're going to show you just how you can partially remove the background of an image to create amazing social media assets.
This is the image we're using as an example:
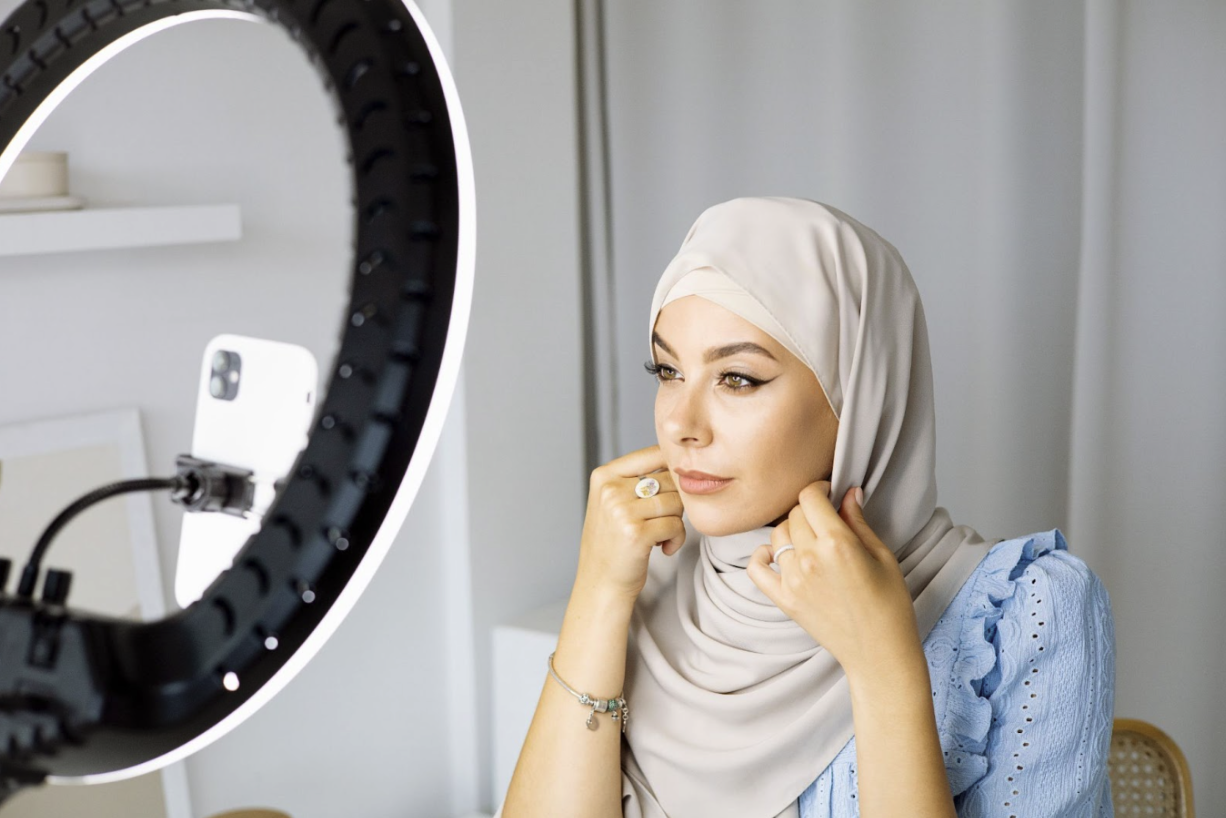
1. Hop on over to remove.bg to remove the background. Just drag and drop it onto the platform.
2. Now, you'll see that most of the background has been removed, but an object you might not want to keep might have been removed. Like the tripod in our example:
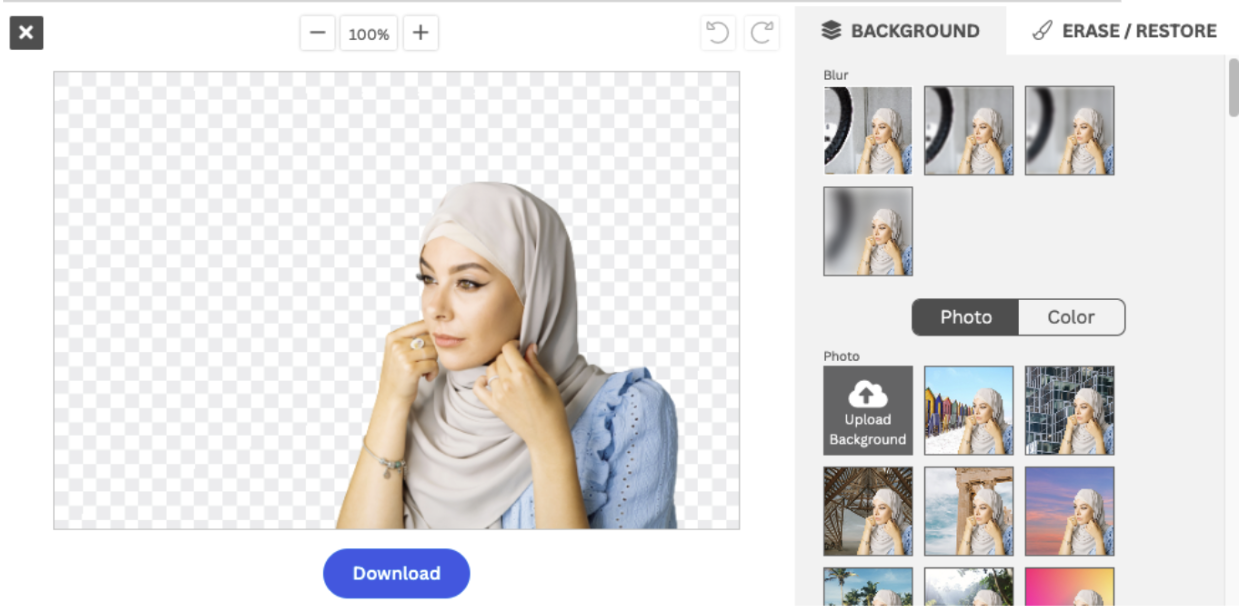
3. To add the tripod back in, go to > Erase/Restore and select > Restore. Then, go ahead and adjust the Brush Size to meet the thickness of the tripod light.
4. You can check the width of the restore tool simply by hovering over the image. Once you've found the perfect width, go ahead and color in the object (ringlight in our case).
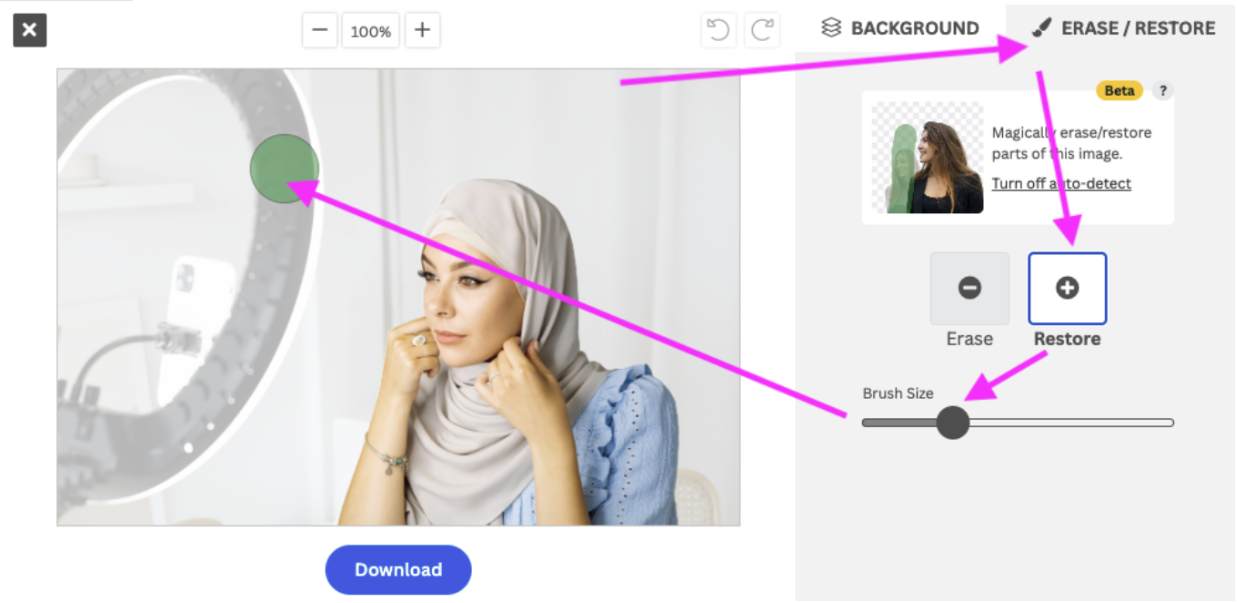
It will look like this:
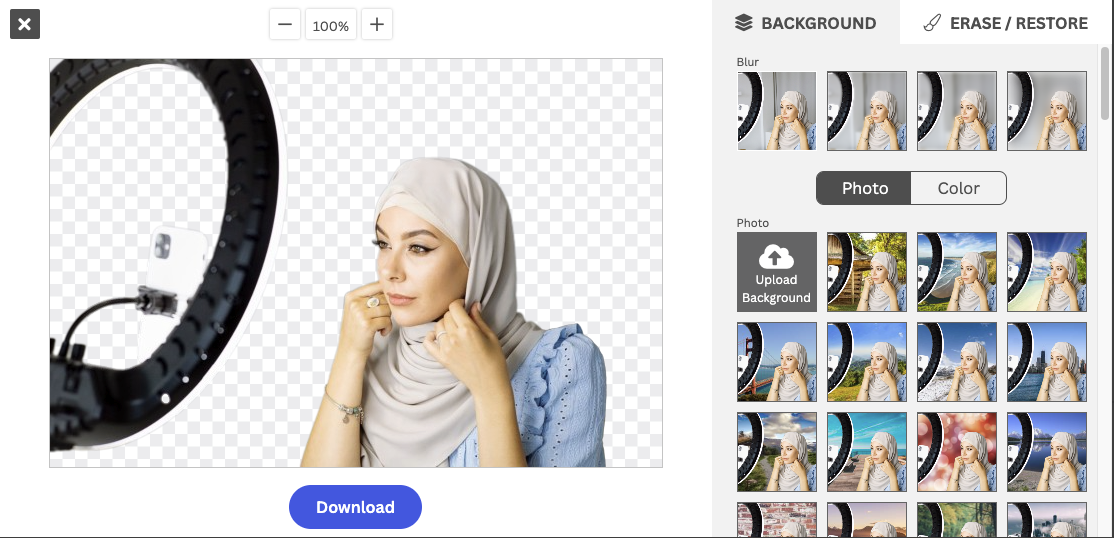
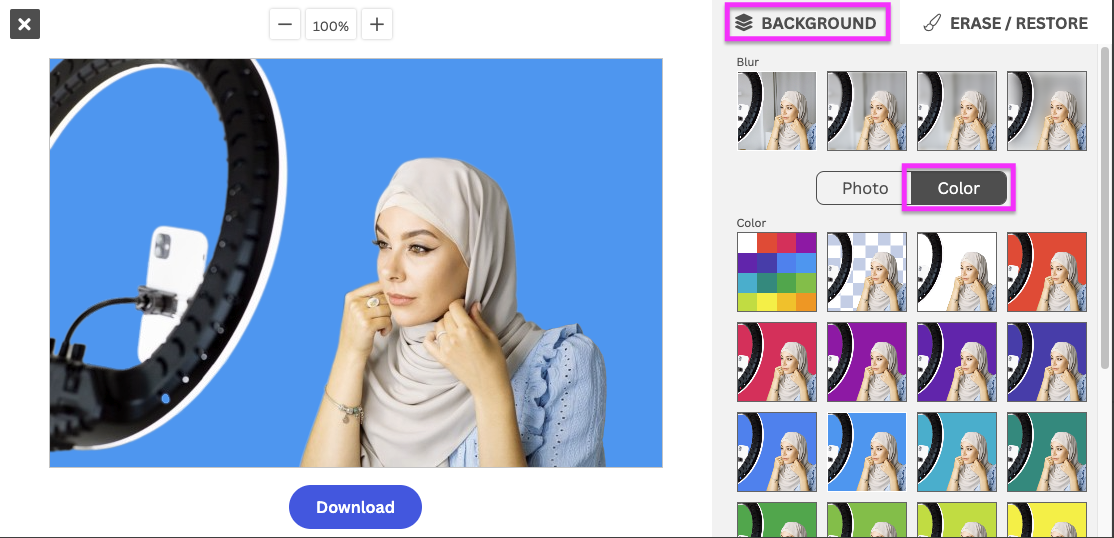
5. Want to add a colorful background? Go to > Background > Color and select your favorite one. You can even add your own brand colors by going to > Color and adding the HEX number.
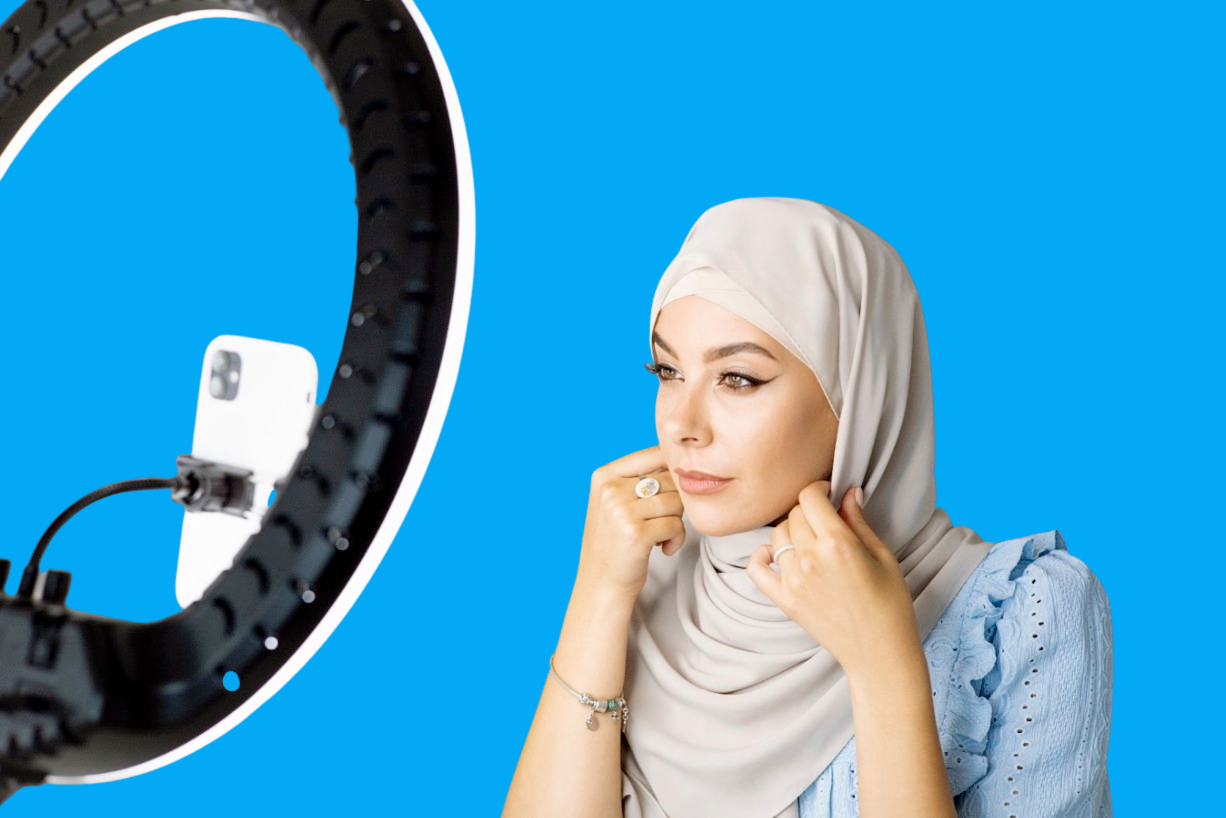
6. Et voilà! You've got the perfect content asset — this could be the baseline for a YouTube Thumbnail or an Instagram post. Just click on > Download to save it to your laptop.
Want to learn more about creating YouTube thumbnails? Read How to make the best YouTube thumbnail to boost video views.
Remove selected backgrounds or objects from an image — in the most straightforward way
Alrighty that wraps up our breakdown of removing partial or selected backgrounds from an image. From portraits to product photos, furniture for interior design concepts, or a selfie for a content piece, you can do it superfast with the right tool.
Want to give Magic Brush a try? Head on over to remove.bg and remove your partial background today.
Komentari
Još nema komentara.