A good logo makes or breaks a brand. In fact, to the average person, the logo is the brand. It's the visual identity with which they know and recognize a company and a signifier of whether or not they can trust a product or service enough to procure them. From attracting prospective patrons to securing customer trust and loyalty, logos are invaluable to the success of a brand.

Índice
The Squint Test
In the design world, there's a concept called the Squint Test. Good design should still be recognizable even when the audience can view only limited parts, for example, if they're squinting.
People won't always see your work in its whole, unhindered glory. This is especially true for product designs, as items can be on shelves, cabinets, or otherwise unflattering display locations. Since your logo will go on just about every branded item you will ever produce, it's doubly important that your logo passes the Squint Test. One of the ways to do this is by removing all background elements from your logo design, even something as seemingly innocuous as a white background.
Why does my logo need to be transparent?
Your logo will go everywhere. A background, even a solid color, won't look good on everything. It limits your creative choices or makes your design look messy and unprofessional.
A transparent logo has no background. It's easier to put anywhere on your website, use on all your social media posts and promotional materials, and incorporate into your products and packaging.

Where can I remove the background from my logo?
There's no shortage of options when removing any background from your logo.
1) remove.bg
remove.bg is a dedicated website for removing the background from your images automatically. Use this platform to quickly and easily extract your logo and produce a new transparent image file ready to go on any web page, social media, or branded item. Because remove.bg is specifically designed to delete backgrounds, it does so faster and more seamlessly than other generic editing tools.
2) Adobe Photoshop
Adobe Photoshop is a popular editing tool that guarantees a clean background removal process, no matter how complex your logo may be. In Photoshop, you can use tools like the Magic Eraser or Smart Lasso to select the background and remove it from your image instantly. You can use more advanced tools, like the Pen, to manually extract your image using crisp lines.

How do I remove the background from my logo?
Let's say you've designed the perfect logo that passes the Squint Test with flying colors, but you exported it with a background. Or maybe you're new to the company and can only access an old logo file with a solid background. Whatever the case, there's no need to worry. With the right tools, extracting your logo and saving it in the proper, transparent file format can be done in just a few clicks.
Option 1: remove.bg
1. Head over to remove.bg and click on > Upload Image.
2. Select your logo file, and the tool will automatically start the background removal process.
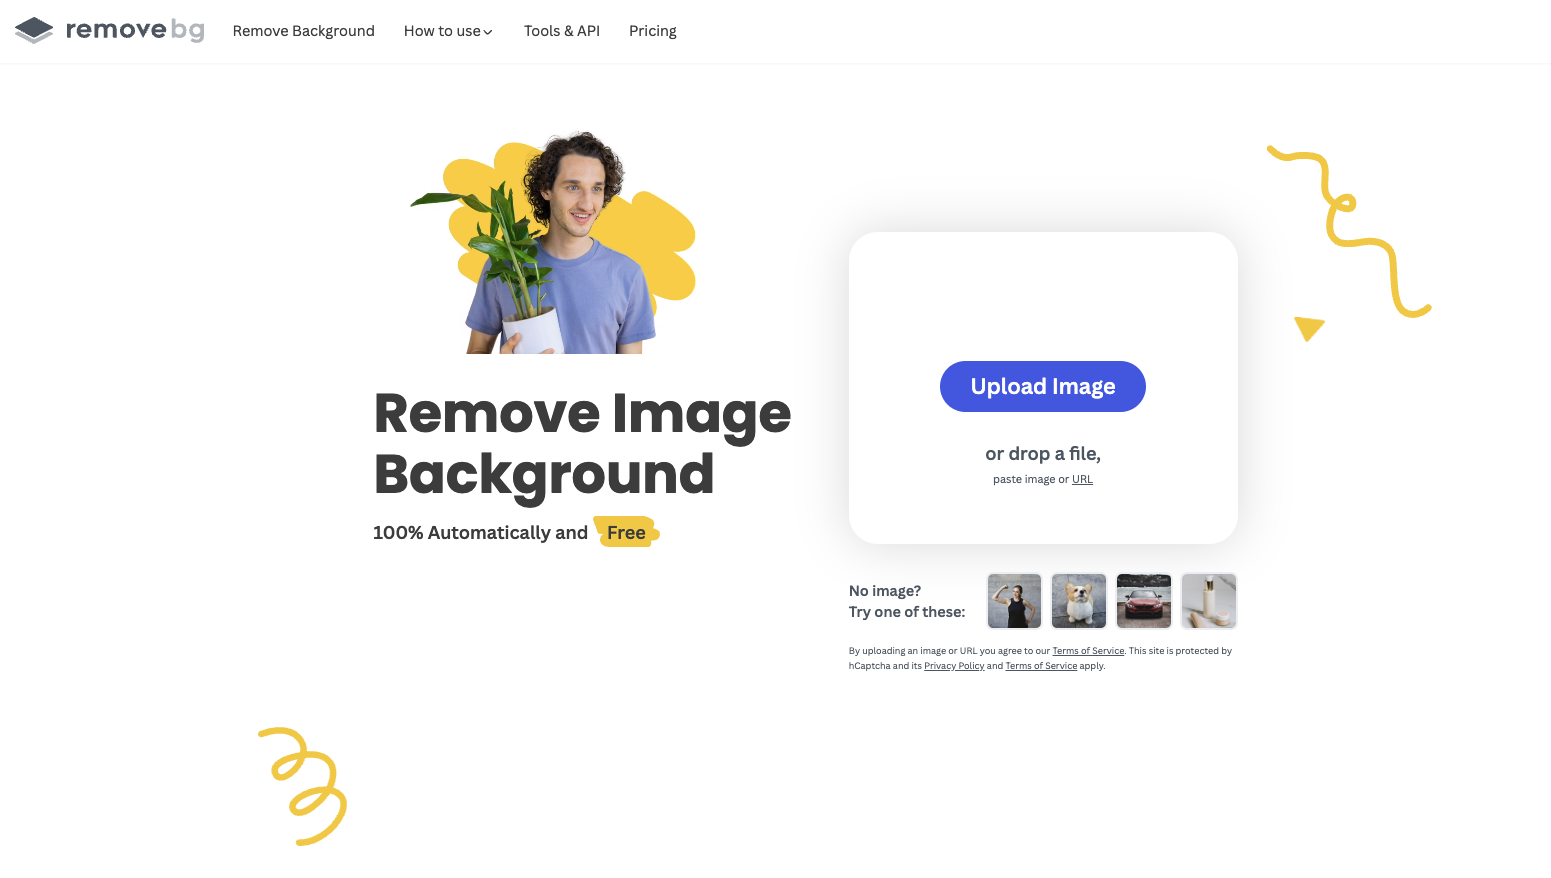
3. That's it! You will now have a new, background-less image in just a few moments. Click on > Download to save your file as a transparent PNG.
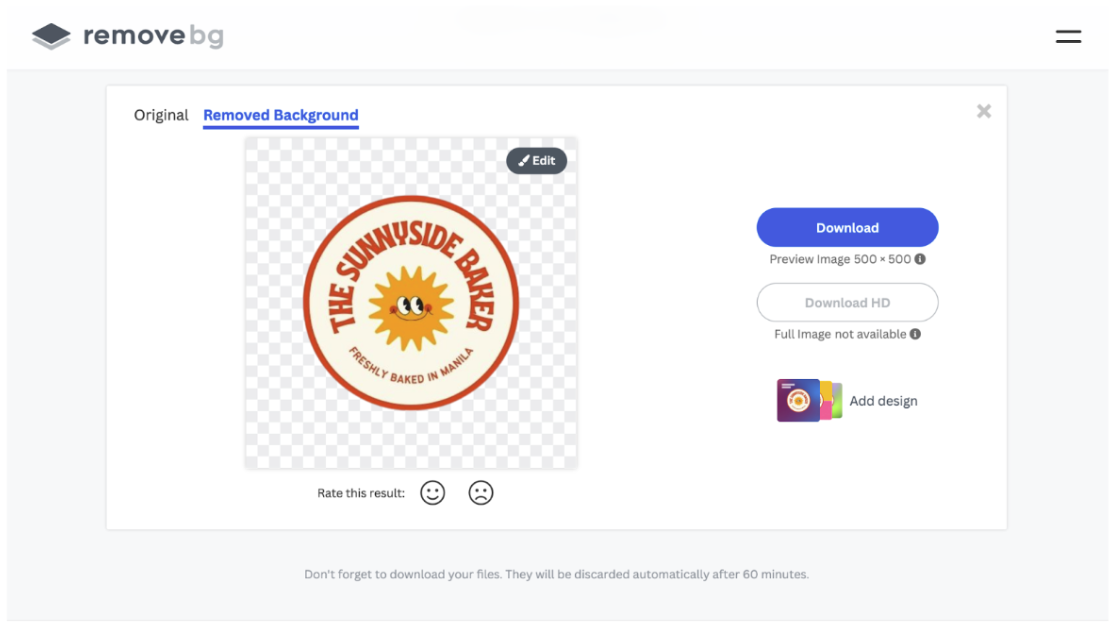
You can download your file completely for free from remove.bg in its standard resolution. But if you want a higher quality copy, the Download HD option is available to premium subscribers, giving you an HQ file that’s up to 25 megapixels in resolution – ideal even for printed displays.
Option 2: Adobe Photoshop
1. On Adobe Photoshop, click on > Open or press > Ctrl/Command + O to pull up the file browser. Select your logo file.
2. On the Layers panel, select your image file, then click on > Duplicate or press > Ctrl/Command + J. Duplicating your image makes it easier to restart your work if you make big mistakes.
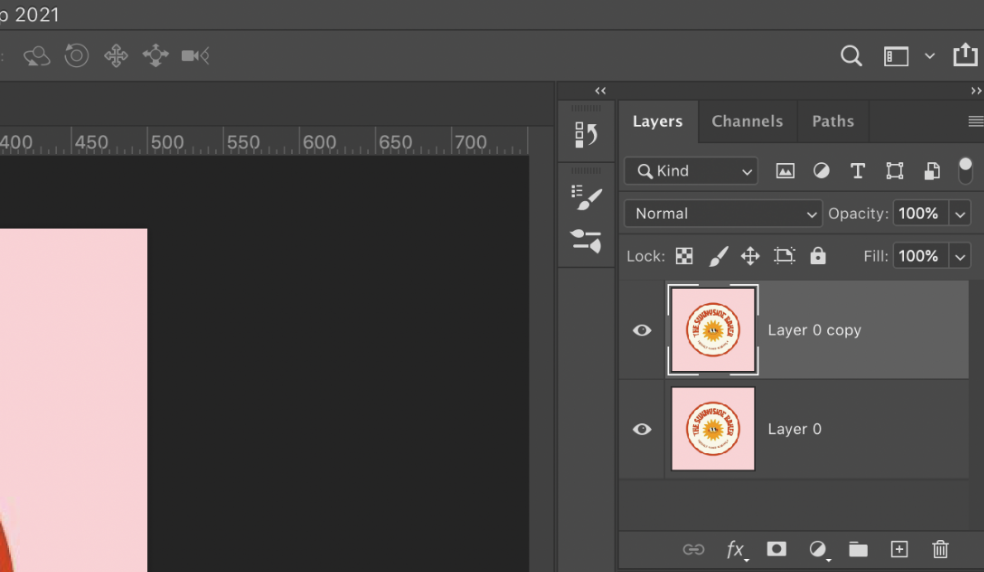
3. Check that you have the duplicated layer selected. Consider renaming, locking, or hiding the layer to prevent accidental editing.
Use the right background removal tools
Photoshop has different options on how you can remove the background from your logo image, depending on your design’s complexity.
Tool 1: Remove Background
This option is ideal for simple logos (solid shapes, etc.) or for users who don’t need their edges to be crisp and clean.
With your Duplicate layer selected, navigate to Window, click on > Properties > Quick Actions.
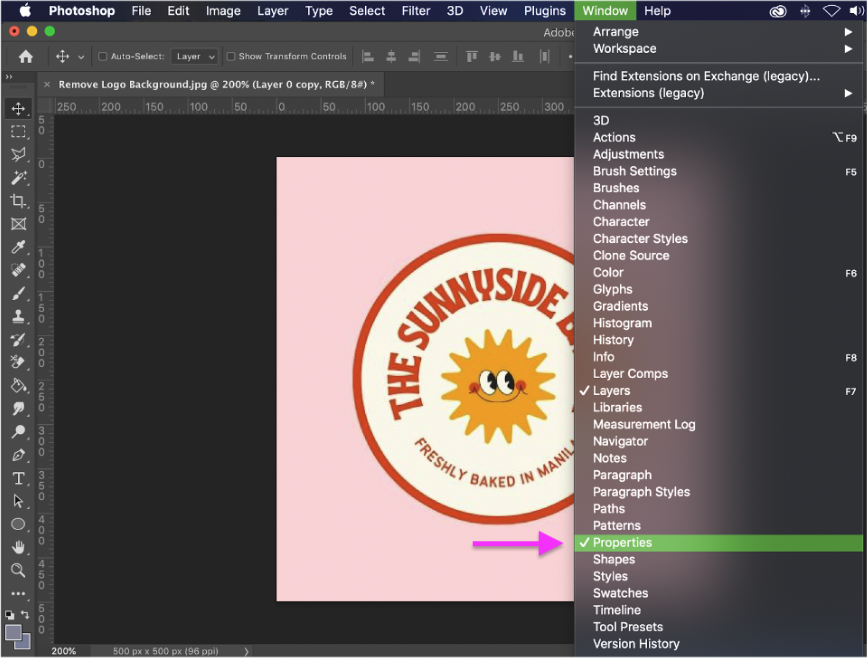
Click > Remove Background.
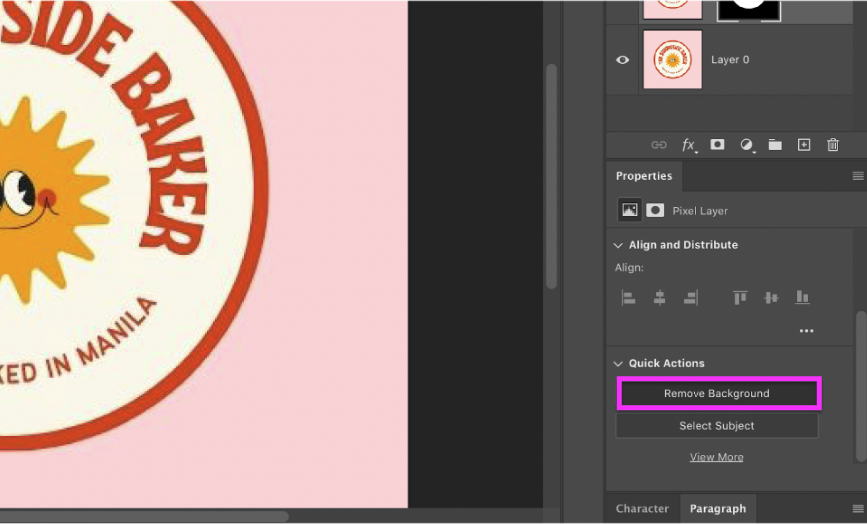
Tool 2: Magic Wand
This tool gives you more control over which parts of your photo to remove, using artificial intelligence to analyze your image's pixels. This works especially well if your logo has distinctive elements like strongly contrasting colors or sharp, definitive lines.
To use this, hit > W or navigate to the tools panel, long-press on the > Selection icon to toggle the other Selection options, and click > Magic Wand tool.
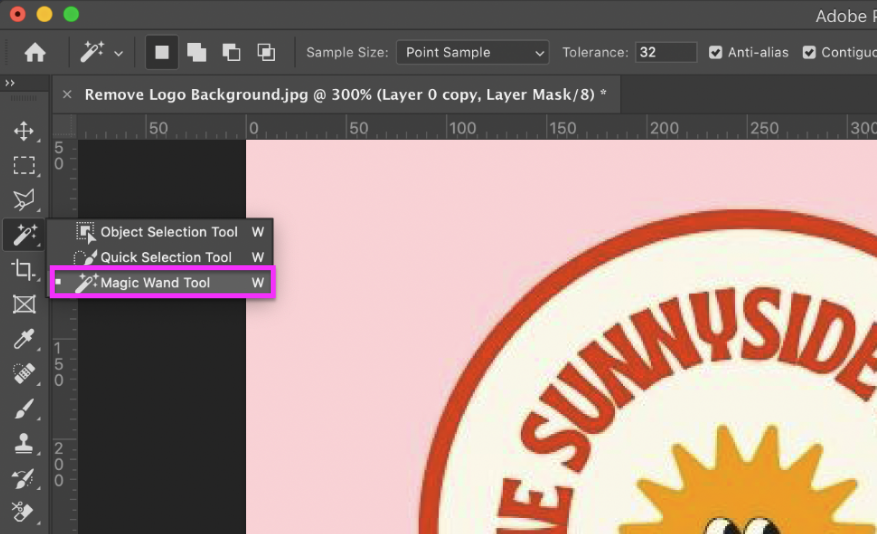
With the Magic Wand tool, click on the parts of your picture you want to delete. You can expand the area it covers by pressing Shift as you click on more areas. Conversely, you can remove selected parts by pressing > Alt (Windows) or Option (MacOS). Hit Backspace or Delete to completely remove the selected areas from your picture.
Alternatively, you can click the Mask button to create a layer mask. This will allow you to remove or add back parts of your photo by toggling the Brush tool (B).
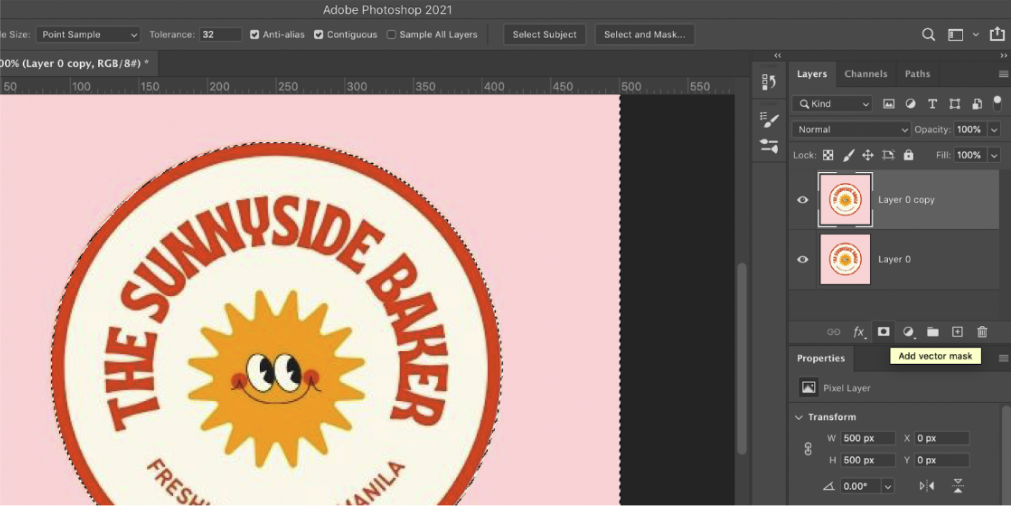
Brushing over your image with black will hide (or "mask") the selected area. Opposite this, white will reveal these masked parts. Using Vector Masks gives you more control over the parts you want to hide or clean up.
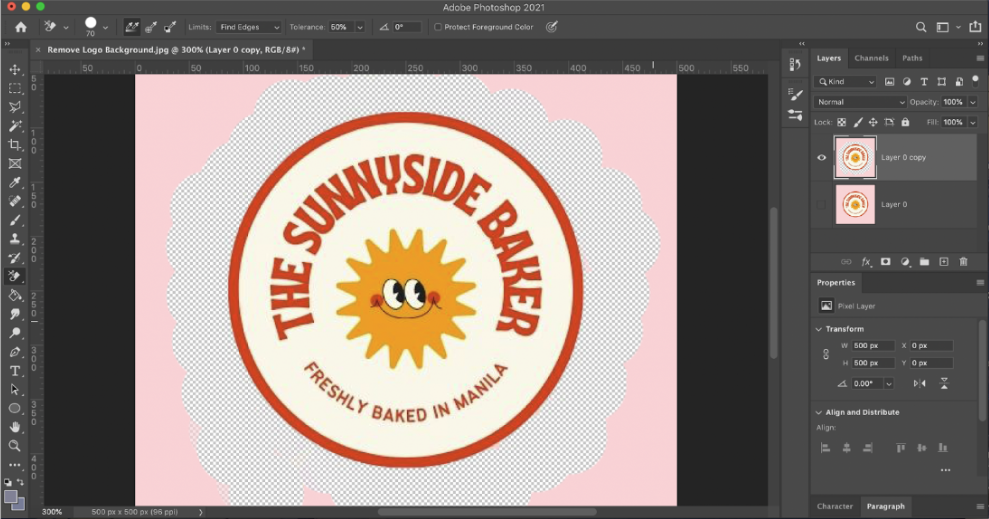
Tool 3: Background Eraser
Another convenient tool in Photoshop's arsenal is the Background Eraser, which you can toggle by pressing > E or navigating to the tools panel, long-pressing on the Eraser icon, and selecting > Background Eraser Tool.
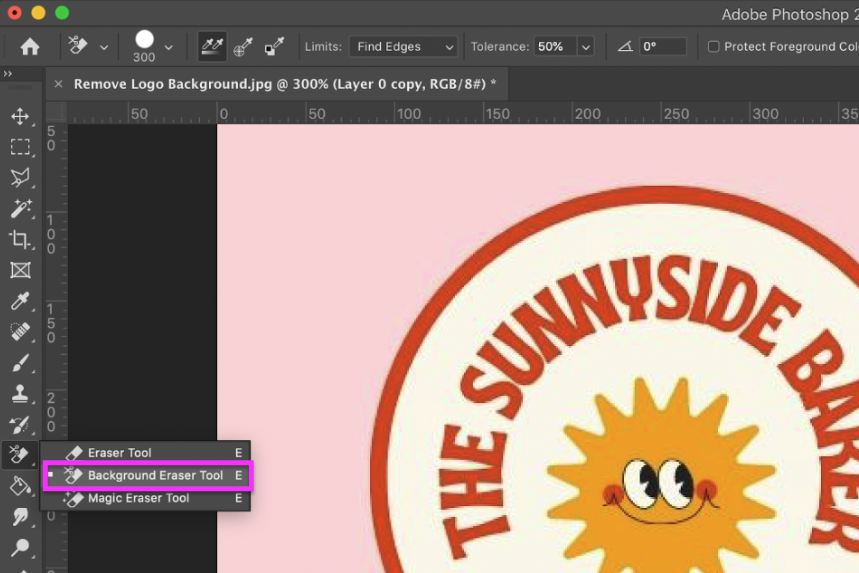
Using AI technology, the Background Eraser will analyze your image and identify the subject and background. Advanced controls can give you more precise results. Play around with the brush size, limits, and other toggles to get the best controls for your needs.
Tool 4: Pen Tool
Finally, use the Pen tool to get the most precise selections, no matter how complex your logo design is. Toggle this tool by hitting > P or clicking on the > Pen tool icon.
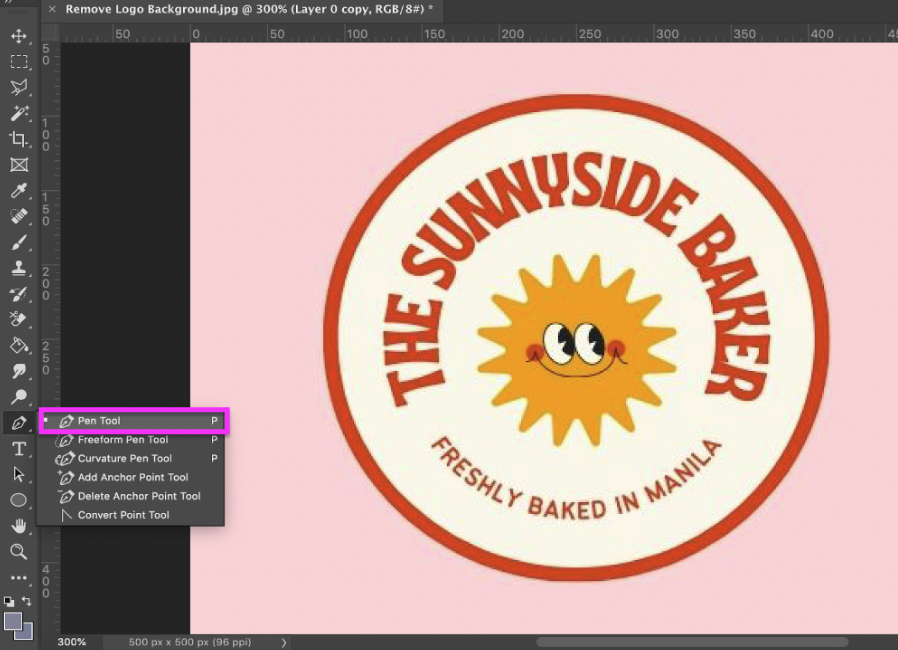
Remember that the Pen tool can have a learning curve because of its versatility. It makes selections based on individual points you will set, which you can further adjust to curve or straighten as needed.
Make a selection around your logo, closing it off by clicking on the first point you set. Once done, right-click on the editor and select > Make Selection to turn the Pen tool "path" into a proper selection.
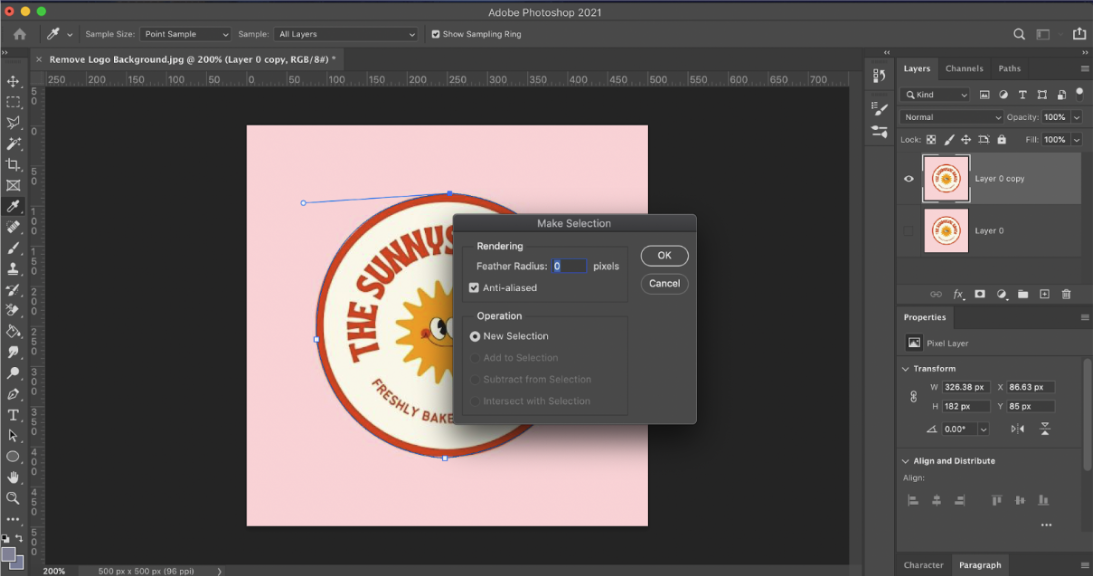
On the ensuing dialogue box, adjust the settings to soften or sharpen the edges of your selection. Once the selection is toggled (as shown by the moving ant lines), you can delete the background or create a Vector Mask.
Remove logo backgrounds - by following our tips & tricks
Removing the background from your logo is an absolute must. Fortunately, design tools like remove.bg make this a straightforward (and free!) process, all without compromising on the quality of the final product.
So get your old logo, use modern technology like remove.bg to remove the background easily, and save it as a high-quality, background-less image ready to grace your website, products, or business.
Comentários
Nenhum comentário até agora.