Want to know how to make background transparent in Photoshop in just a few simple steps? We’re here to guide you through the process. Throw in the remove.bg plugin, and it’s even easier — here’s how.

สารบัญ
- What is a transparent background, and why is it useful?
- What does a transparent background look like in Photoshop?
- How do I make an image background clear in Photoshop?
- How do I make a white background transparent in Photoshop?
- A step-by-step guide on how to make an image background transparent in Photoshop
- Most popular Photoshop features for removing an image background
- Is there an easier way to make a background transparent in Photoshop?
- How to create a transparent background in Photoshop with the remove.bg plugin
What is a transparent background, and why is it useful?
A transparent background is when an image background is faded out completely to remove the color or series of colors while keeping the foreground image or object intact. That means you can take a single photo, strip out its background, and replace it with as many others as you like.
Want to make products look more inspiring, place your sales team in different settings, or create fun memes for social sharing? The image background you choose can make all the difference in how your branding comes across, or can better set the scene and emotion of a subject. It’s perfect for bloggers and social media managers to photographers and graphic designers looking to get more creative with their work.
What does a transparent background look like in Photoshop?
When you strip an image background of its color in Photoshop and make it transparent, it will appear as a grey and white criss-cross pattern of tiny squares. Your foreground image will be preserved, creating a cut-out on top of the chessboard-like background. Like this:

How do I make an image background clear in Photoshop?
It’s easy to create a clear background in Photoshop in a few clicks (we’ll take you through it step-by-step below). But it can also be tricky if you have more complexity in the foreground and background. You’ll need to use layering, masking, and brush tools to really get a perfect result. Not everyone has time for such detailed processes, right? But we’ve got a workaround.Other than Photoshop, you can also use tools like remove.bg and Canva as well, if you’d like to find out more about how to do just that check out our article on how to make image backgrounds transparent in seconds.
How do I make a white background transparent in Photoshop?
Photoshop is also great for making an image background transparent, even if it’s a block color like green, blue, or white.
While Photoshop has its own built-in, quick tool for background removal, it still requires a lot of precision in the editing process to get those shape edges and defined outlines just right, even if you are only working with a single color backdrop. You can even do it online in seconds with remove.bg in few seconds.
Find out how in our article where we talk about how to remove white background from image online.
A step-by-step guide on how to make an image background transparent in Photoshop
Newer editions of Photoshop now have a built-in background removal tool. Here’s what you need to do to make use of it:
1. Open the image you want to get creative with.
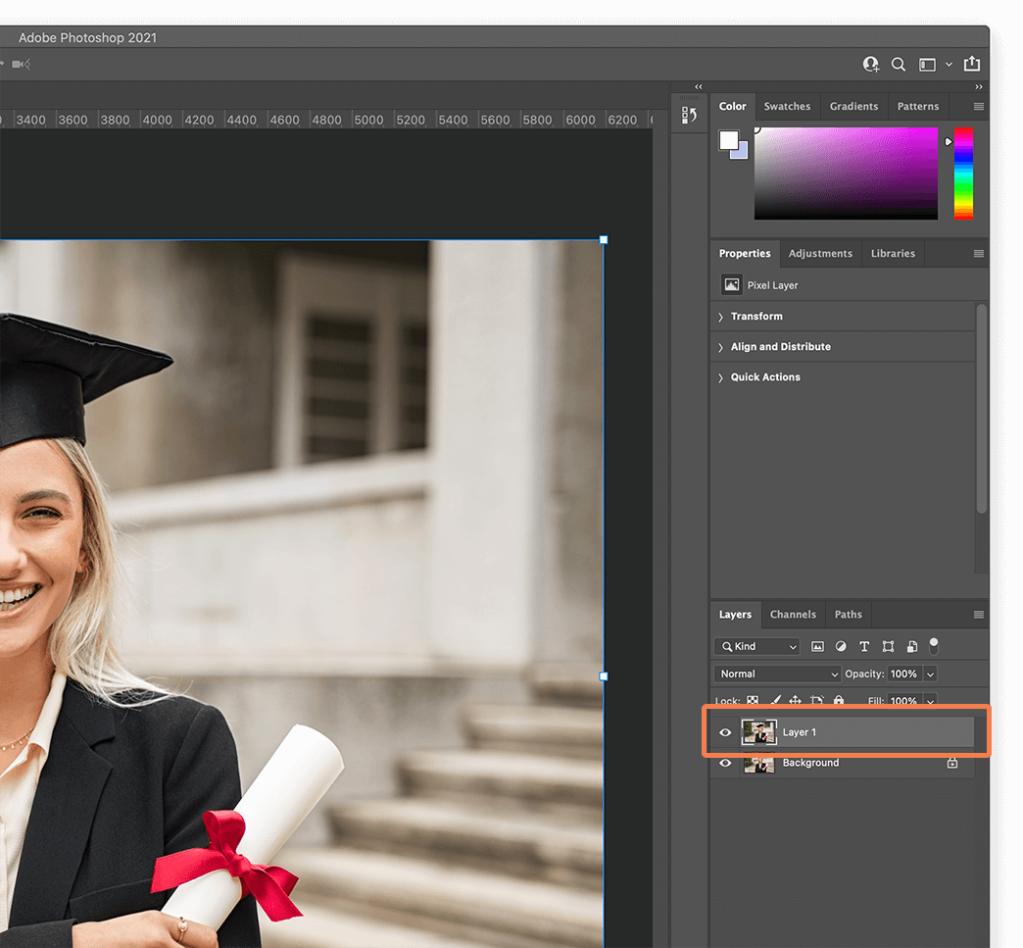
2. Find the Layer panel on the right-hand side and duplicate the background layer. Then, click on the Quick Actions drop-down menu arrow to expand it.
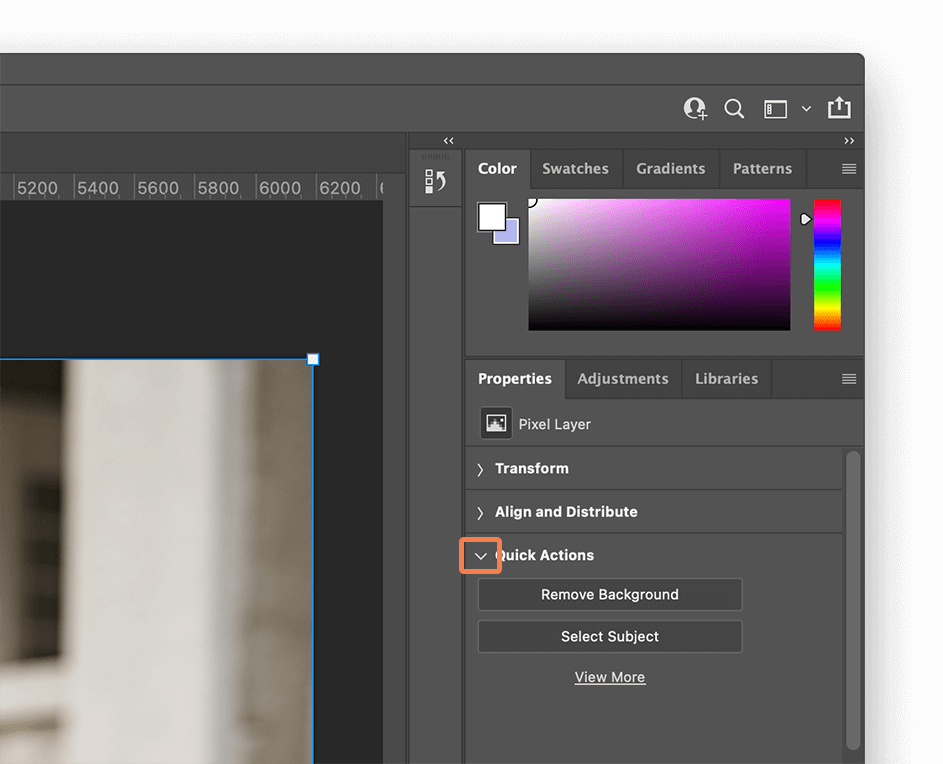
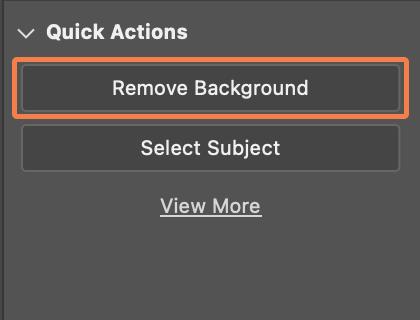
3. There are two options in the Quick Actions menu – choose Remove Background.
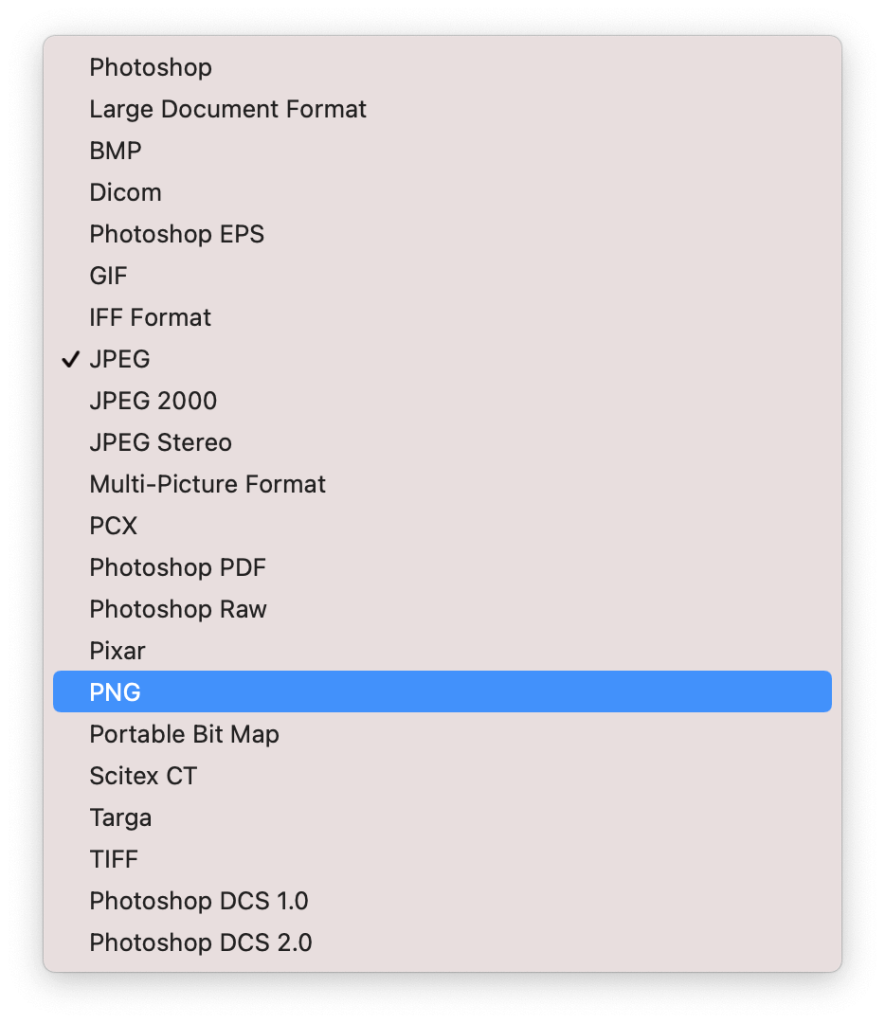
4. Save as a PNG file, which keeps the transparent background and is also web use ready.
Got a picture that’s a little more complex, or where the foreground object is a similar color to the background? First, you’ll have to get to grips with adding layers and using things like the Object Selection Tool or the Lasso Tool, which allows you to do this freehand, and the Magic Wand Tool to perfect the object’s edges.
Most popular Photoshop features for removing an image background
There’s a couple of ways you can go about removing backgrounds in Photoshop, these are the most popular features you can use:
Layers: in Photoshop are like a stack of paper sheets and each layer represents certain features or edits of the photo. Using layers allows you to isolate certain parts of the photo, add effects to certain areas, and more — while still keeping the individual versions in tact. You can easily hide and unhide layers at any time.
Object Selection Tool: this tool will help you select a person, object or animal by automatically recognizing them and drawing along the outline of the edges, you can then move on to removing the background.
Lasso tool: you can also manually and free-handedly select an object, person, or animal by using the lasso tool. Which is a great option if it’s not obvious what you’re trying to isolate.
Remove background tool: a quick action for removing your background, if you’re not too fussy about the edges.
Background eraser tool: this is like a brush you can use to remove the background as you move it along the screen. The brush will remove pixels that have the same color or similar color to the section you first selected. This is a more manual way of doing things that can take a little longer but is great if you only want to remove certain parts of the background.
Pen tool: this is the most manual way of selecting an object or isolating a background. The pen tool is a line you can draw along the outline of a person, animal, or thing to isolate it — afterward you can move onto other editing steps like removing the background or smoothing the edges.
If you don’t have the time to go through these processes yourself, there are plenty of online editing services - like Clipping Path Service or Clippingfactory - you can resort to. Simply upload your photos, specify what your requirements are and a team of professionals will take care of manually editing your images within a determined amount of time (usually between 12 and 24 hours).
If, on the other hand, you decide to go ahead and personally edit your photos, you can check out our detailed step-by-step guide on how to remove the background of an image in Photoshop and use these features.
Is there an easier way to make a background transparent in Photoshop?
Yup, there sure is — and that’s where remove.bg comes in. It’s free to use, super easy to get to grips with, and removes the background of an image in seconds. With a simple drag and drop system, there’s no fumbling around with layers or brushes.
If you’re already using Photoshop, you can even use the remove.bg plugin to do everything in the tool, without completely disrupting your workflow.
Compared to removing the background directly in Photoshop, the plugin is better at isolating complicated parts of a subject like hair or jagged shapes like tree leaves. It enables you to stay in Photoshop while giving you the option to still perfect parts of the image and edit further.
How to create a transparent background in Photoshop with the remove.bg plugin
Get started with the plugin by following these steps:
1. Download the plugin. It’s free of charge to download.

2. Sign up at remove.bg. Your first image is free, so you can try it out and preview your result before purchasing more credits for extensive use (one credit = one photo edit).

3. Enter your API key in the extension.

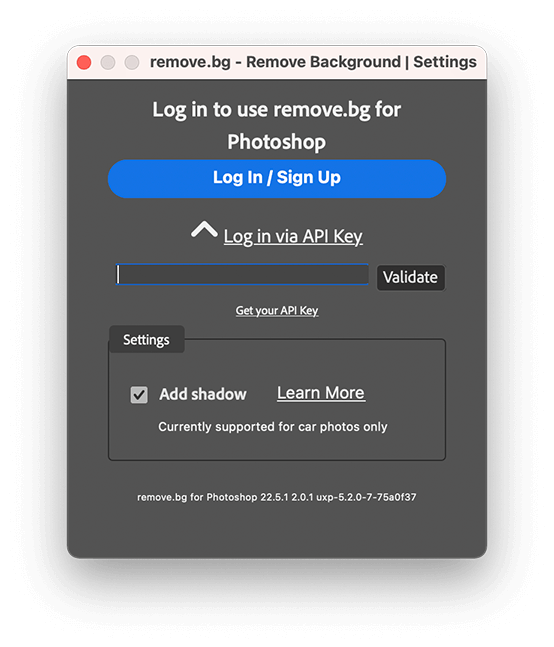
4. Find remove.bg in the Photoshop Plugins drop-down menu.

5. Click the Remove Background button and start removing backgrounds in Photoshop within seconds.
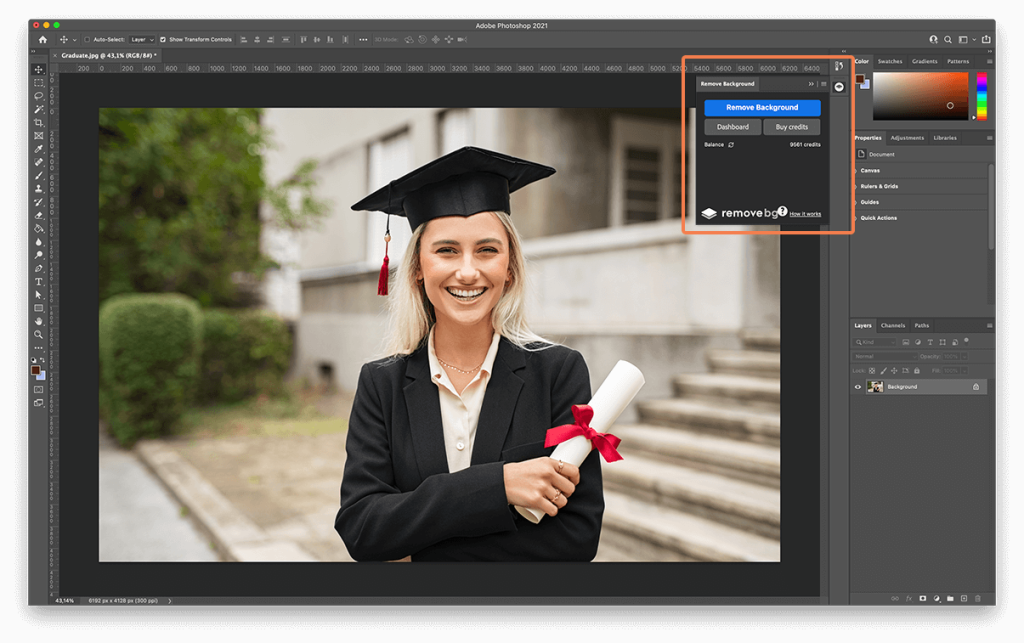
The plugin even features a layer mask editing tool to remove or restore areas of an image but with a one-click starting point. Now that you have all the tools at your disposal, and know how to make an image background transparent in Photoshop, why not give it a try?
คอมเมนต์