Want to add some magic to your Valentine's Day? Or stay connected with your boo even if you're not together on the day? Designing a personalized V-day card or photo collage is bound to put a smile on their face (and yours when you hand it over).
And the best part? You can do this completely online — it’s easy, fun, and quicker than deciding on a dinner date outfit. Plus, you get to add a personal touch that's way more heartfelt than a gift shop card.

With simple, free tools like Designify and Canva, you can work with a whole bunch of cute Valentine's Day card ideas — like a collage of your special pics. Let's get you started.
Isi kandungan
1. Create a cute Valentine's Day card with Designify & Canva
Got a cute pic of you and your special someone? With Designify, you can whip up a gorgeous card like this:

And that's the power of a great photo backdrop — in just a few steps, you can transform a regular photo into something even more special and romantic with a Valentine's Day background. Here's how:
1. Upload (or just drag and drop) your image to Designify:

2. It will remove your image background by default (perfect if you want to get rid of a photo bomber without an expensive Adobe license):

Scroll down and check out Designify's gorgeous background options to find that perfect Valentine-worthy one:
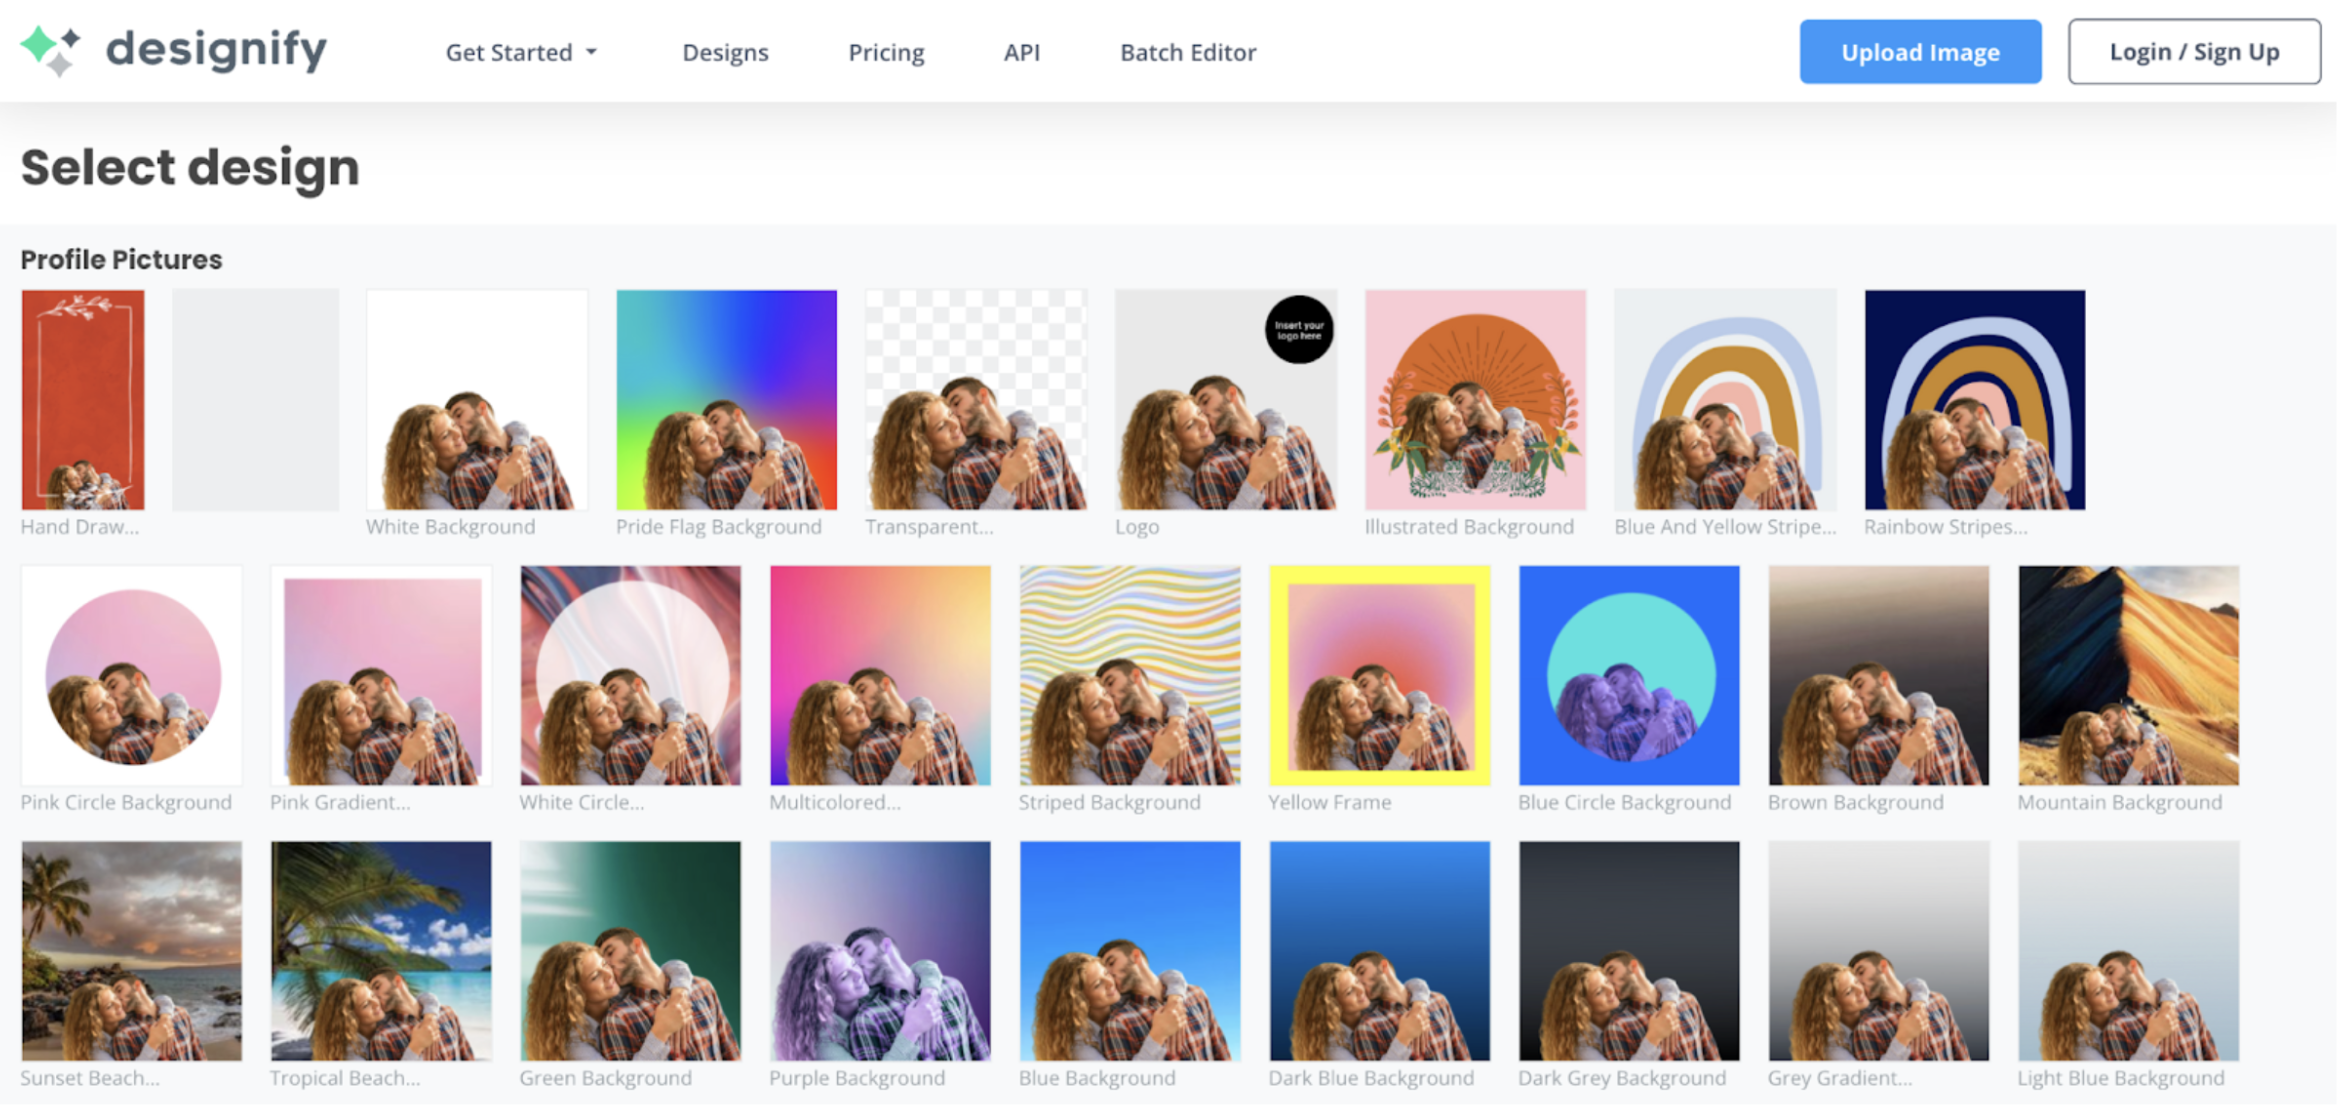
Here's one we thought was cute — Designify's White Circle Background. Perfect for adding a little text (which we cover a bit further below) in the space above the image.

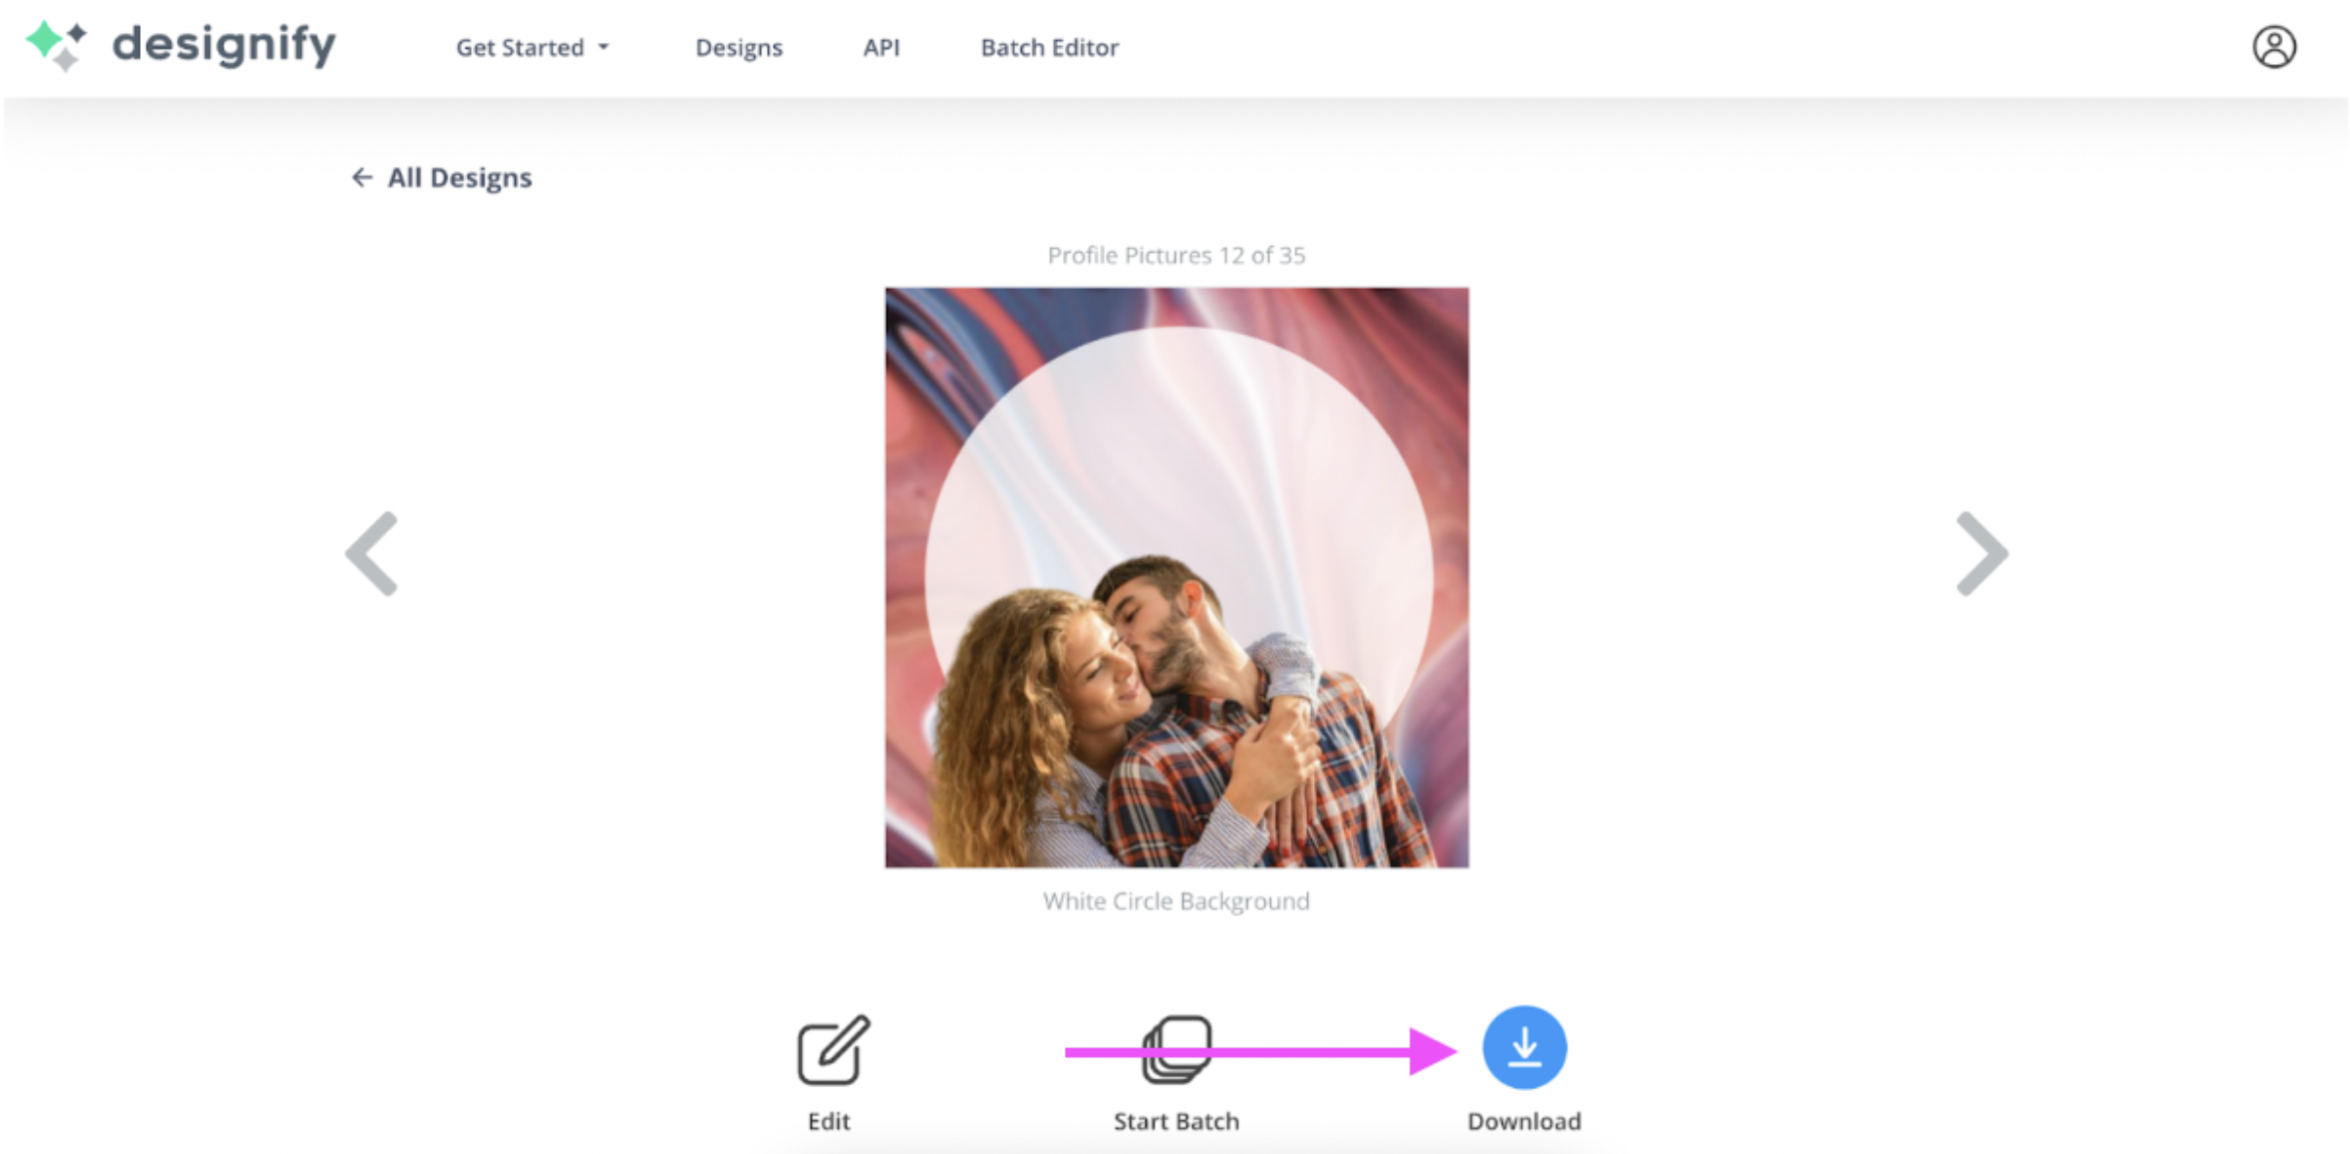
If you find a Designify background you like, hit the blue > Download button to save it to your device as a PNG file.
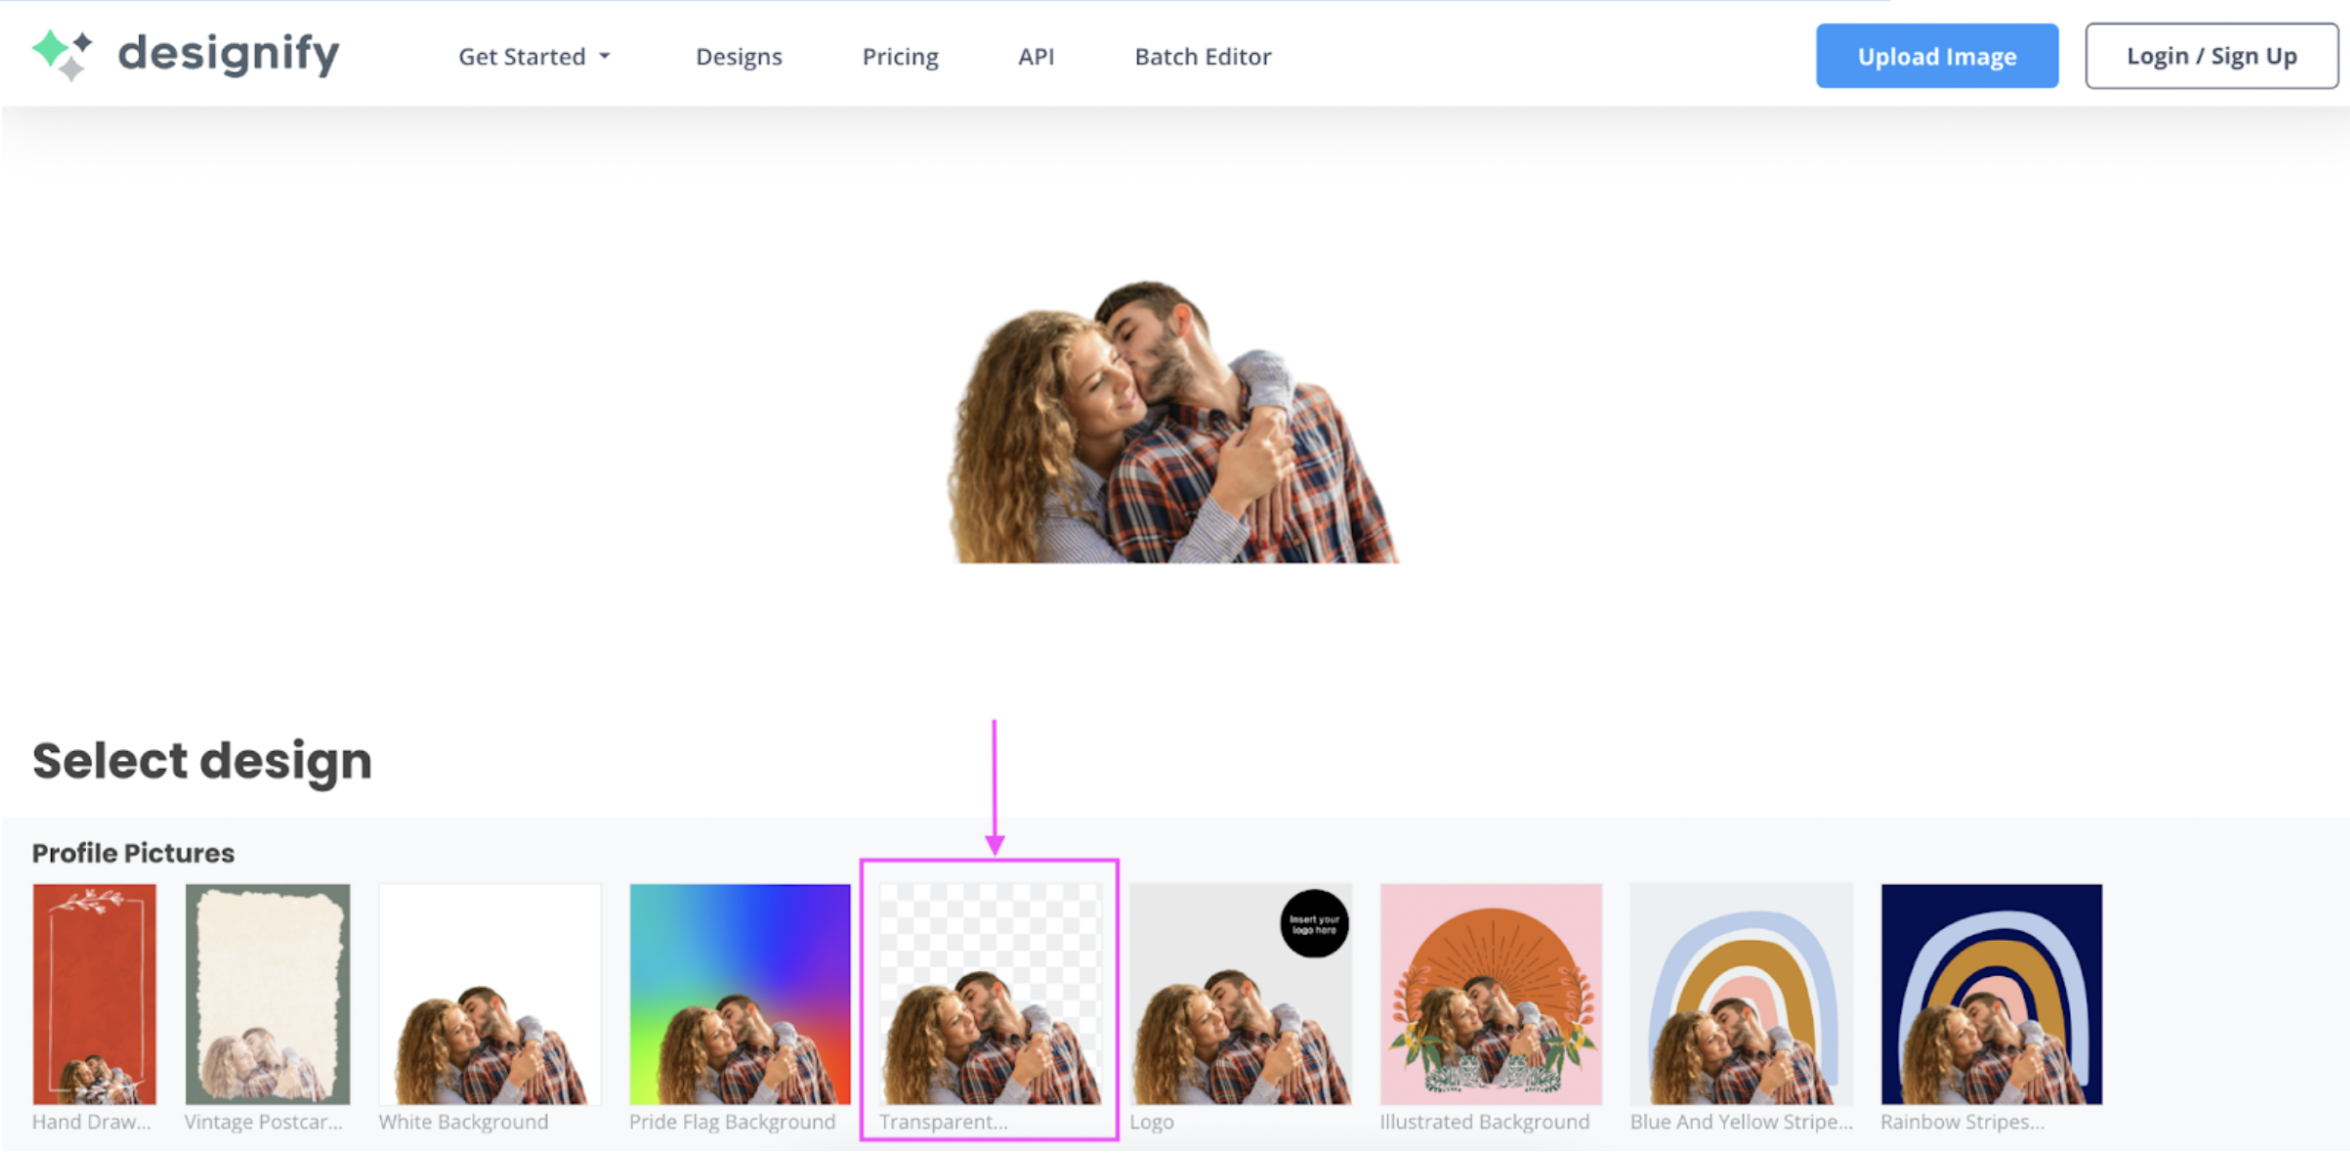
Want to add a special Valentine's Day background you found online to your photo? Upload your pic, but this time pick > Transparent background:
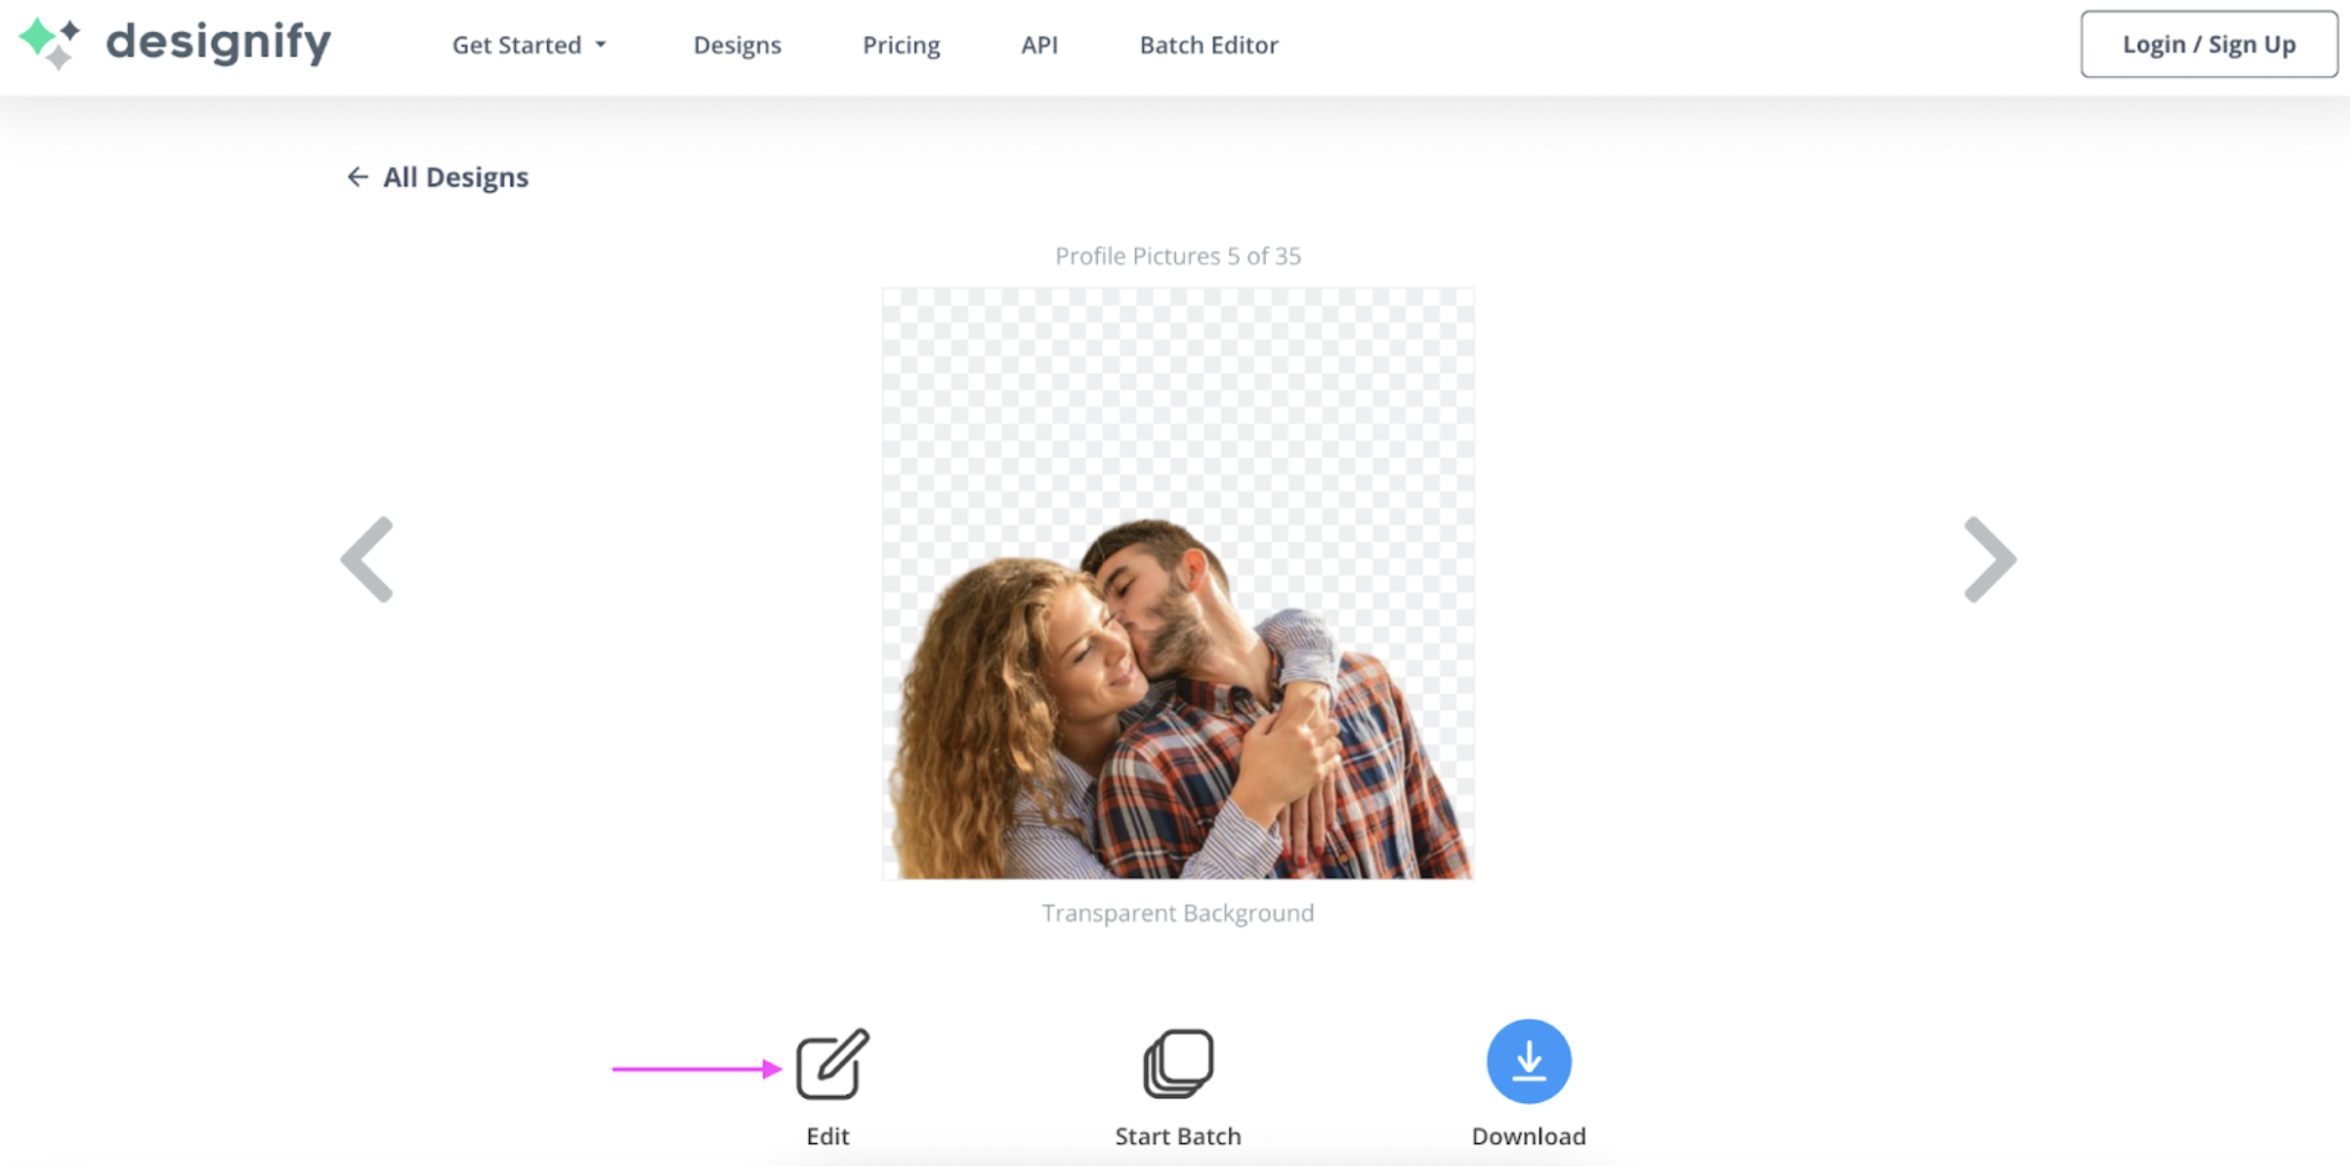
Hit > Edit:
4. Drag and drop your Valentine's Day background to the canvas, click on it, and then hit > Send backward to make it your new background:
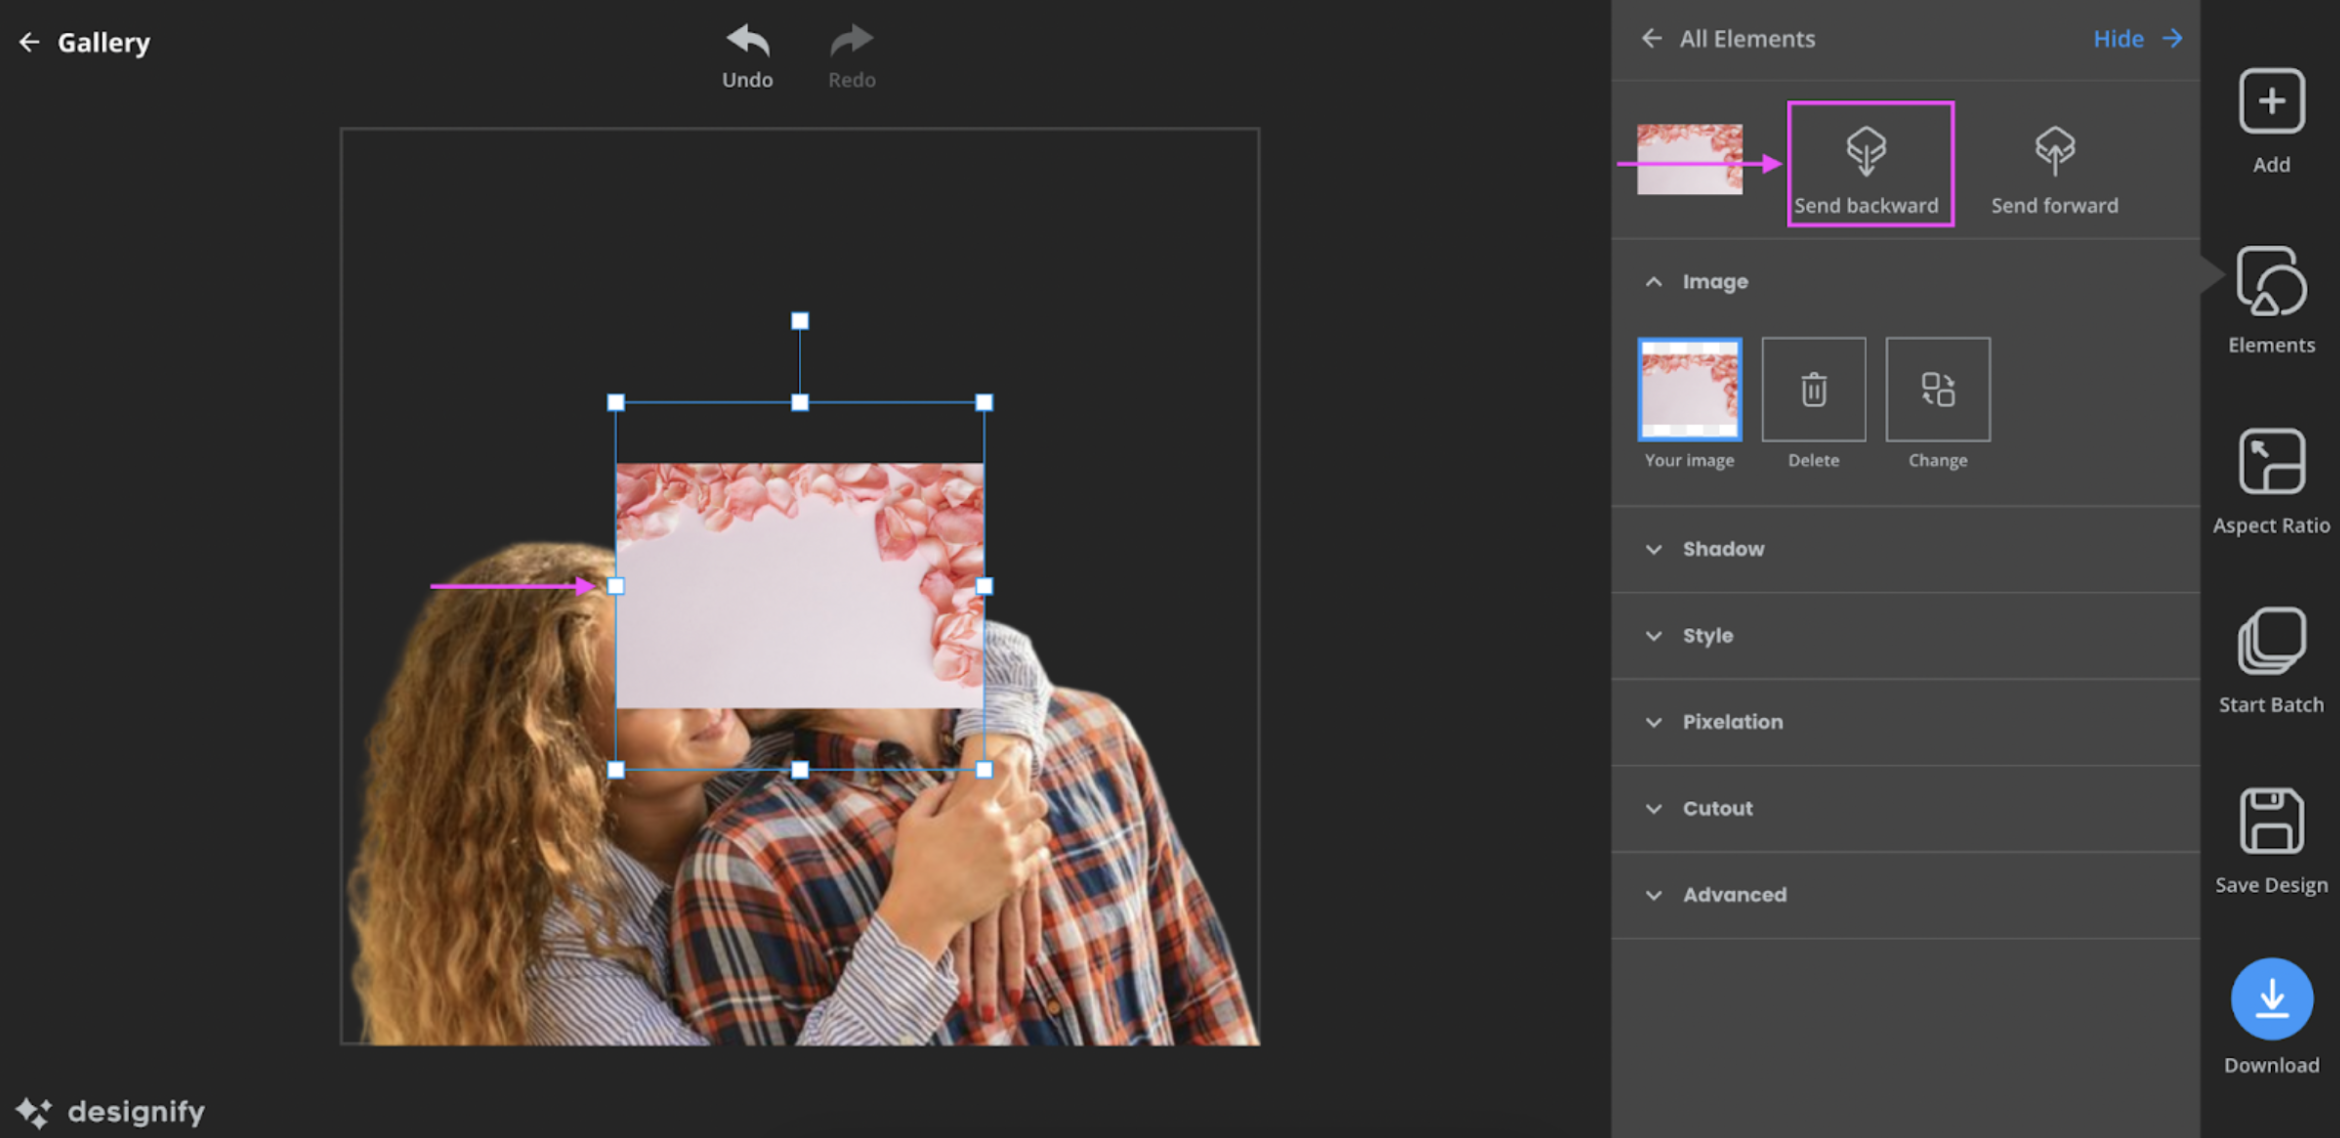
Resize your new background until it fits just right:
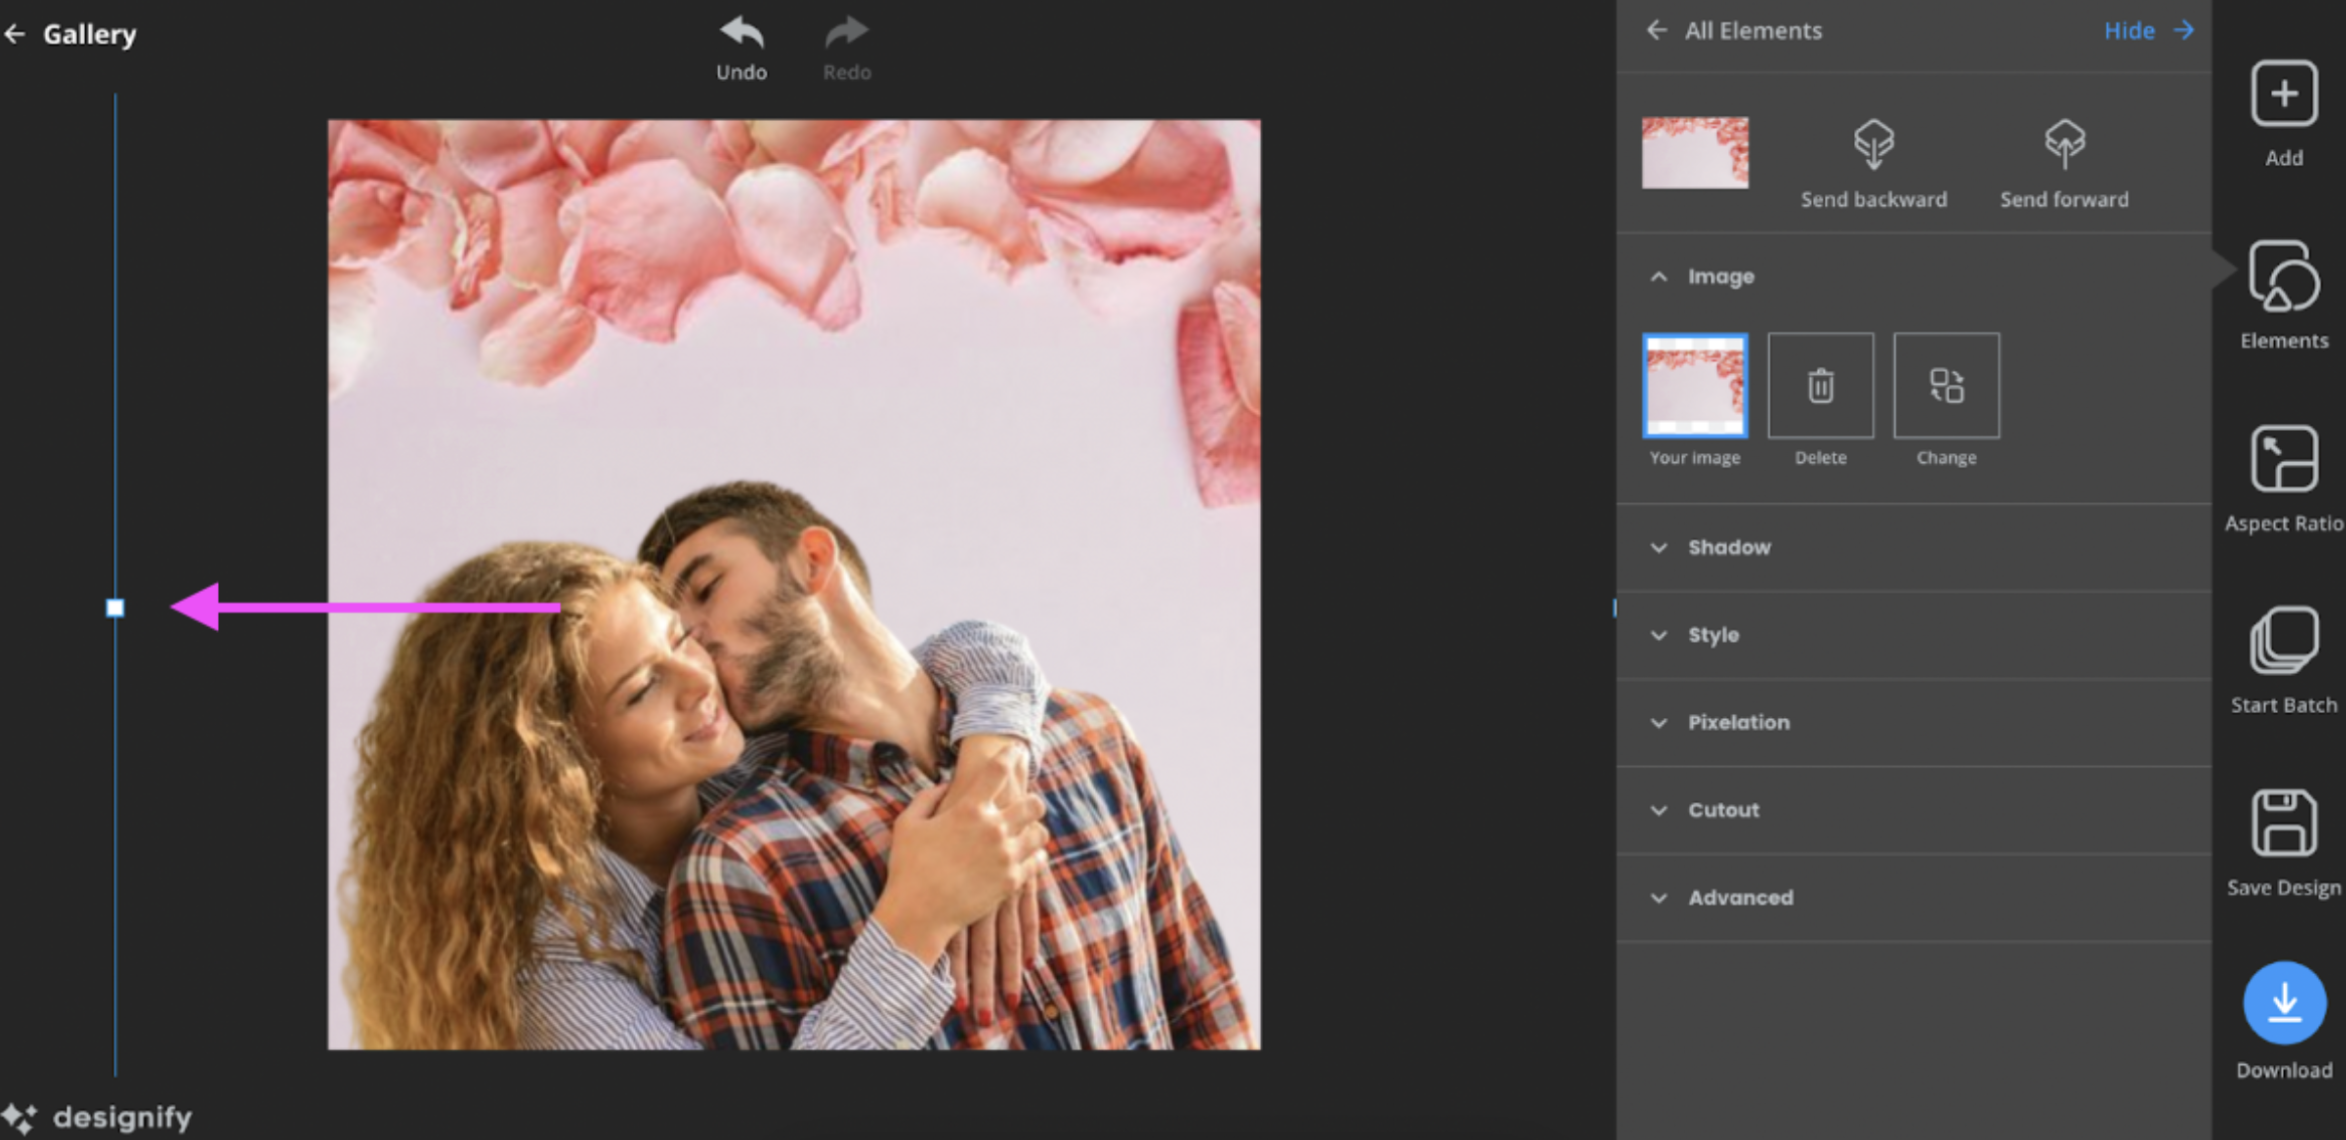
And then, hit the blue > Download button in the bottom-right corner once you're happy with your new image.
Now, what are we missing? That's right: a heartfelt message. To do this, we’re going to hop on over to Canva: a free design tool with a ton of features to create your perfect Valentine's Day card. Here you can add some text to your Designify image — even something simple like this goes a long way to show them you care:

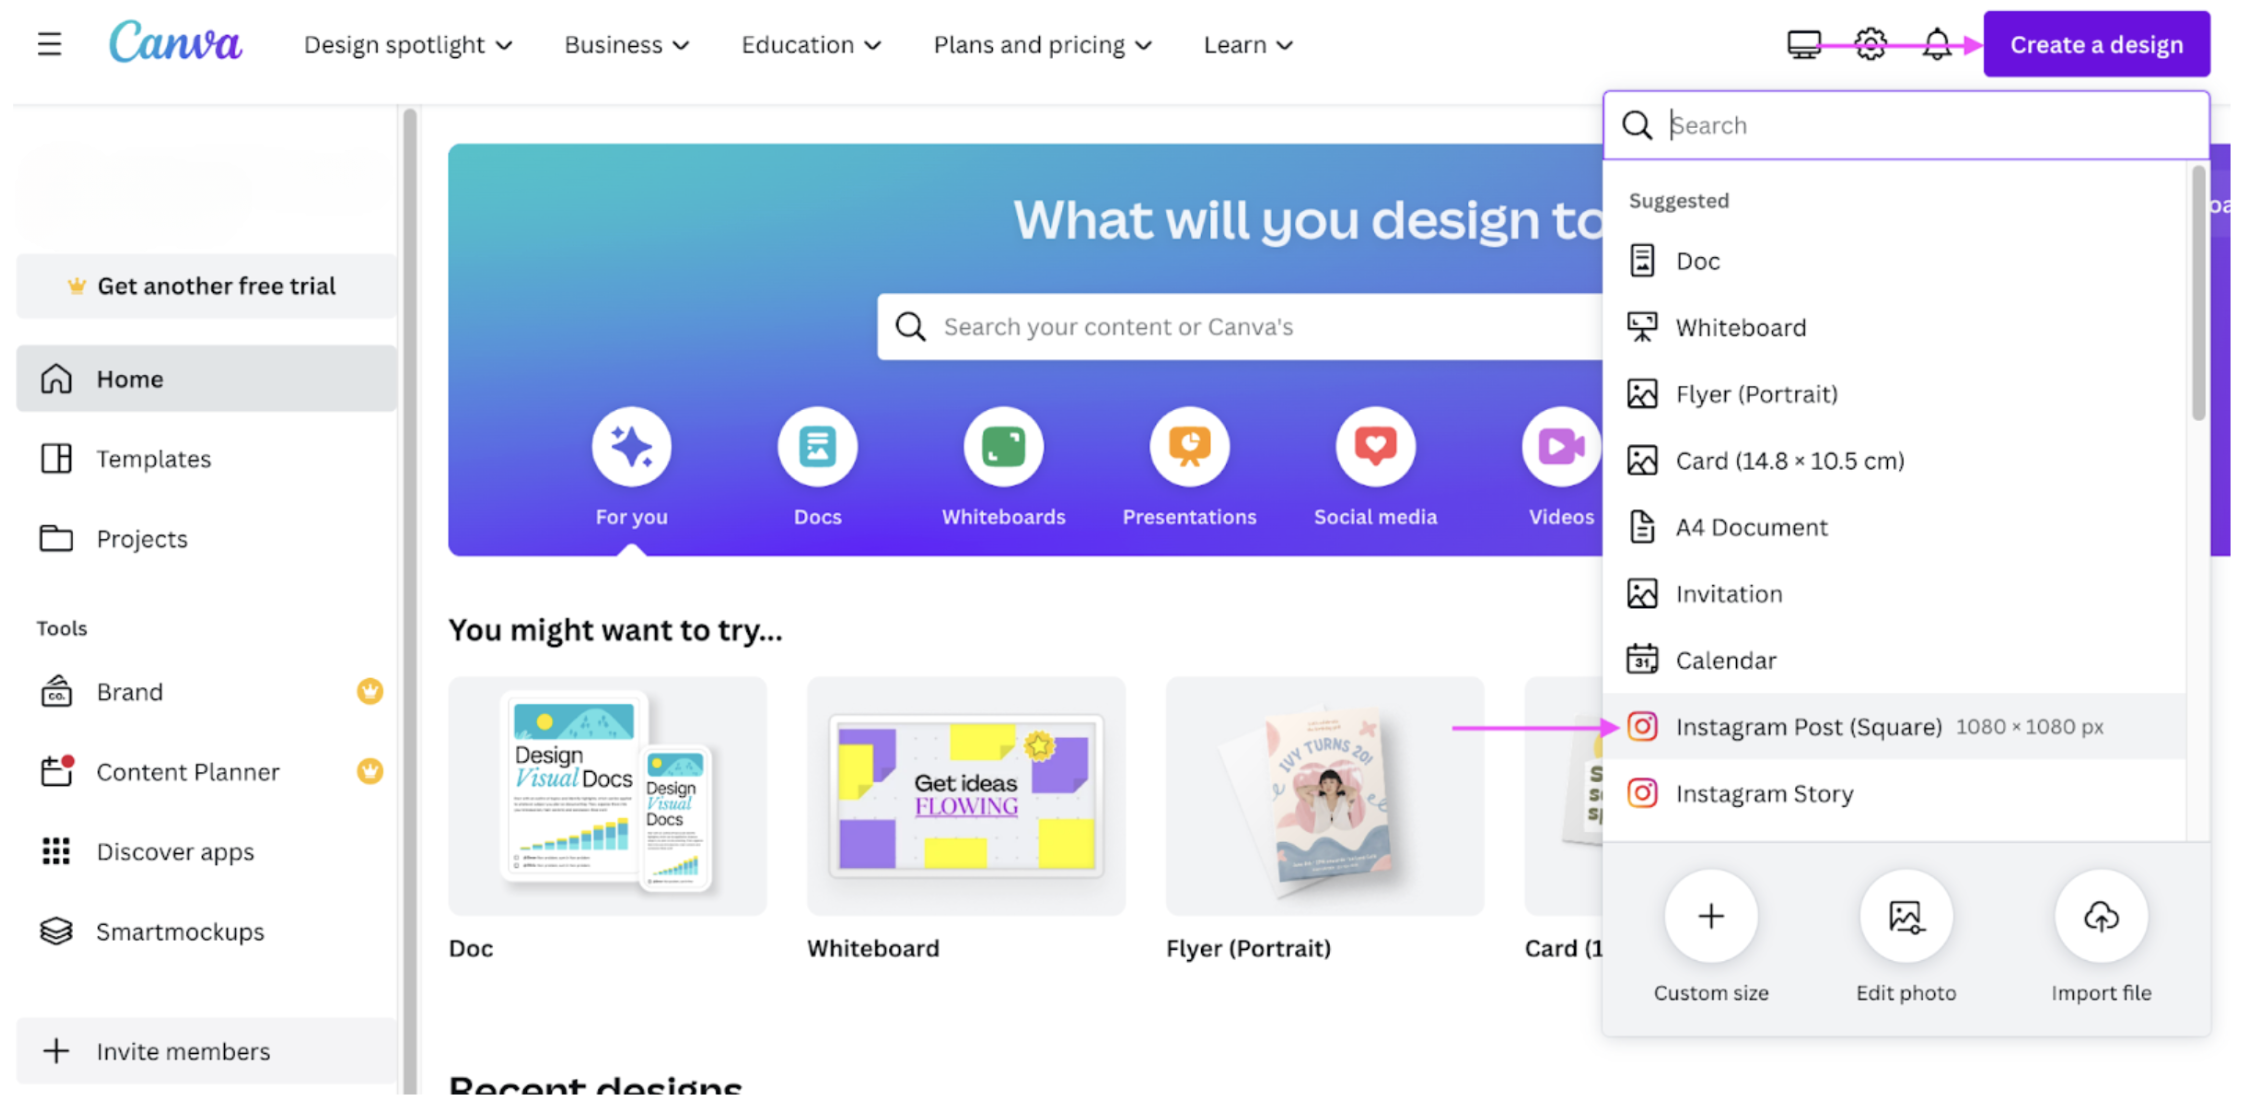
1. Once you're on Canva, start from > Create a design. We picked the > Instagram Post (Square) format, which is the easiest to share on your socials:
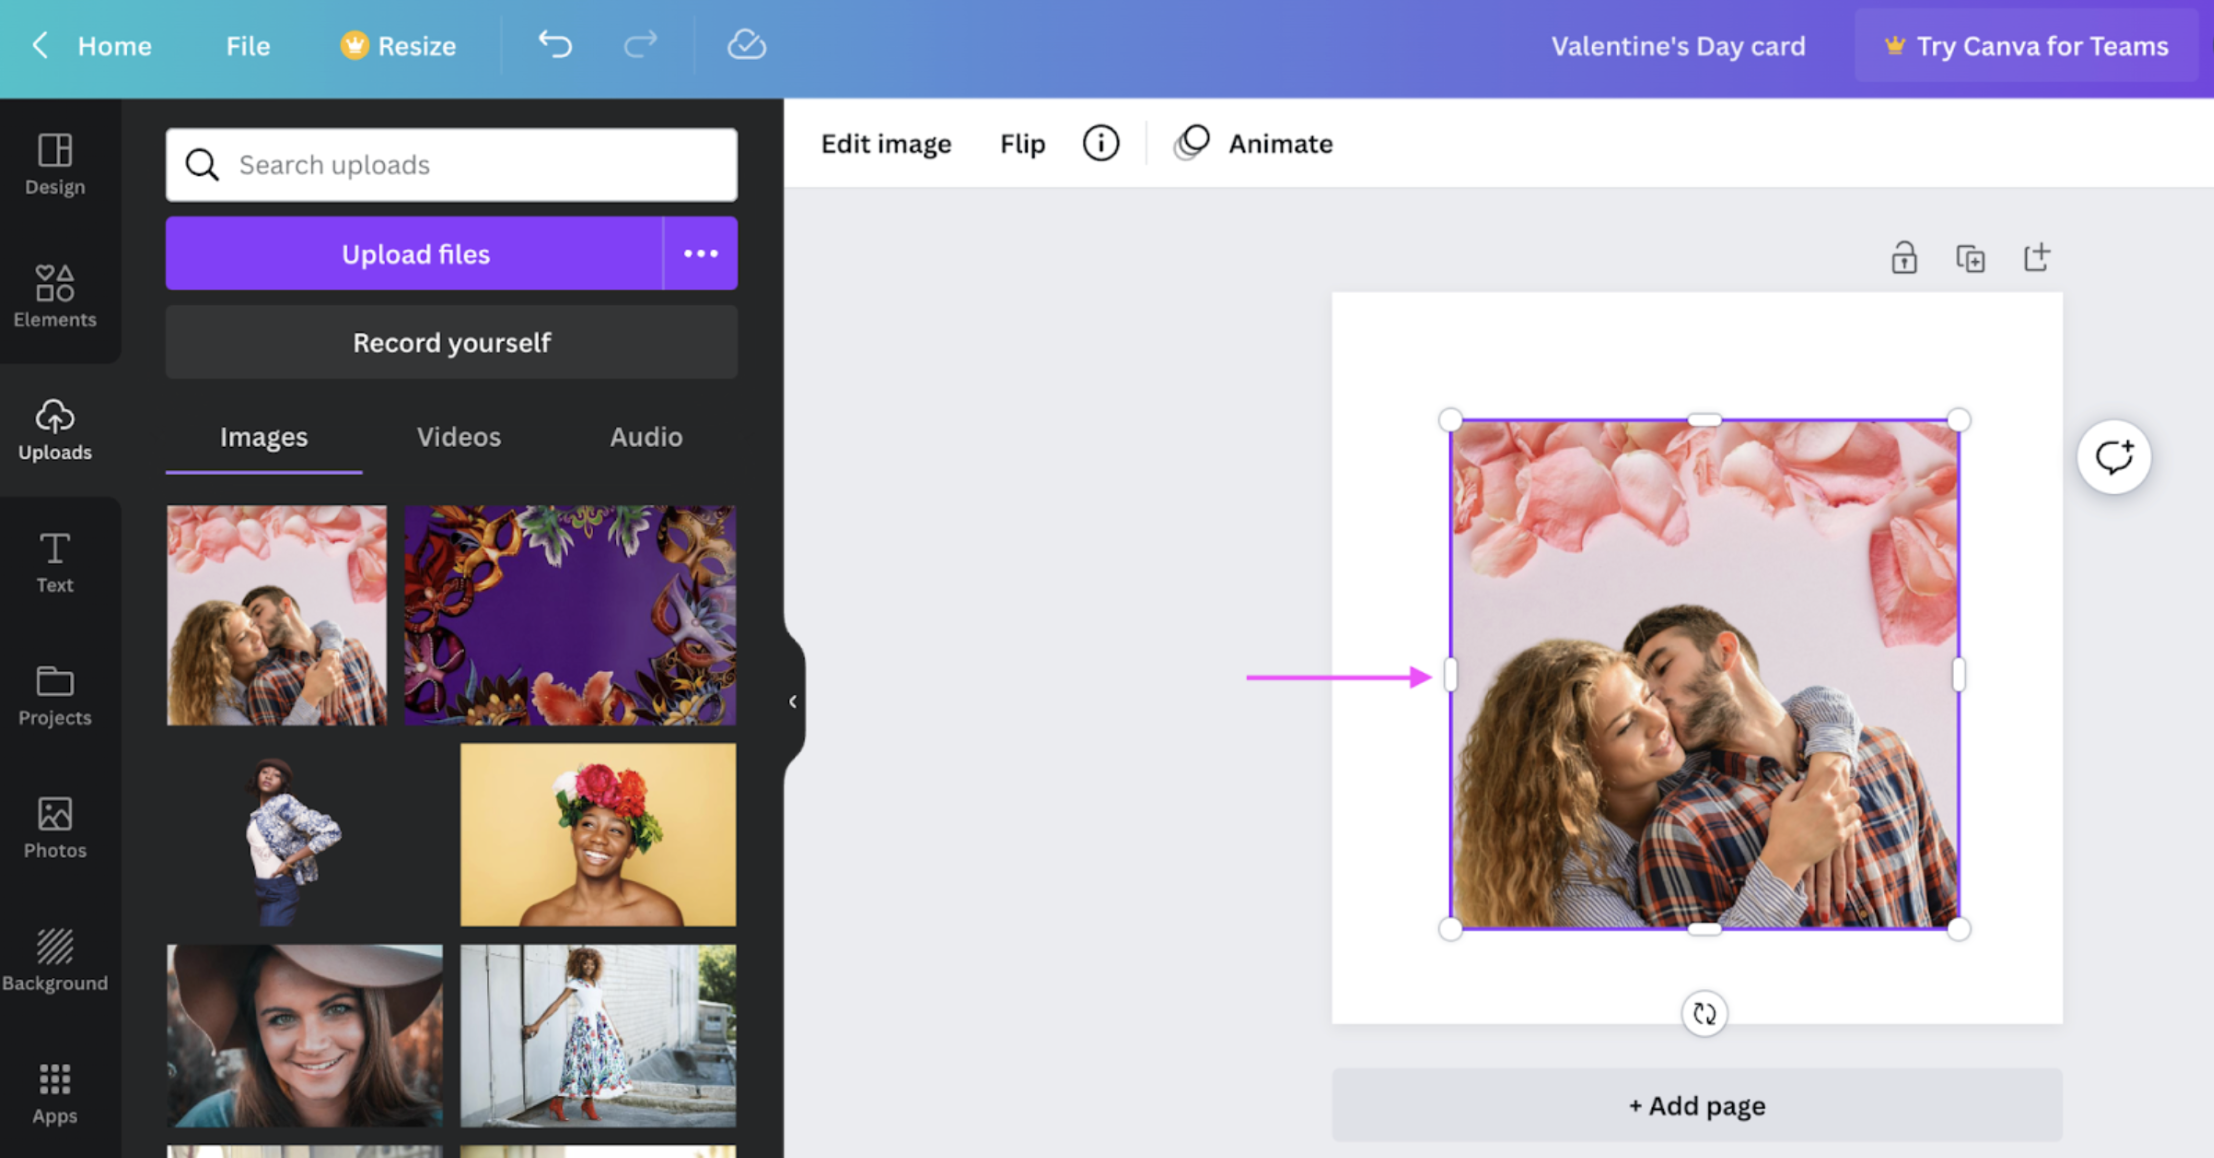
2. Add your Designify image to the canvas from > Uploads on the left-hand side:
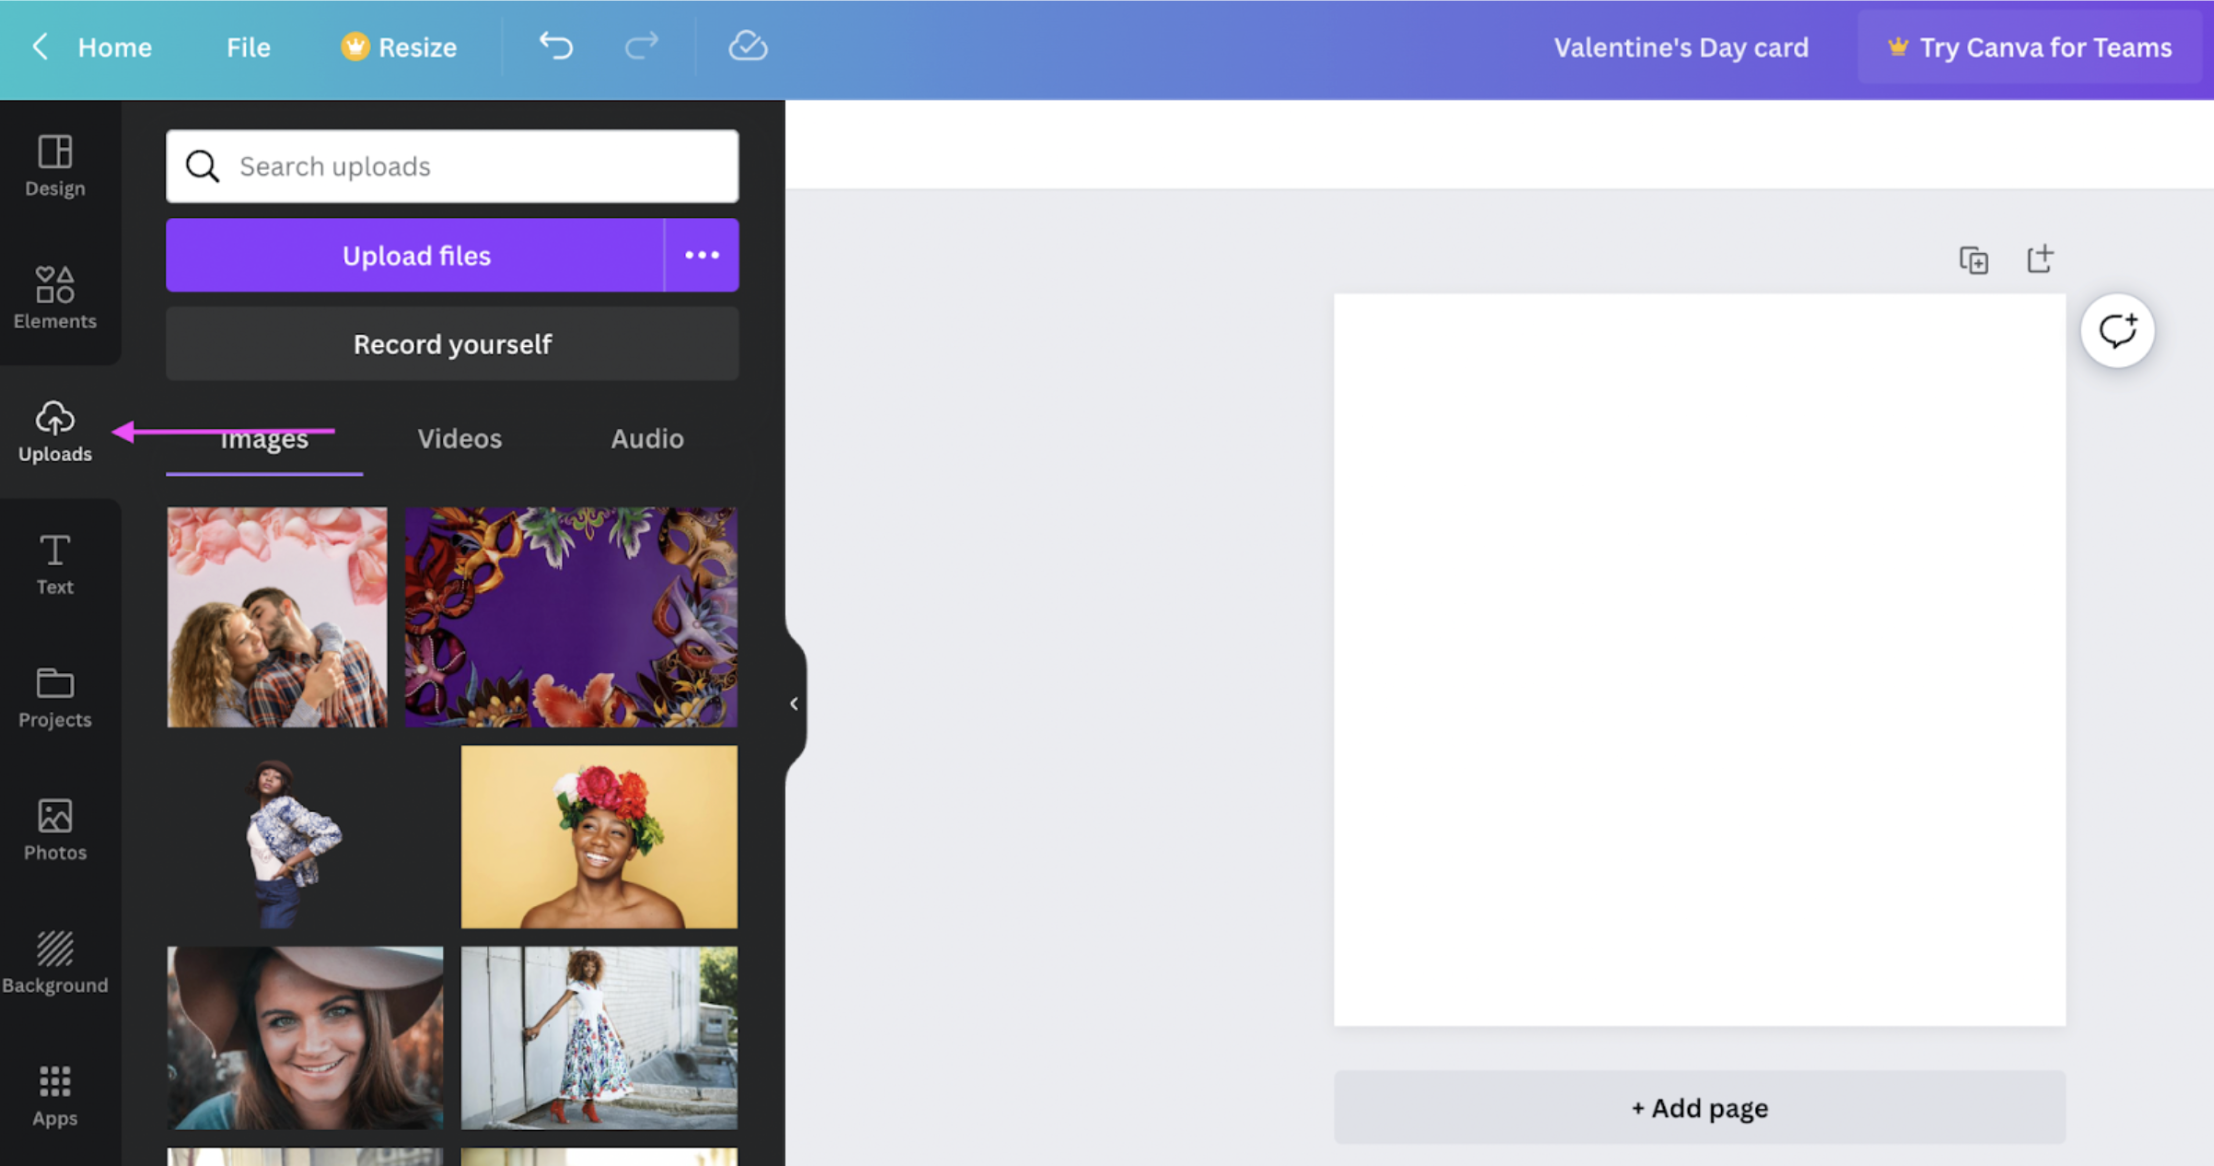
Drag and drop it to the canvas and resize it until it fits:
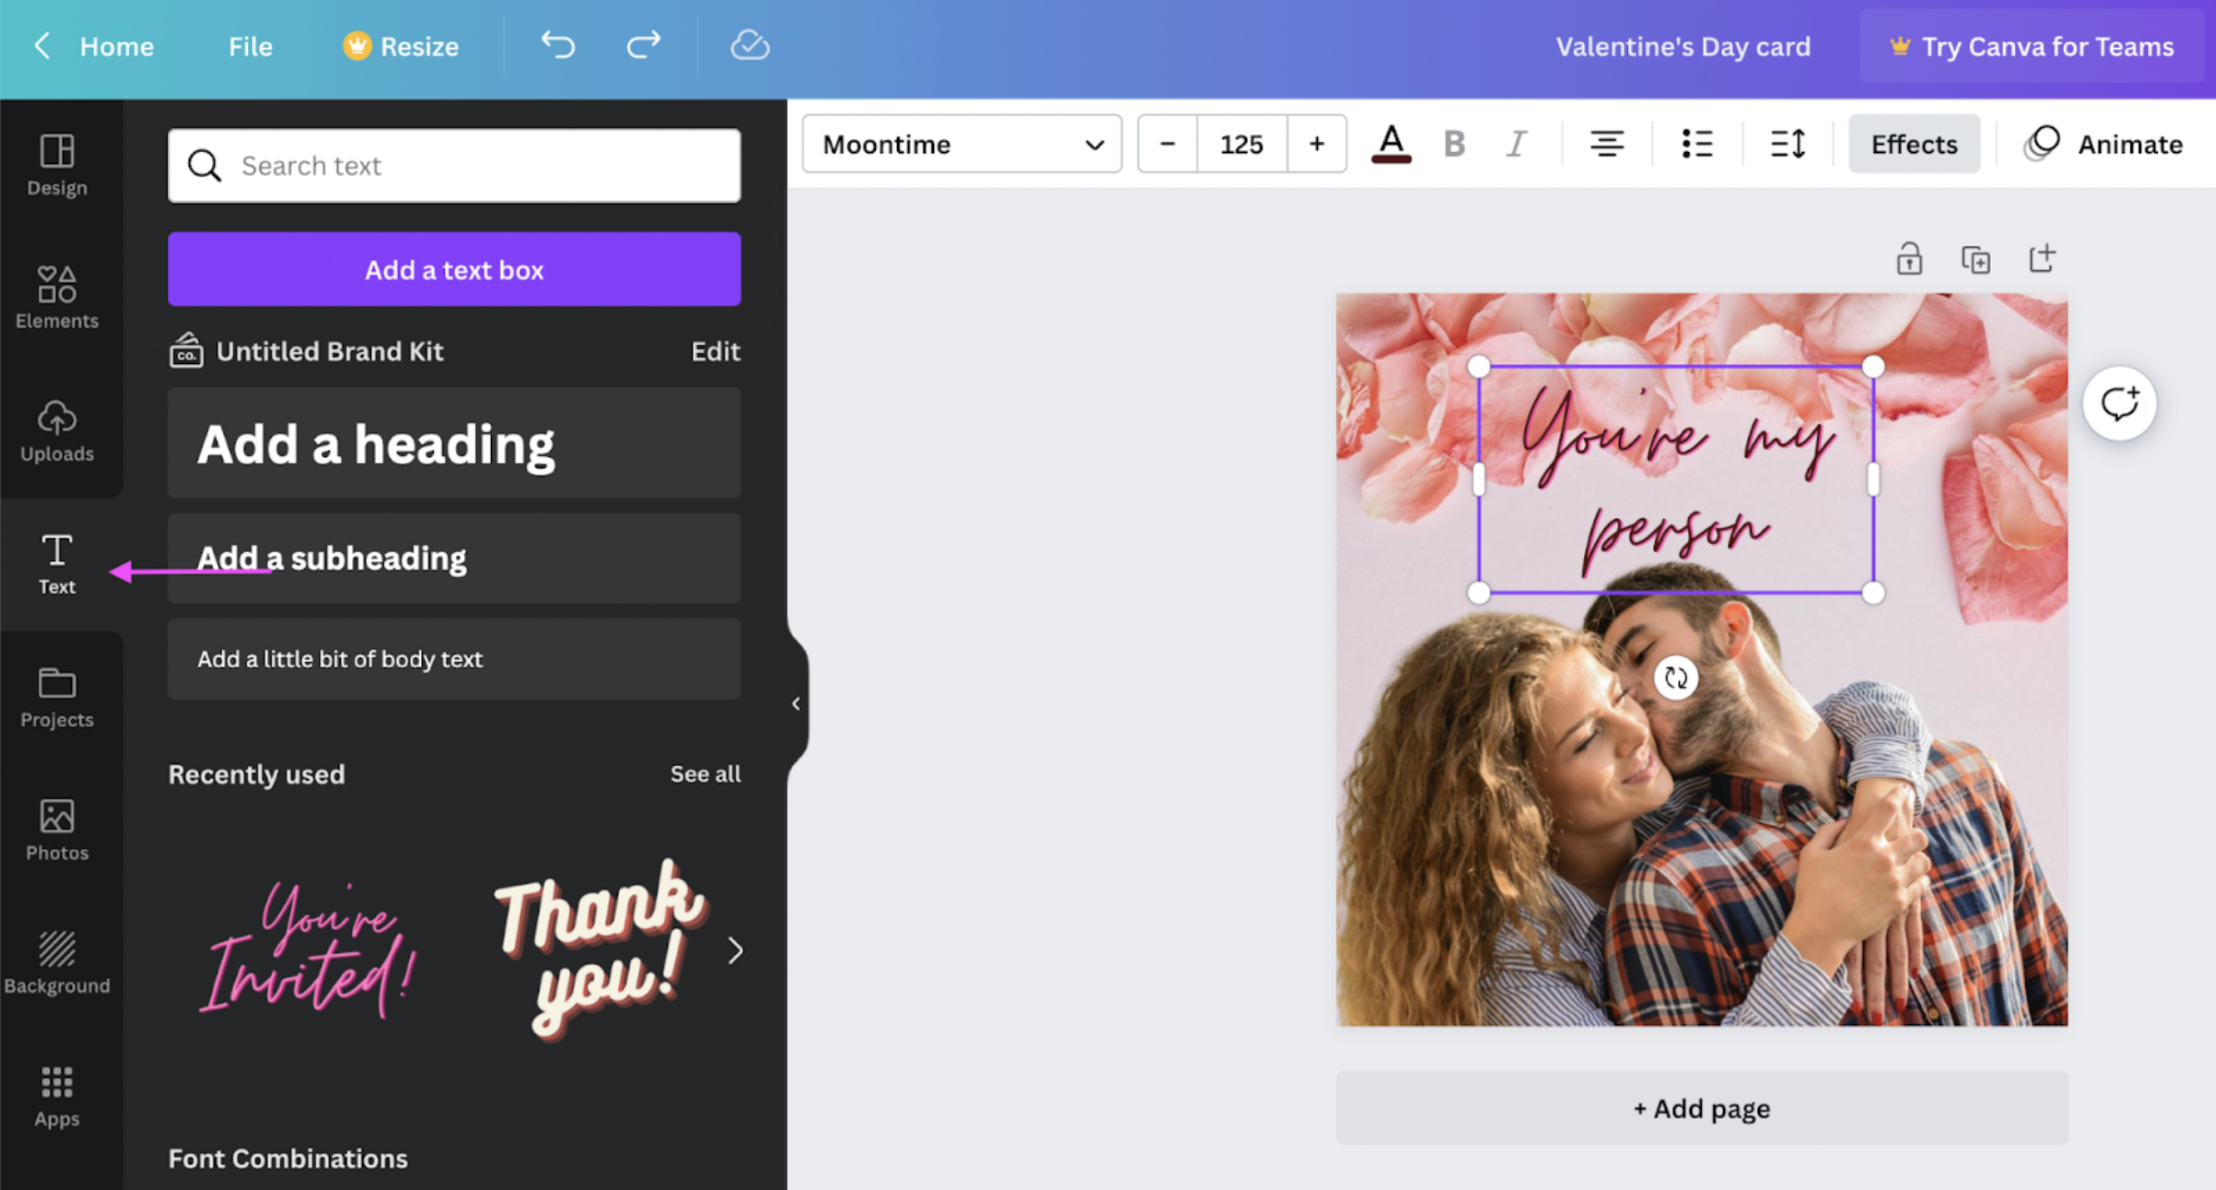
3. Add a special message with > Text on the left-hand side. (And get creative! A simple 'Happy Valentine's Day!' message is great — but a quote from your favorite Netflix show, inside jokes, or even your special song work wonders).
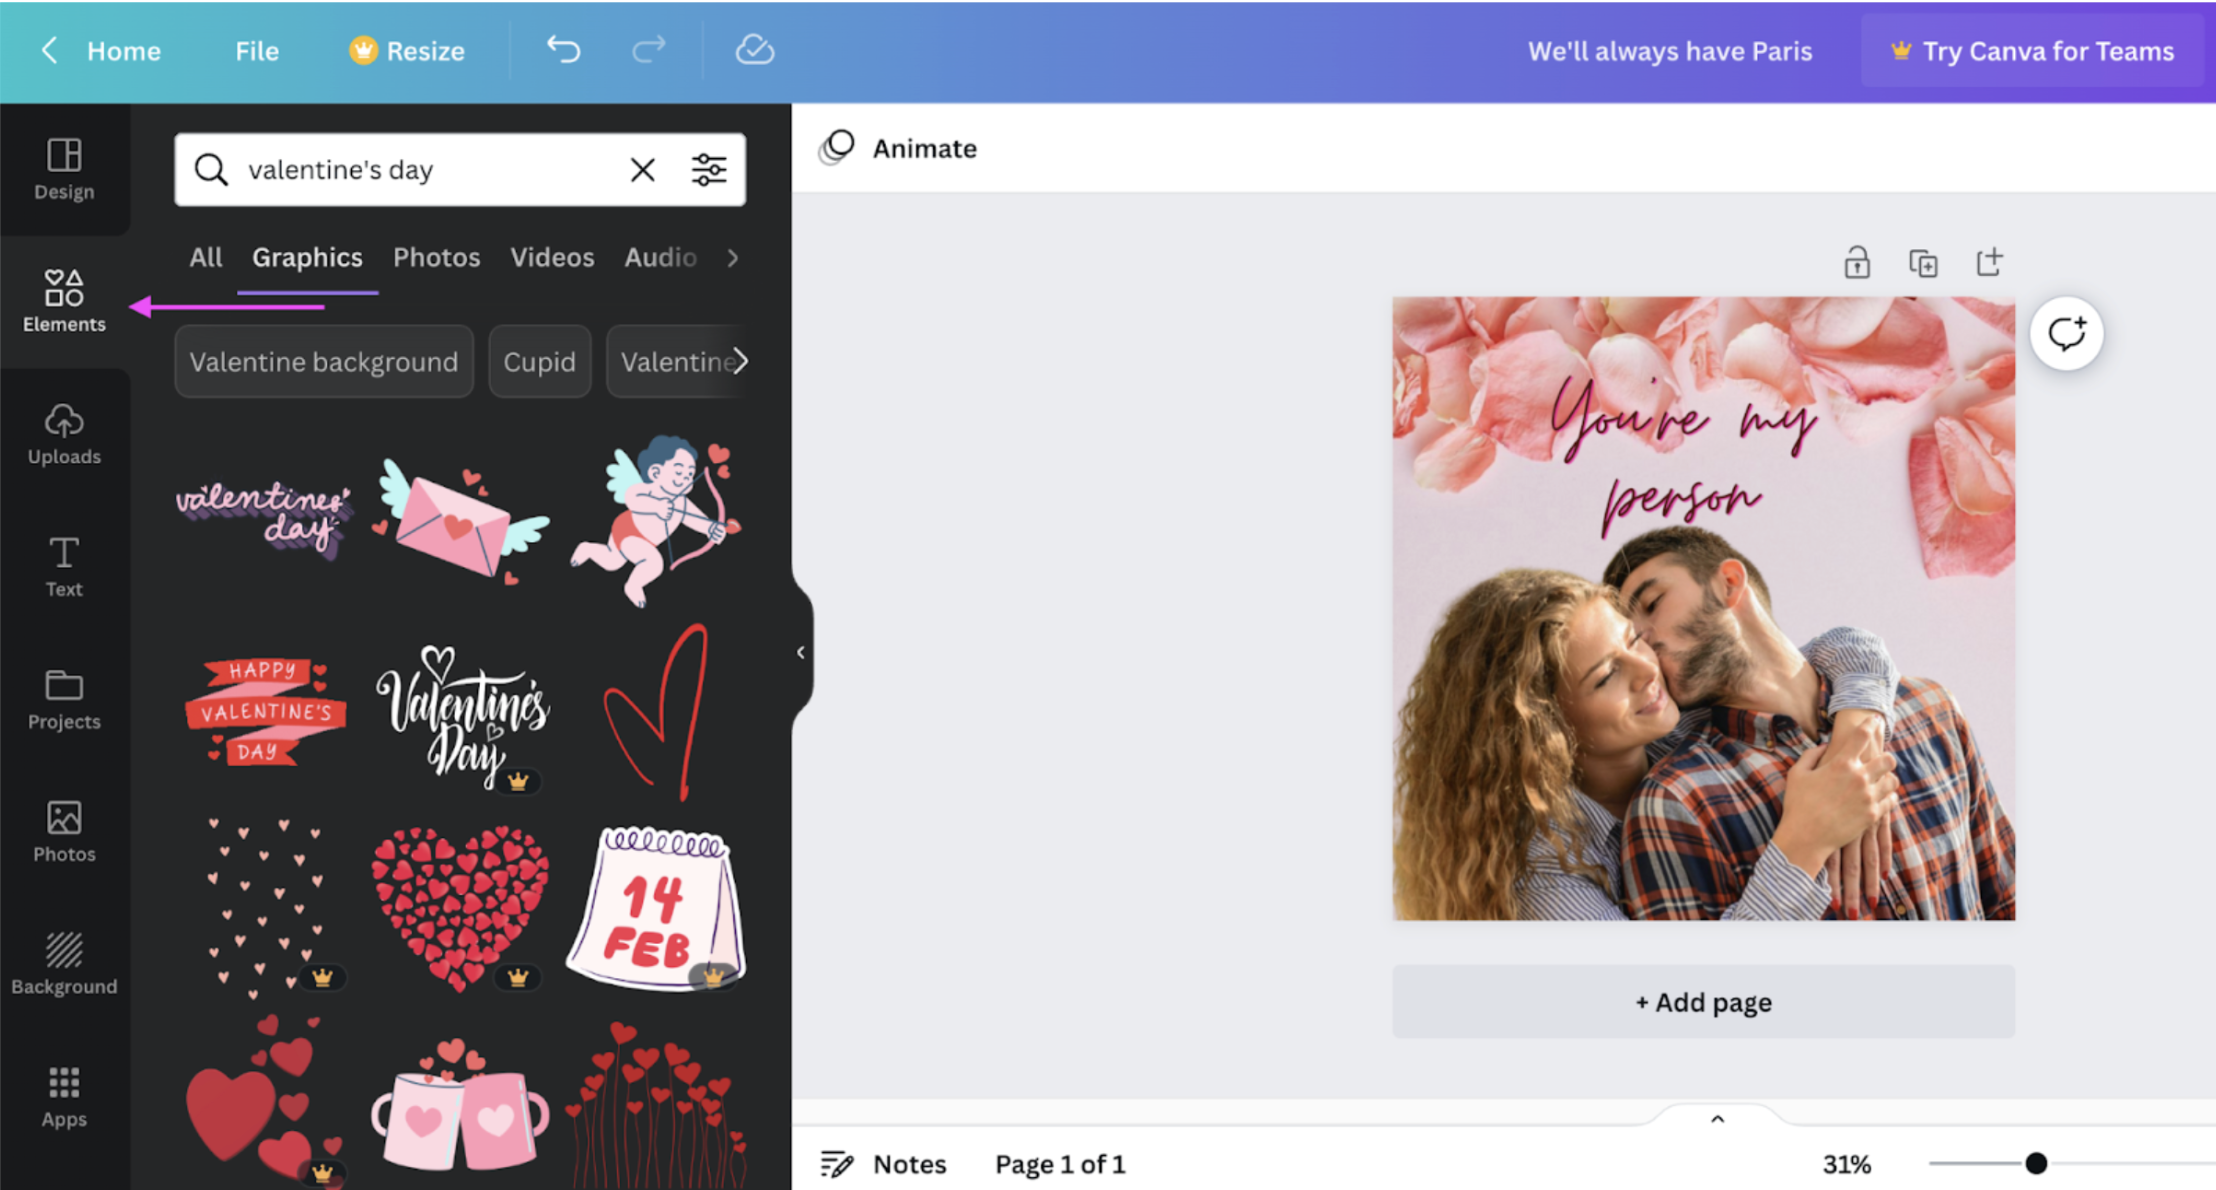
4. Add some cute Valentine's Day-themed hearts and blurbs from > Elements on the left-hand side:
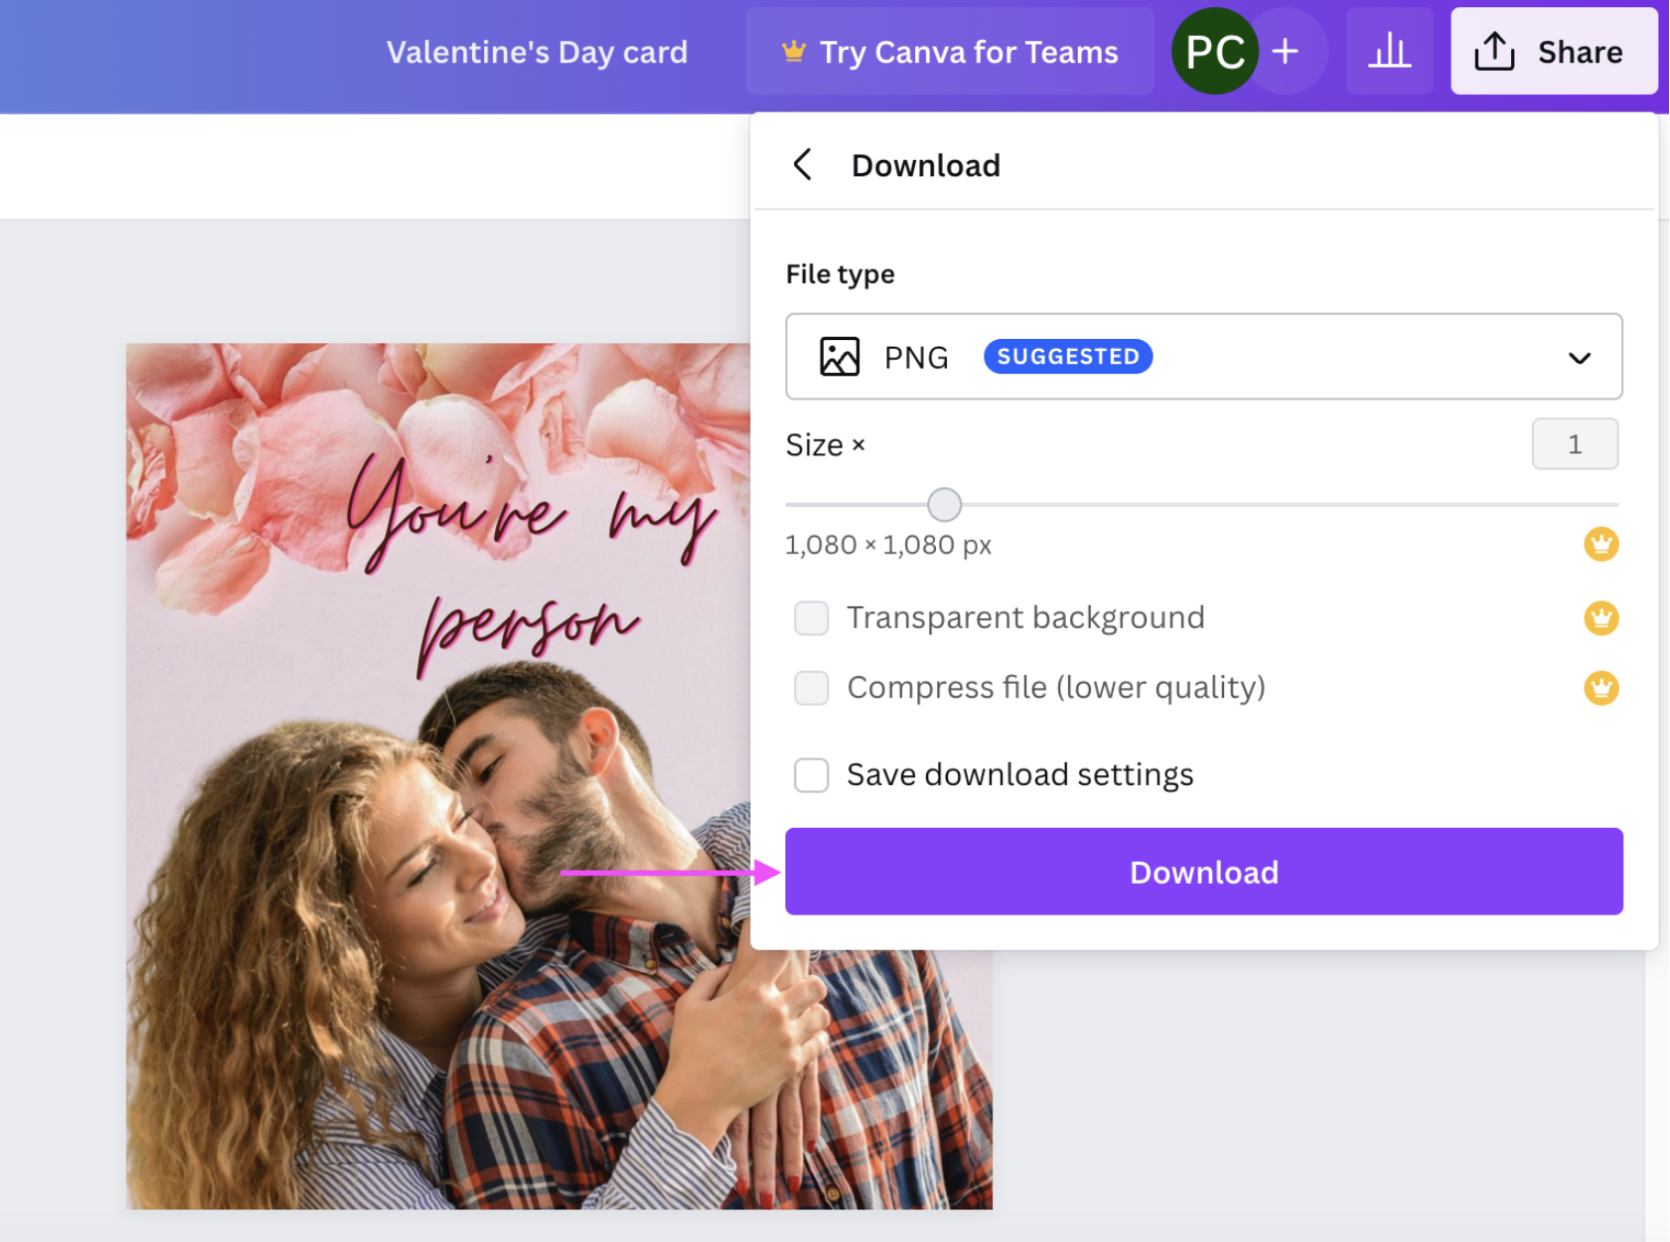
5. Once you're happy with your design, hit > Share in the top-right corner and then > Download:
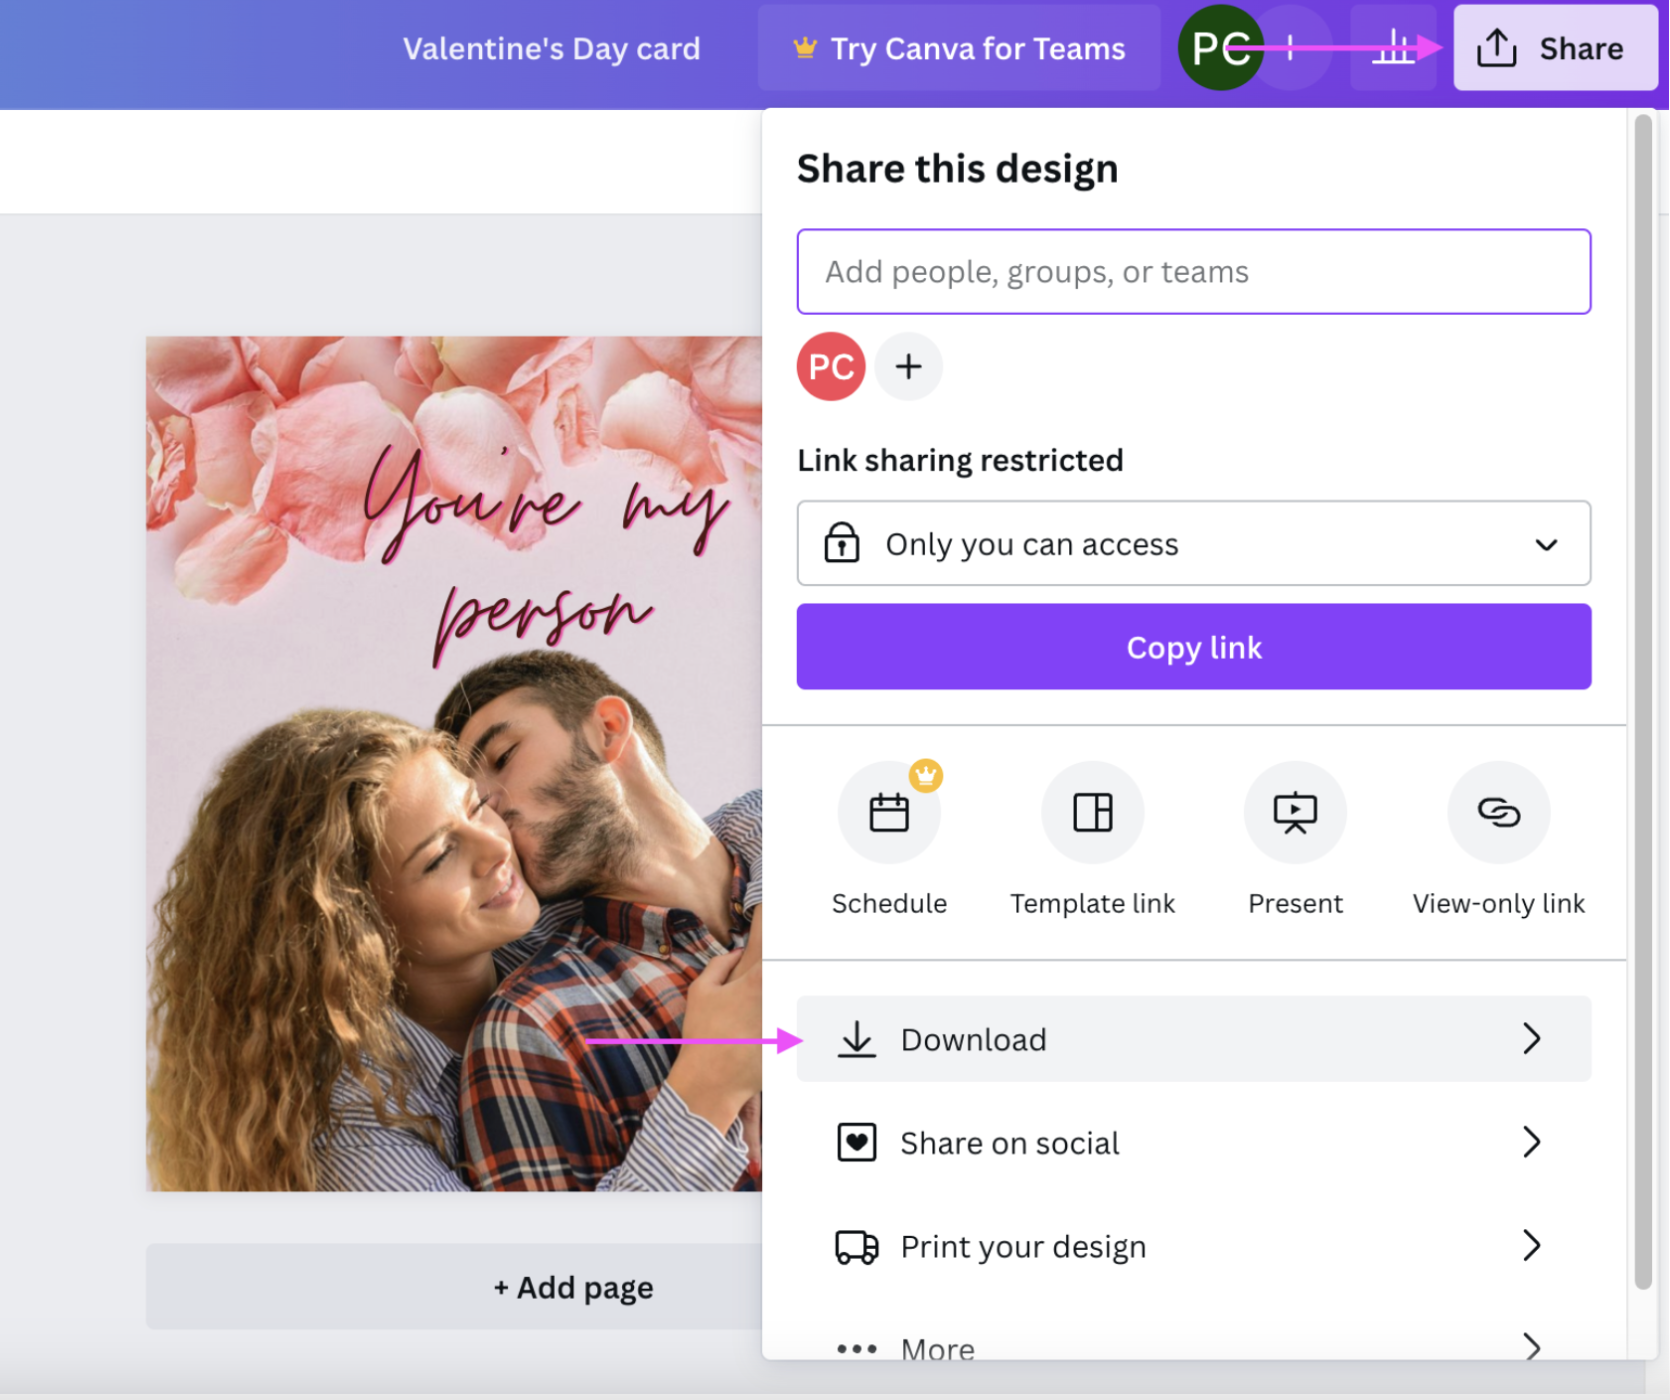
Hit > Download again to save your Valentine's Day card as a PNG file:
Here's some more inspiration with the Designify White Circle background we showed you earlier:

Want to order a print version of your Valentine's Day card? Hit > Share and then > Print your design:
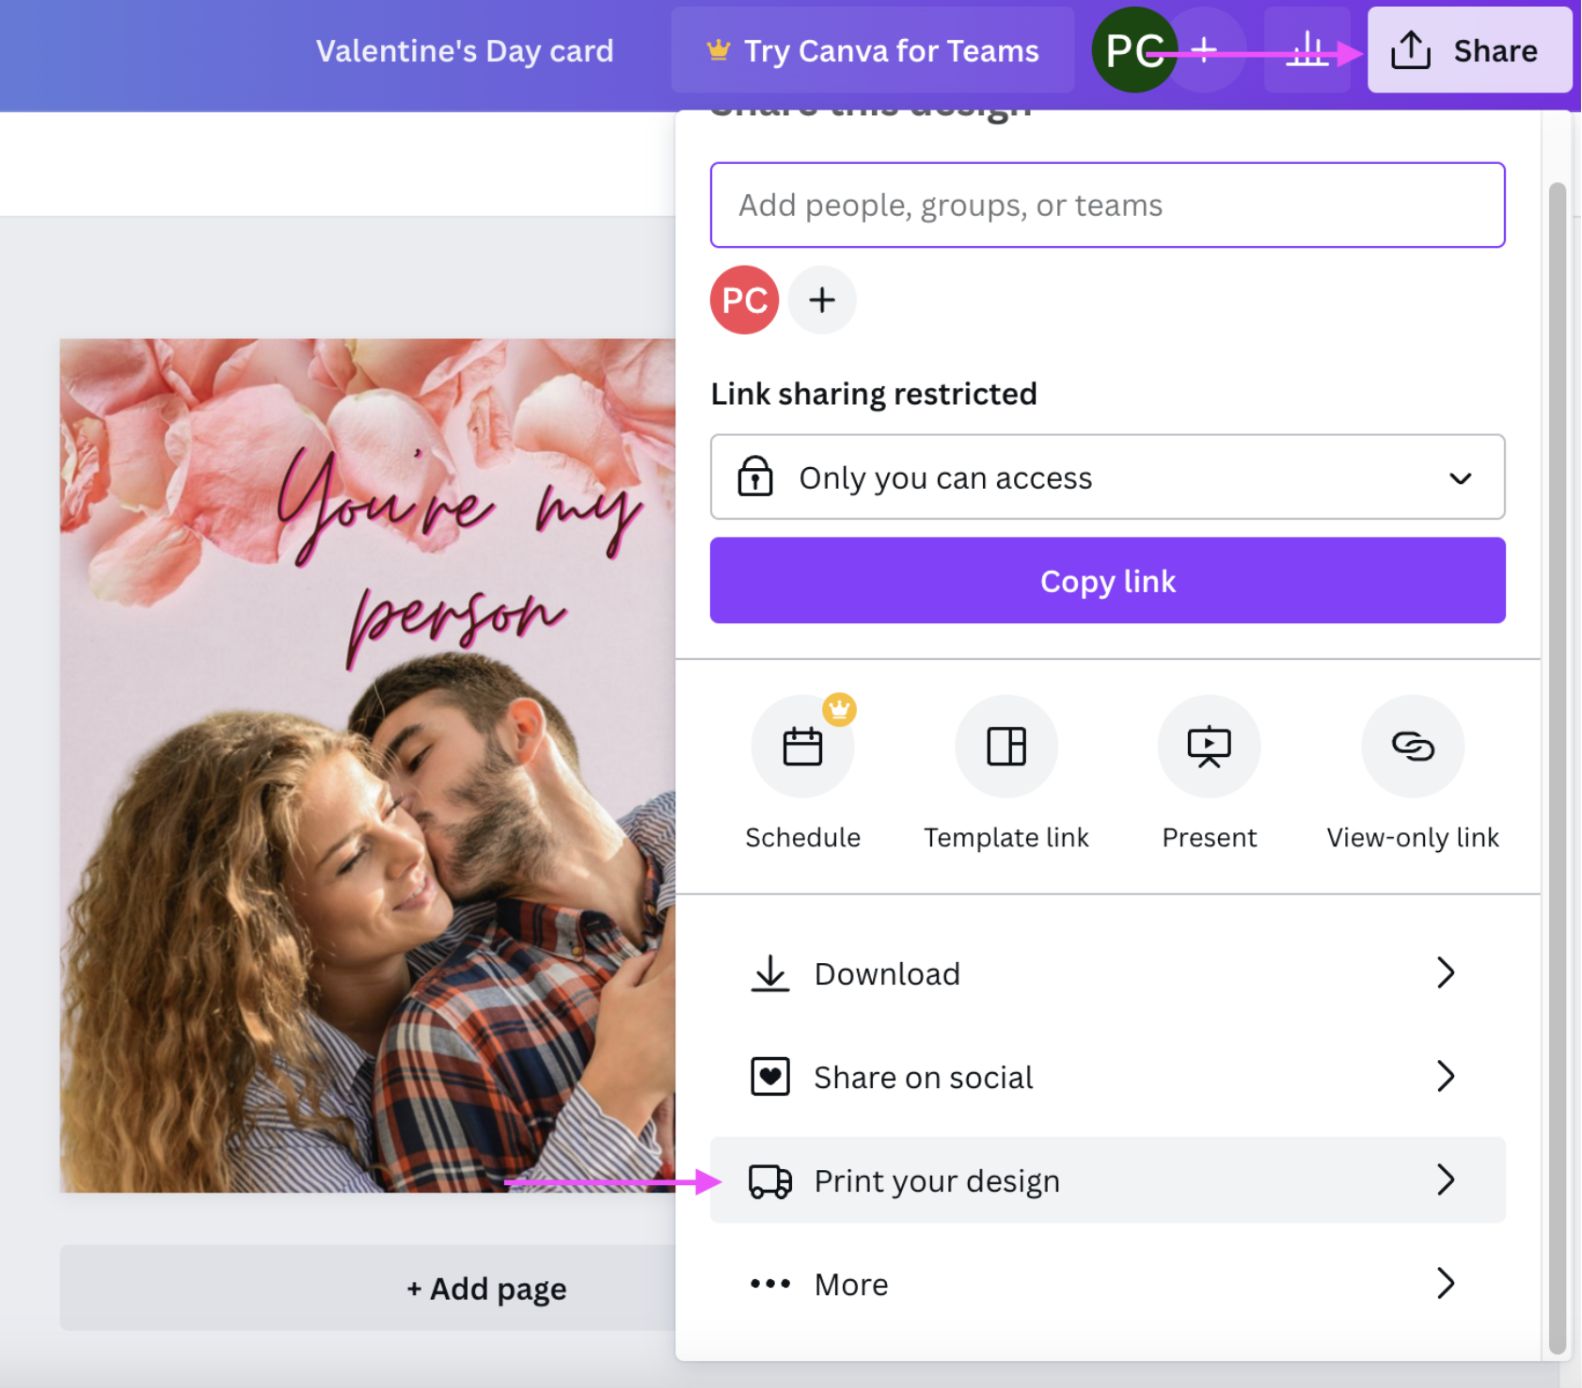
1. Scroll down to the Folded Cards format and pick the one you like:
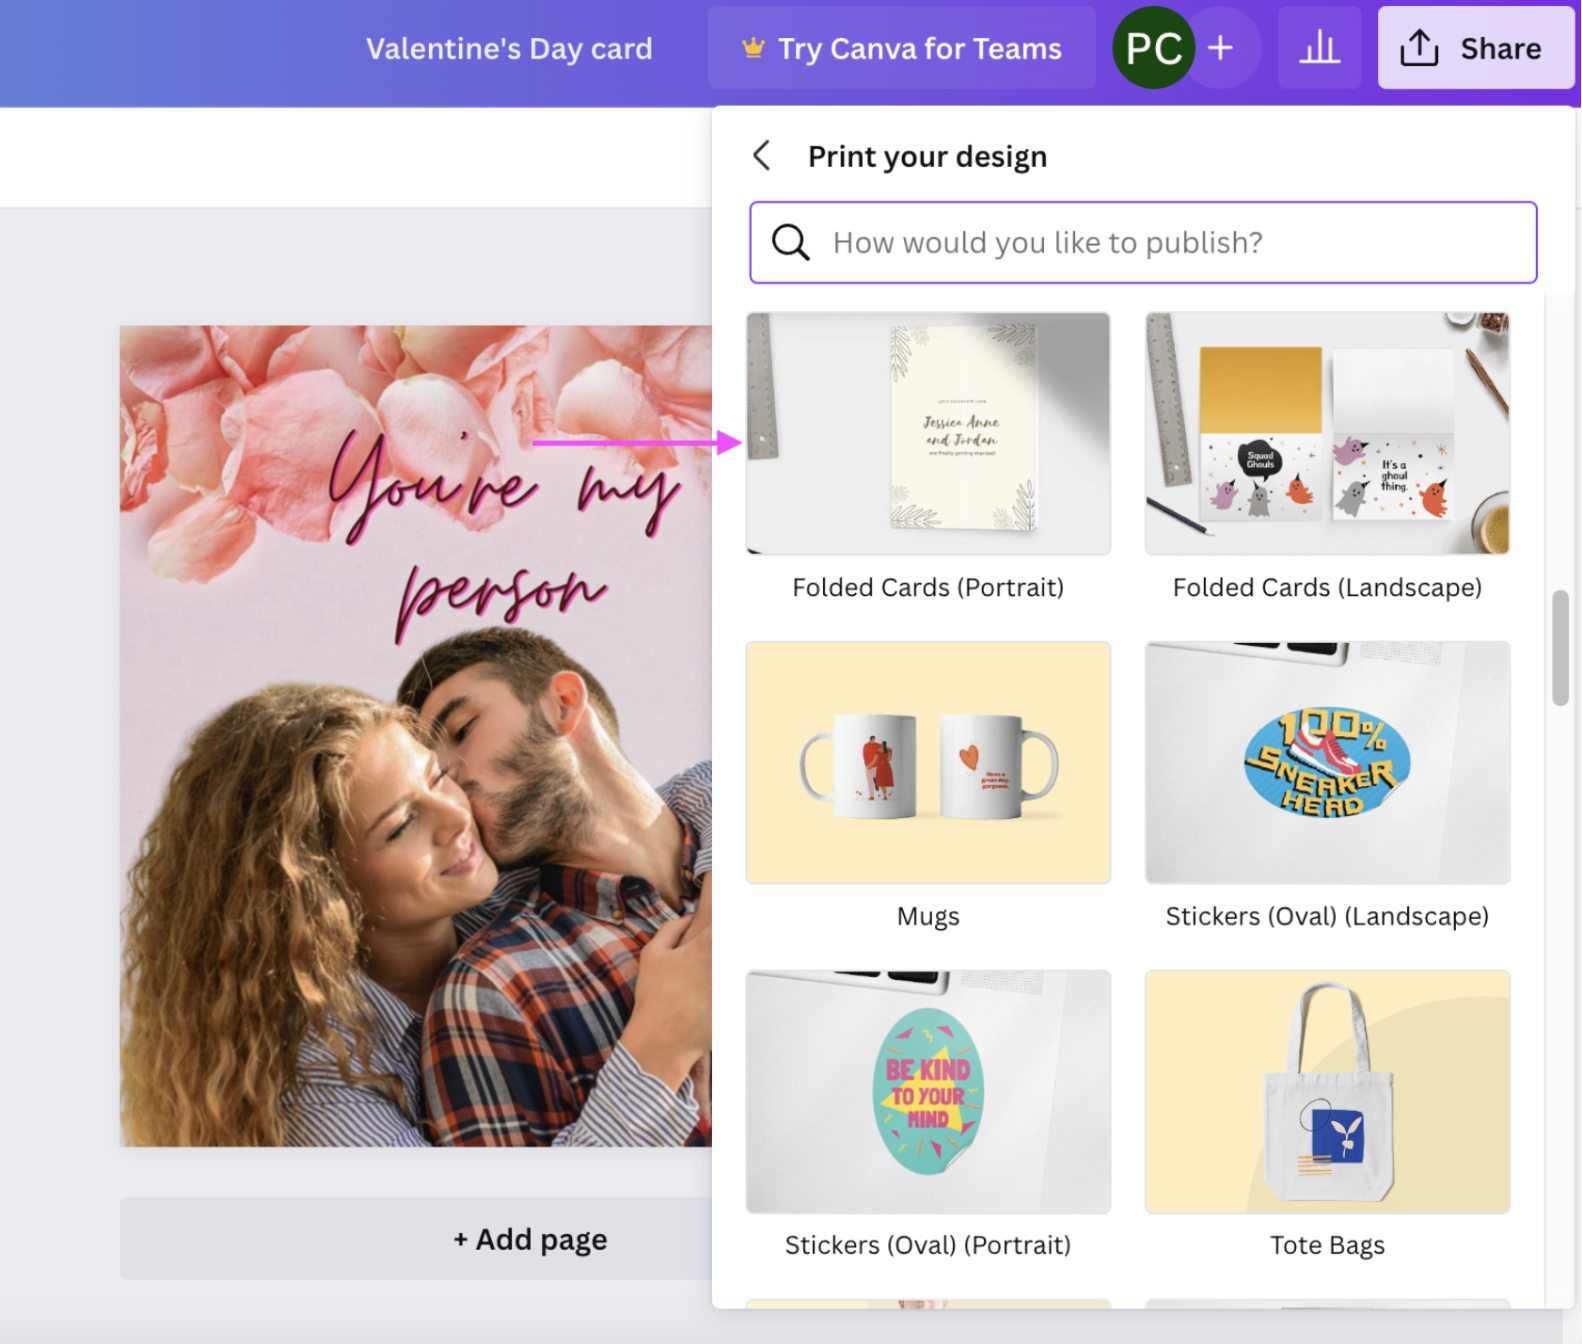
2. Hit > Resize design:
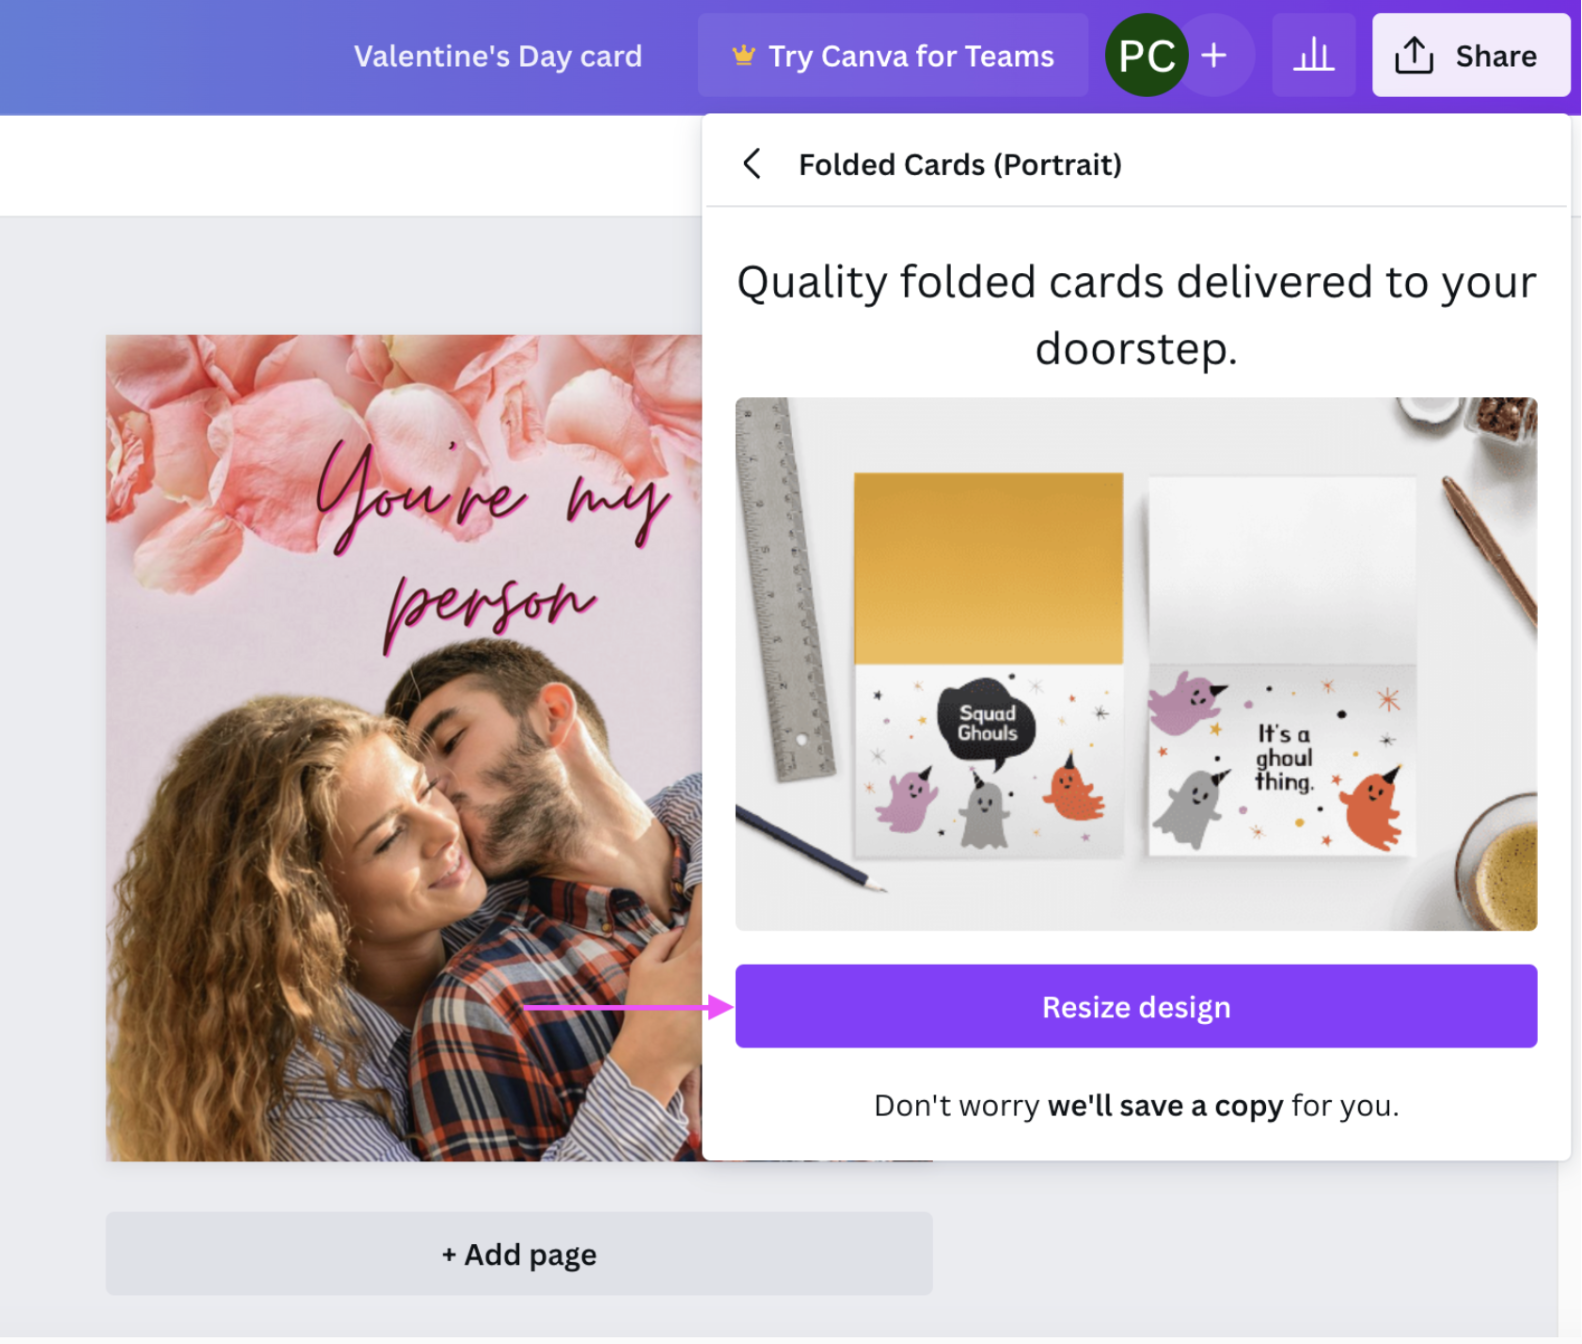
3. Click your image and drag it around to switch up its position:
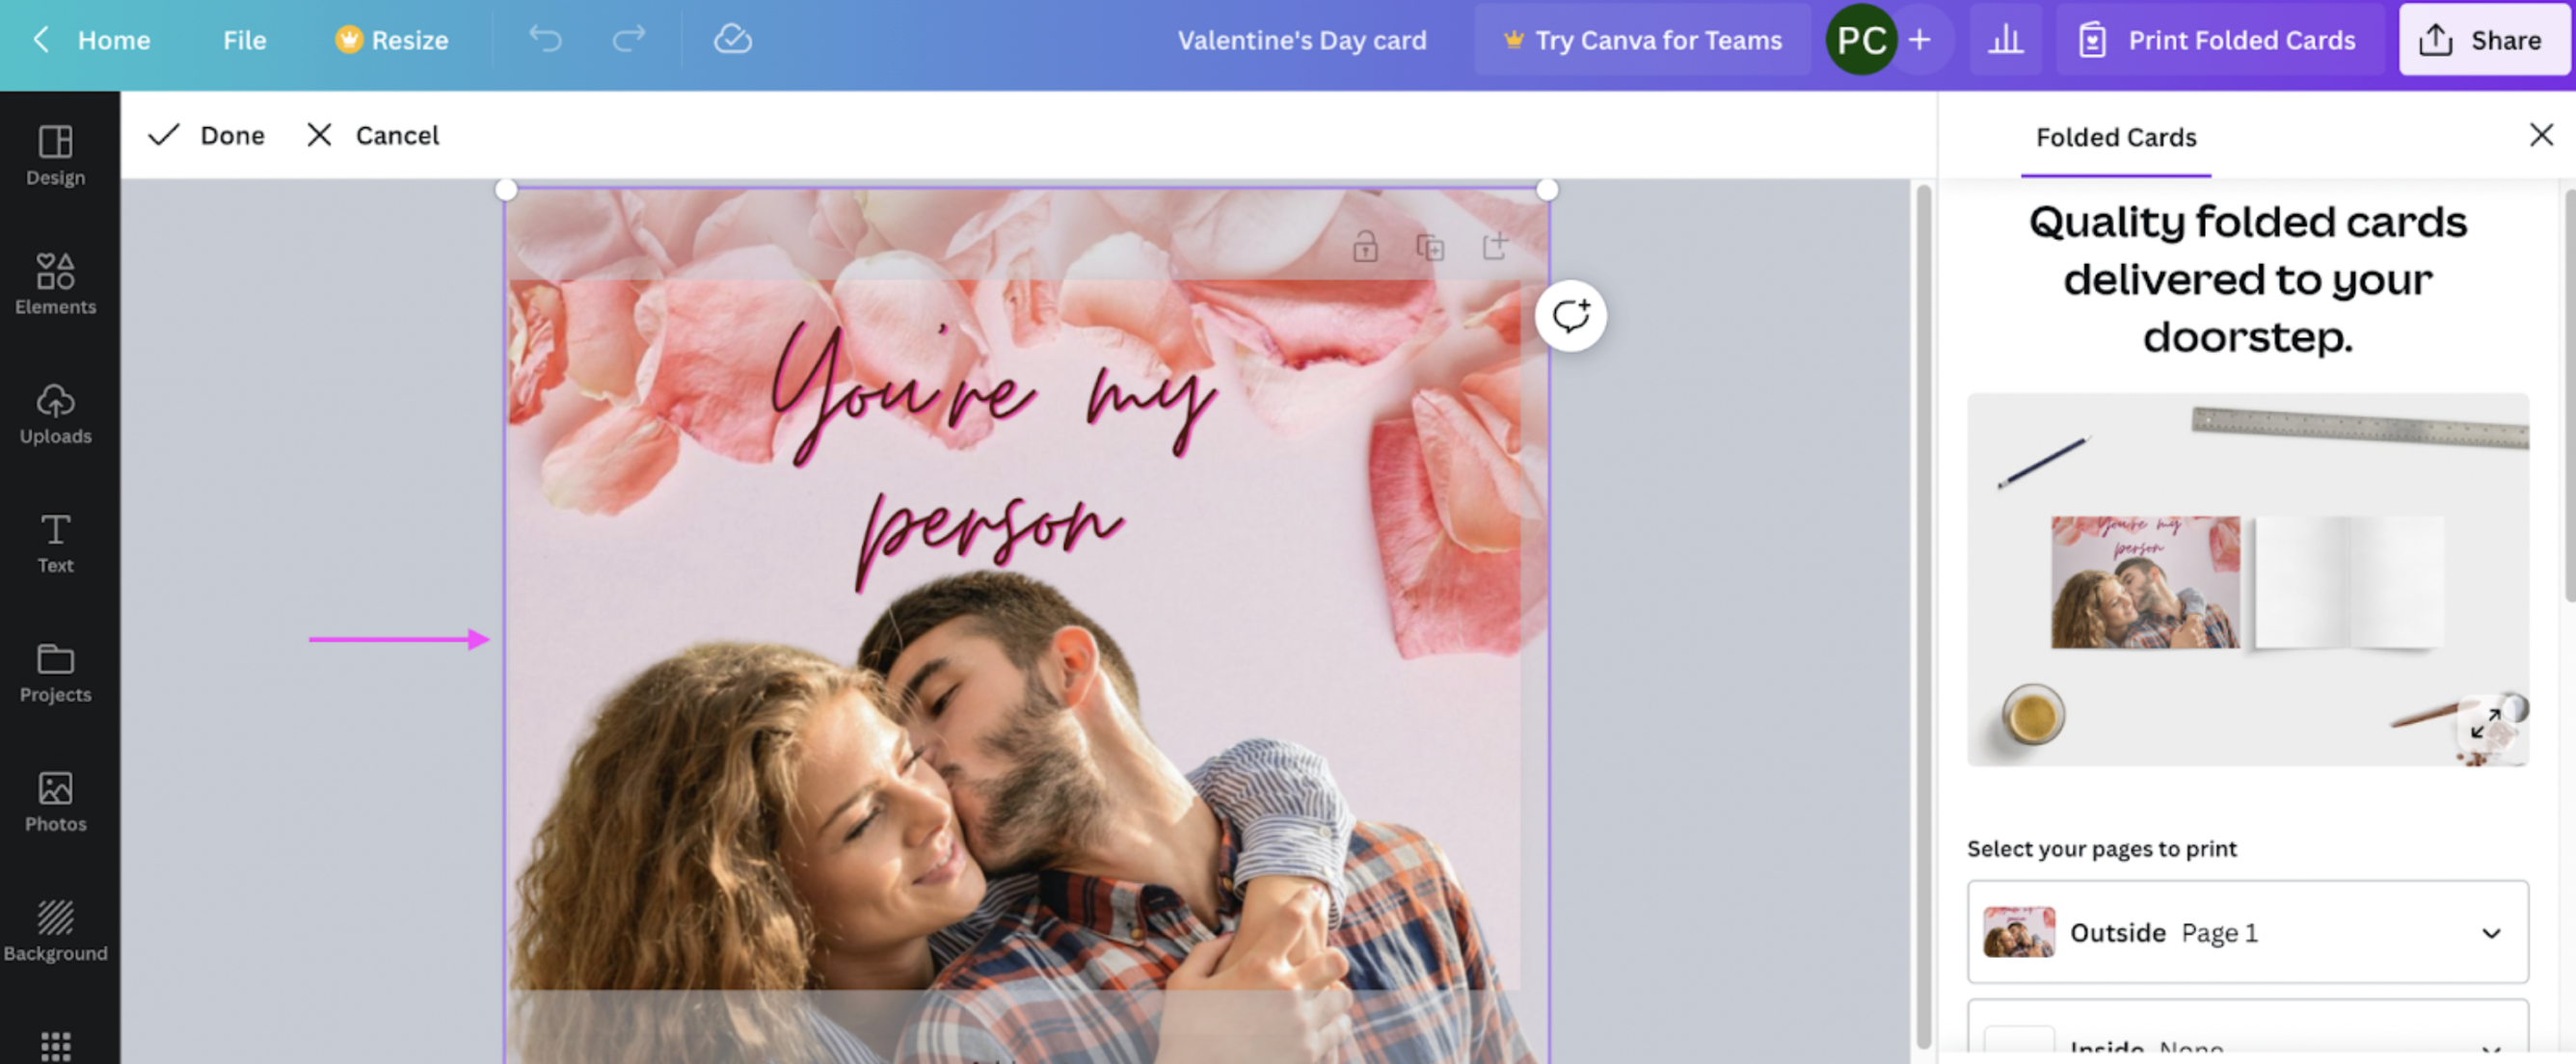
4. Hit > Continue once you're done designing and then > Checkout:
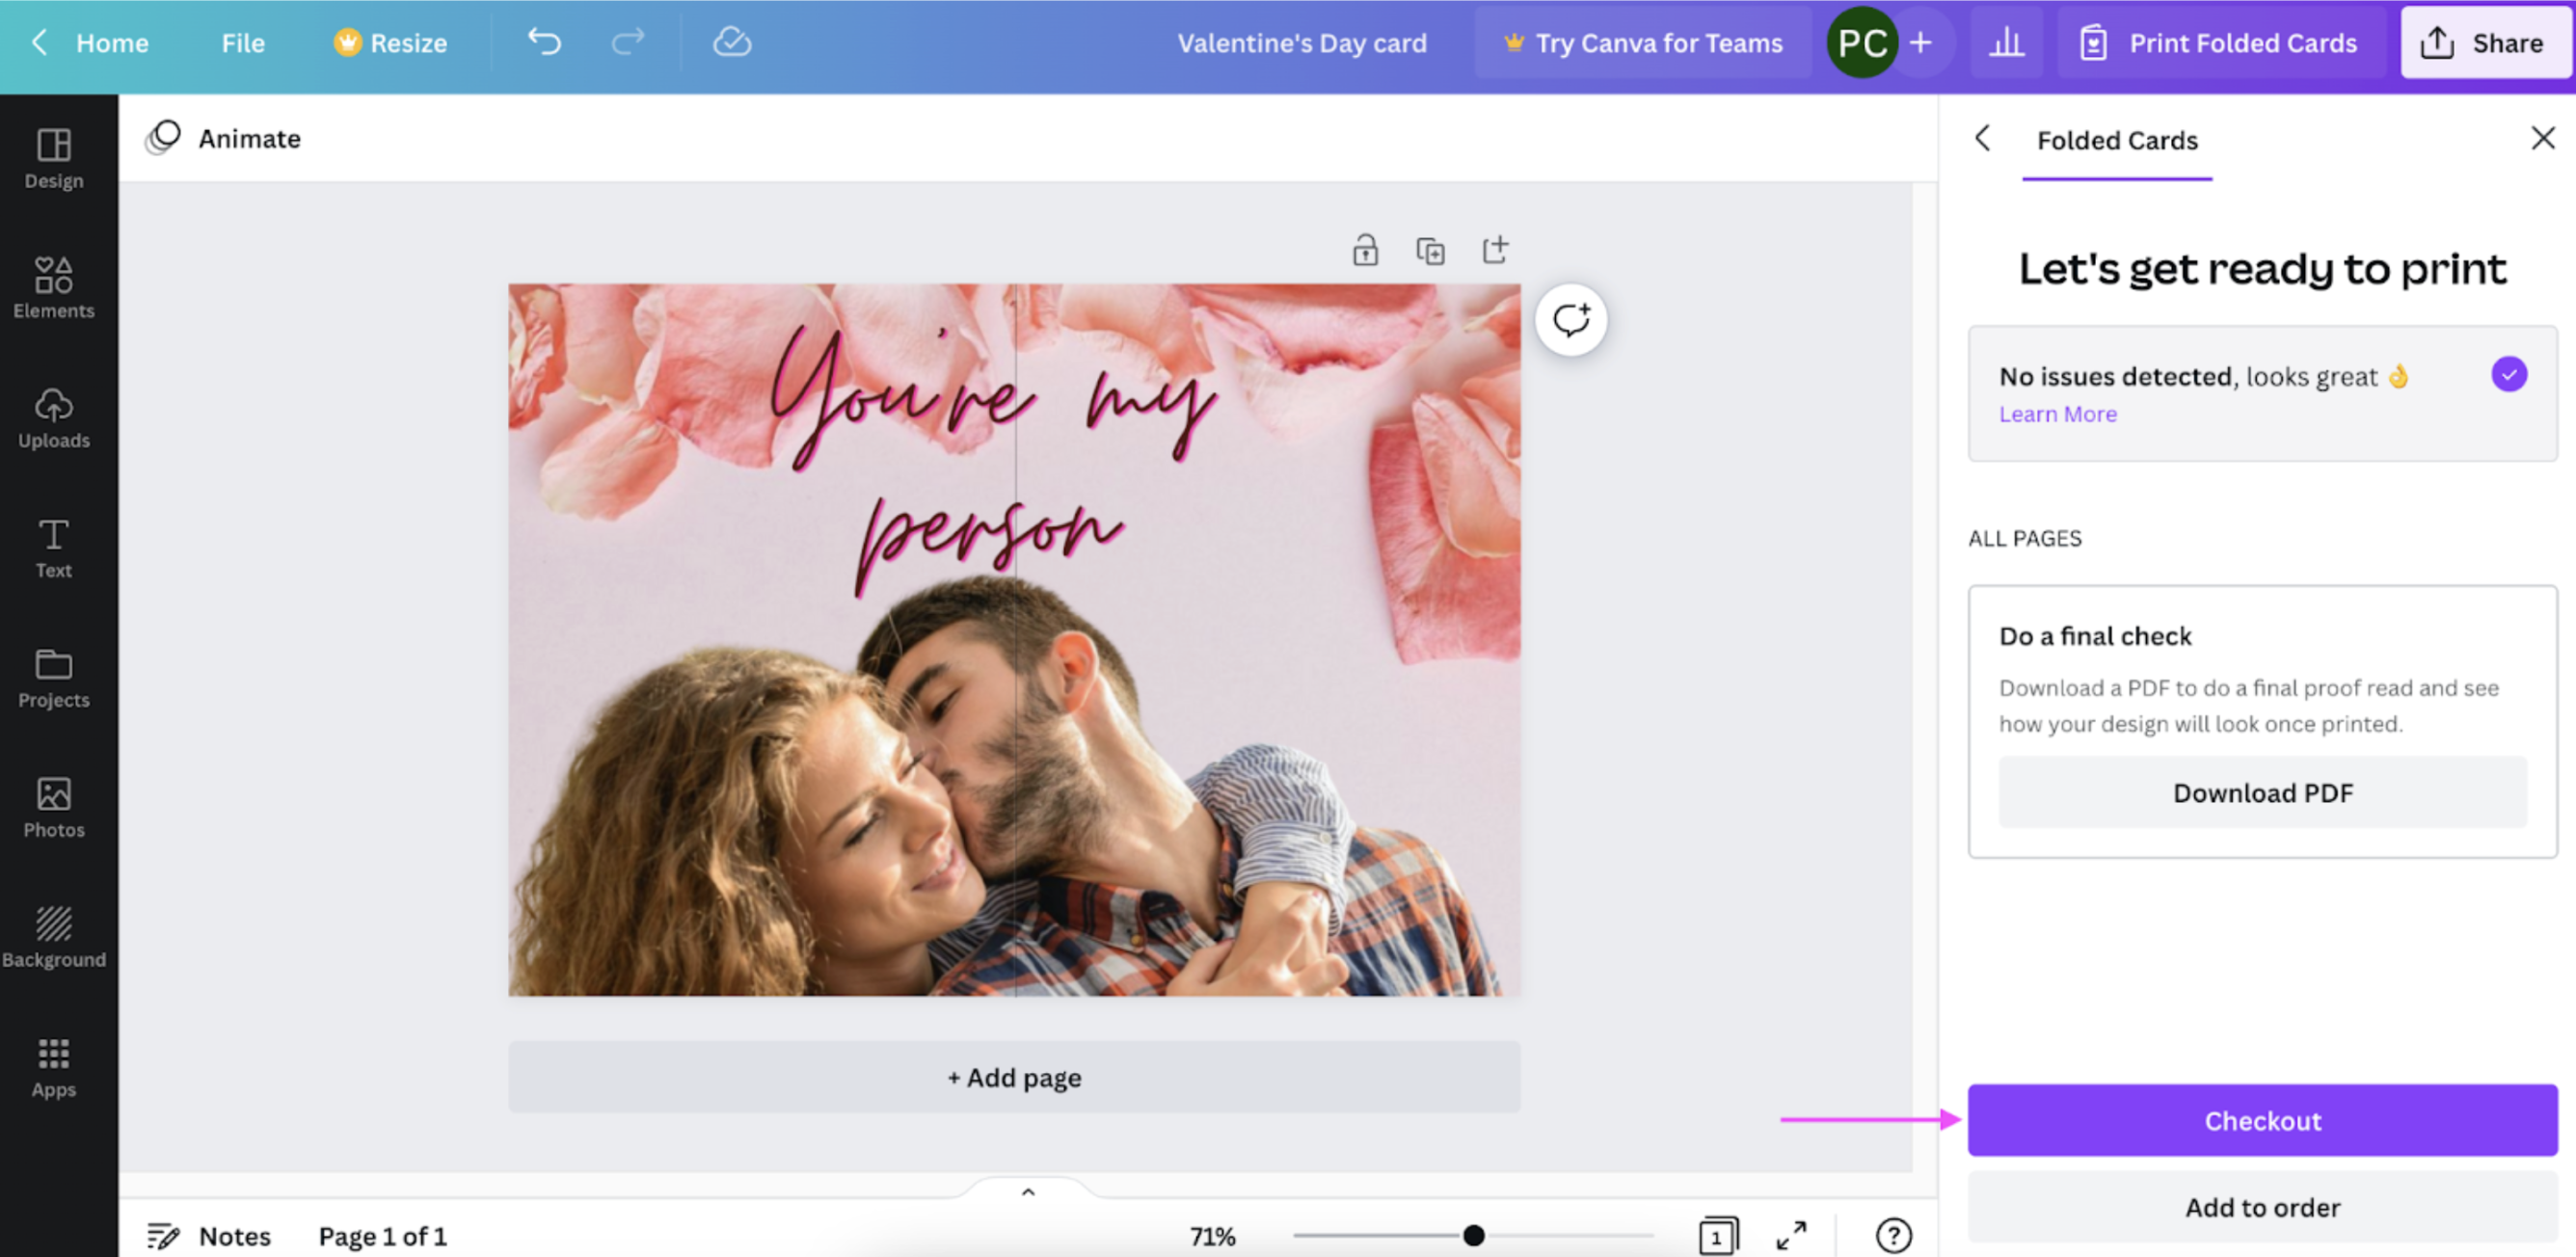
And that's how you bring a smile to your love's face — with just two simple tools and your creativity and effort. Way more heartwarming than a generic greeting card, if you ask us.
Here's an even quicker option if you liked working with Designify — using its Valentine's Day Card template.
2. Use Designify's Valentine's Day Card template
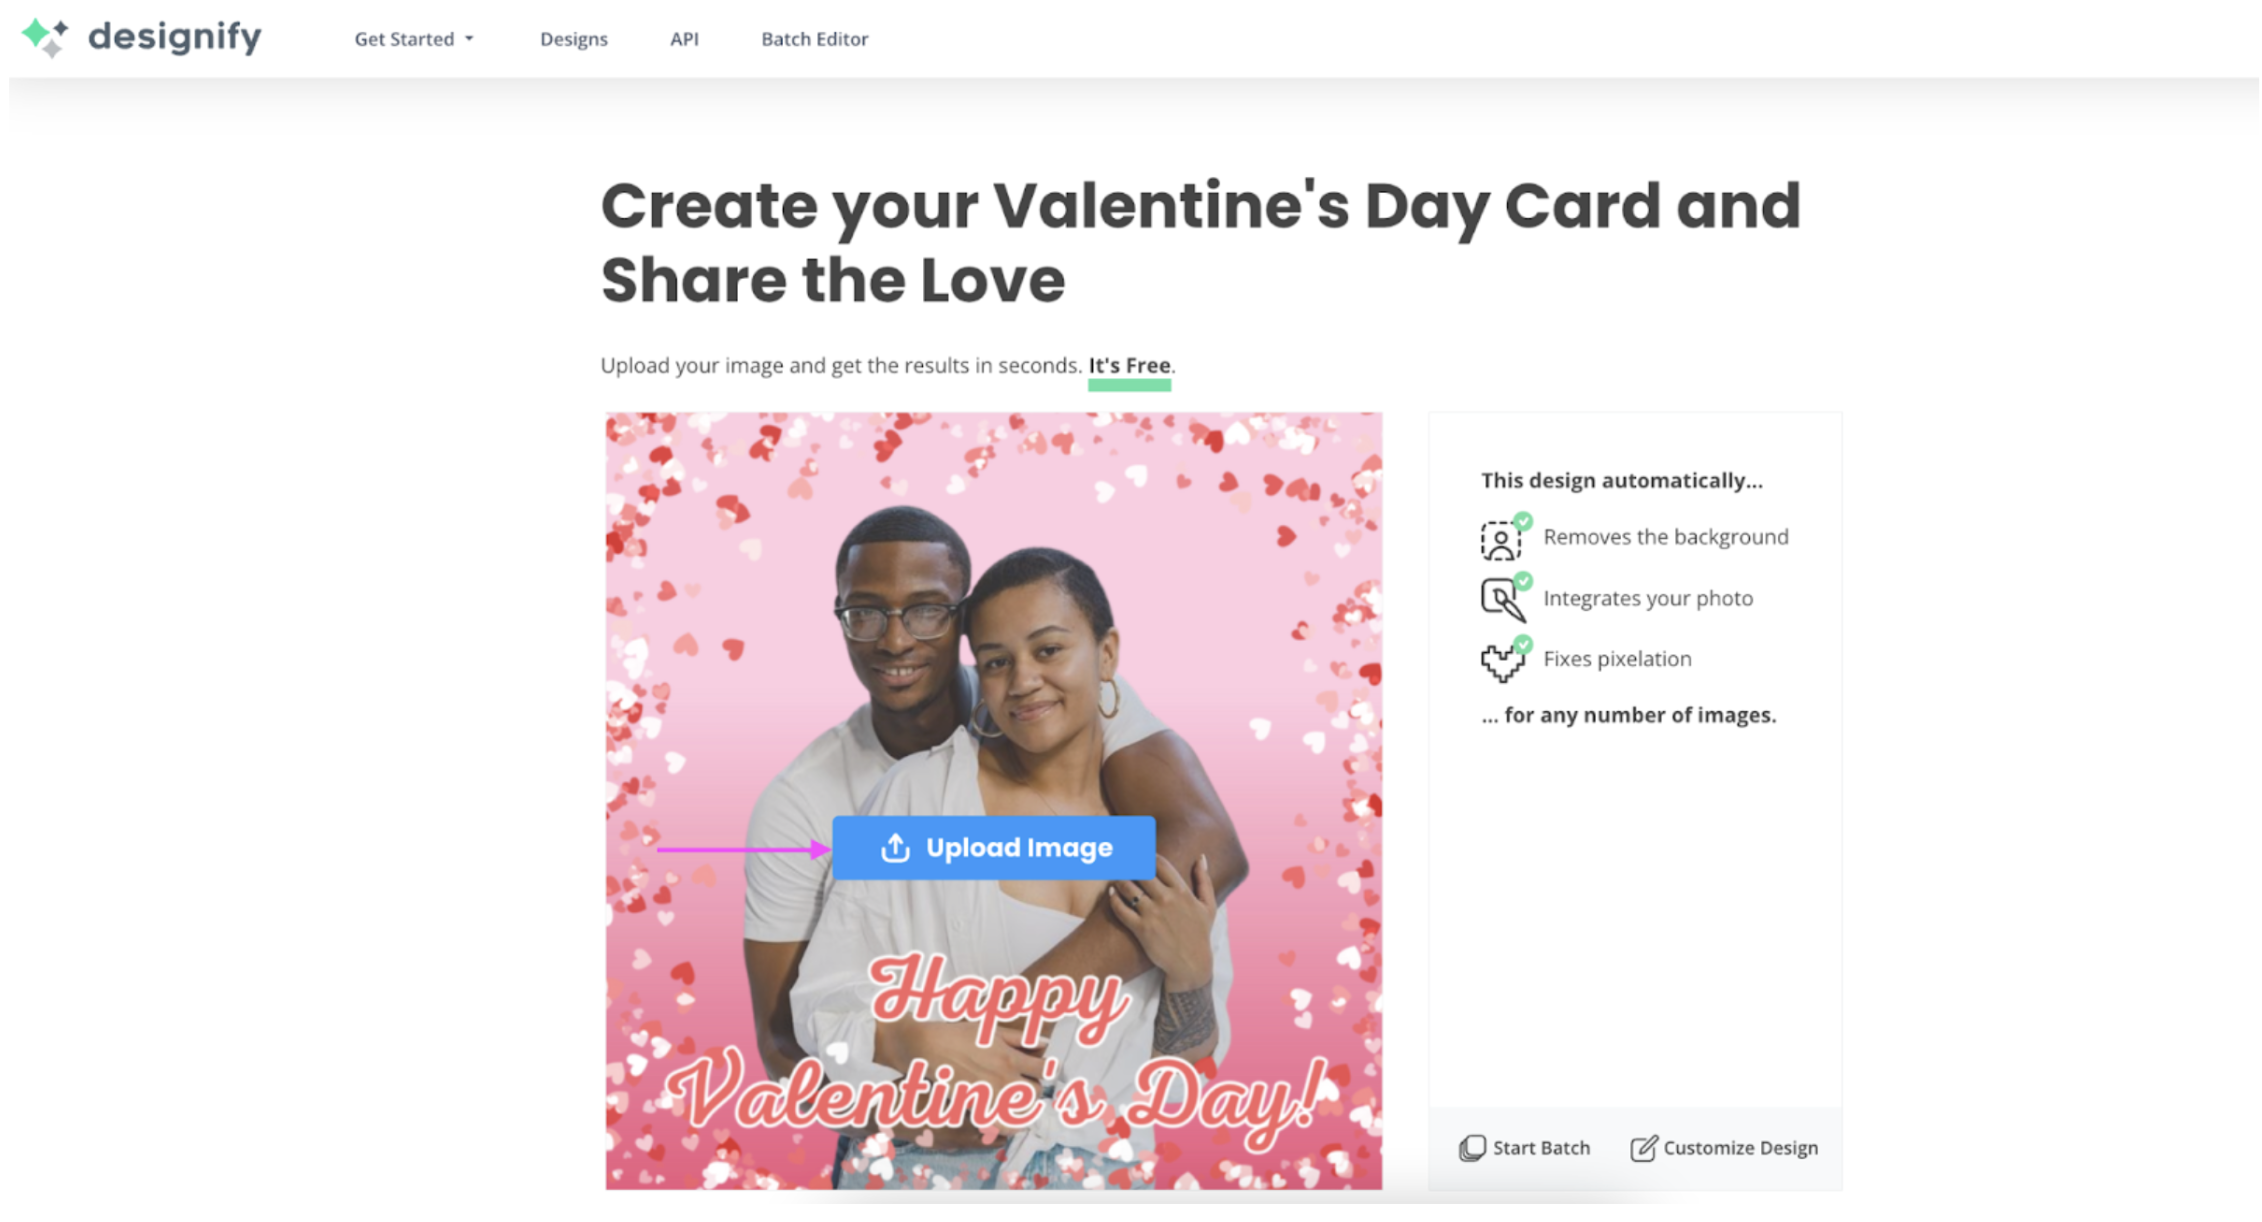
In a rush but want a readymade card which already has a cute message? You're going to love Designify's Valentine's Day card template. With it, you can whip up something dreamy just like this:

And here's how:
1. Use this link to Designify's Valentine's Day Card template to access the template page and just hit > Upload Image:
2. Here's our readymade Valentine's Day card — message and all! Hit the blue > Download button if you're happy. But in case you want to adjust the image a bit, just select > Edit:
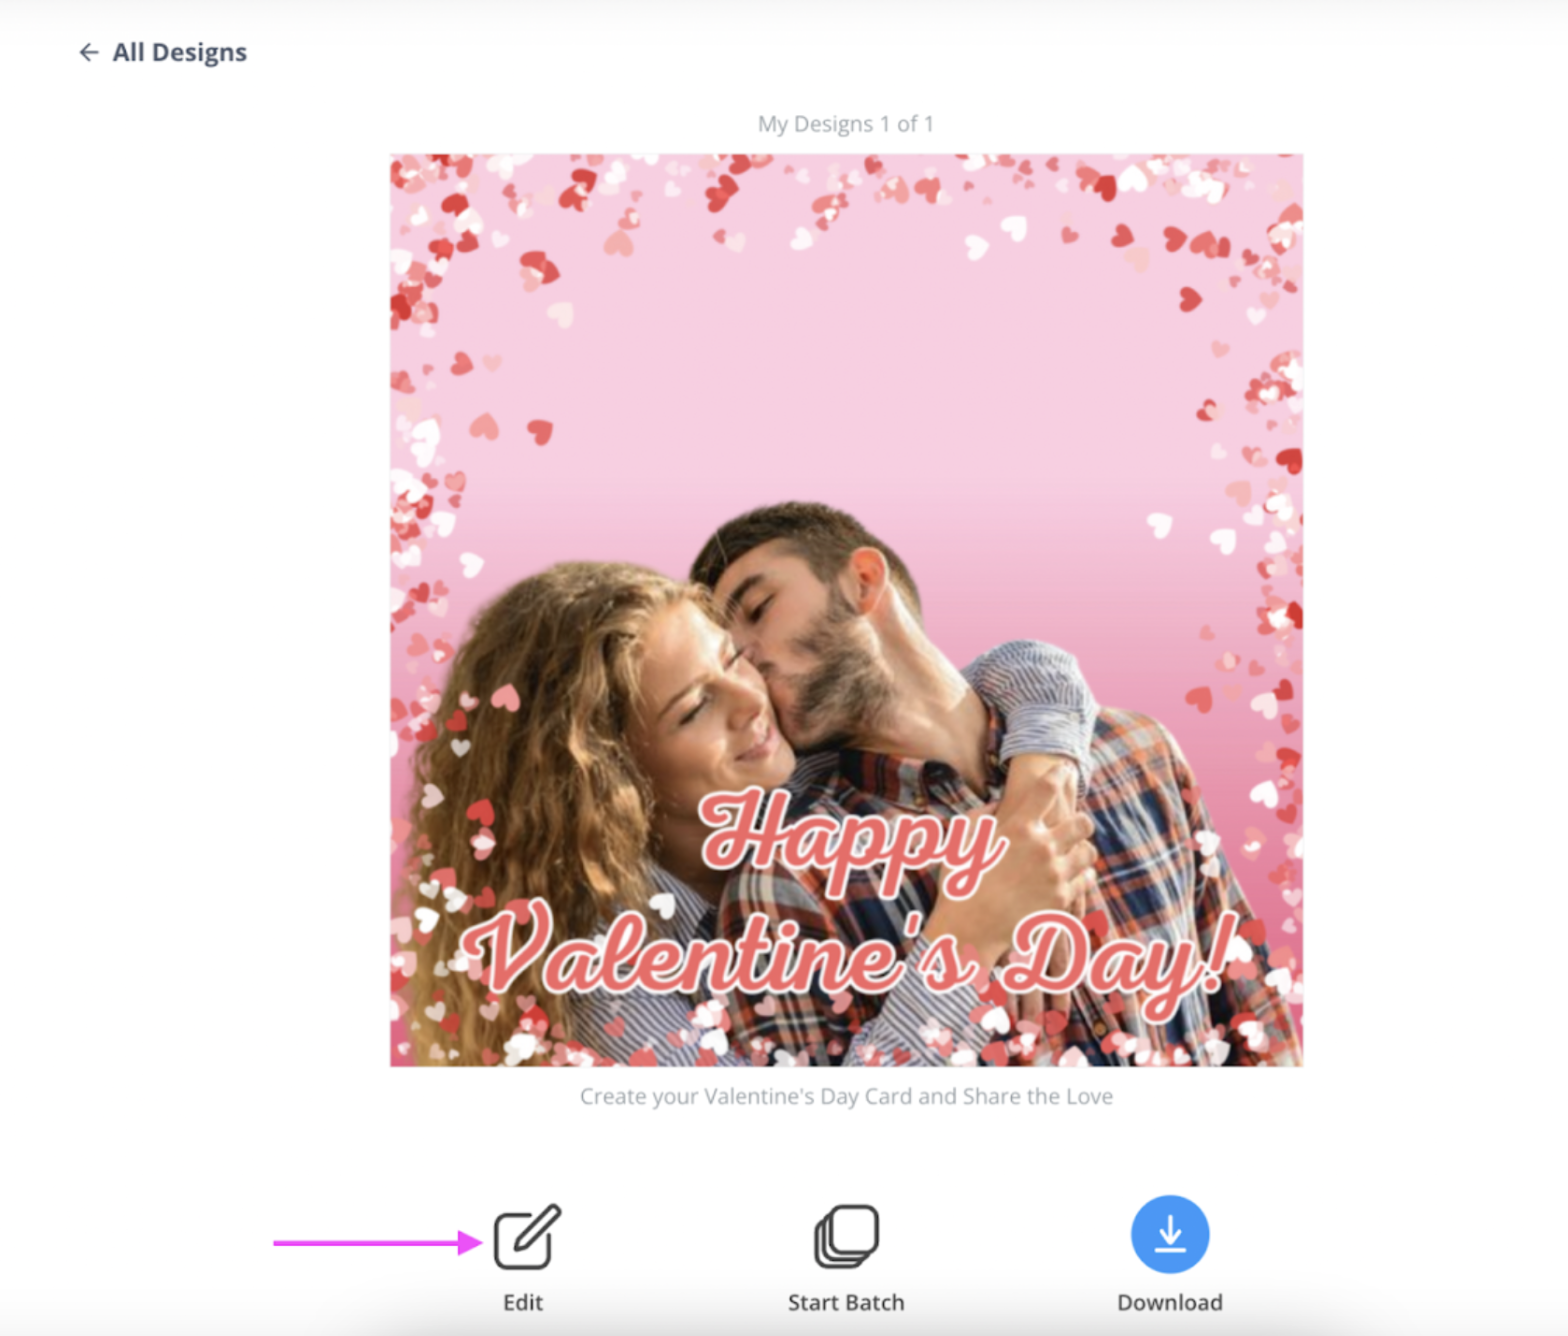
3. Click on the photo element and shift it around until it fits better with the template:
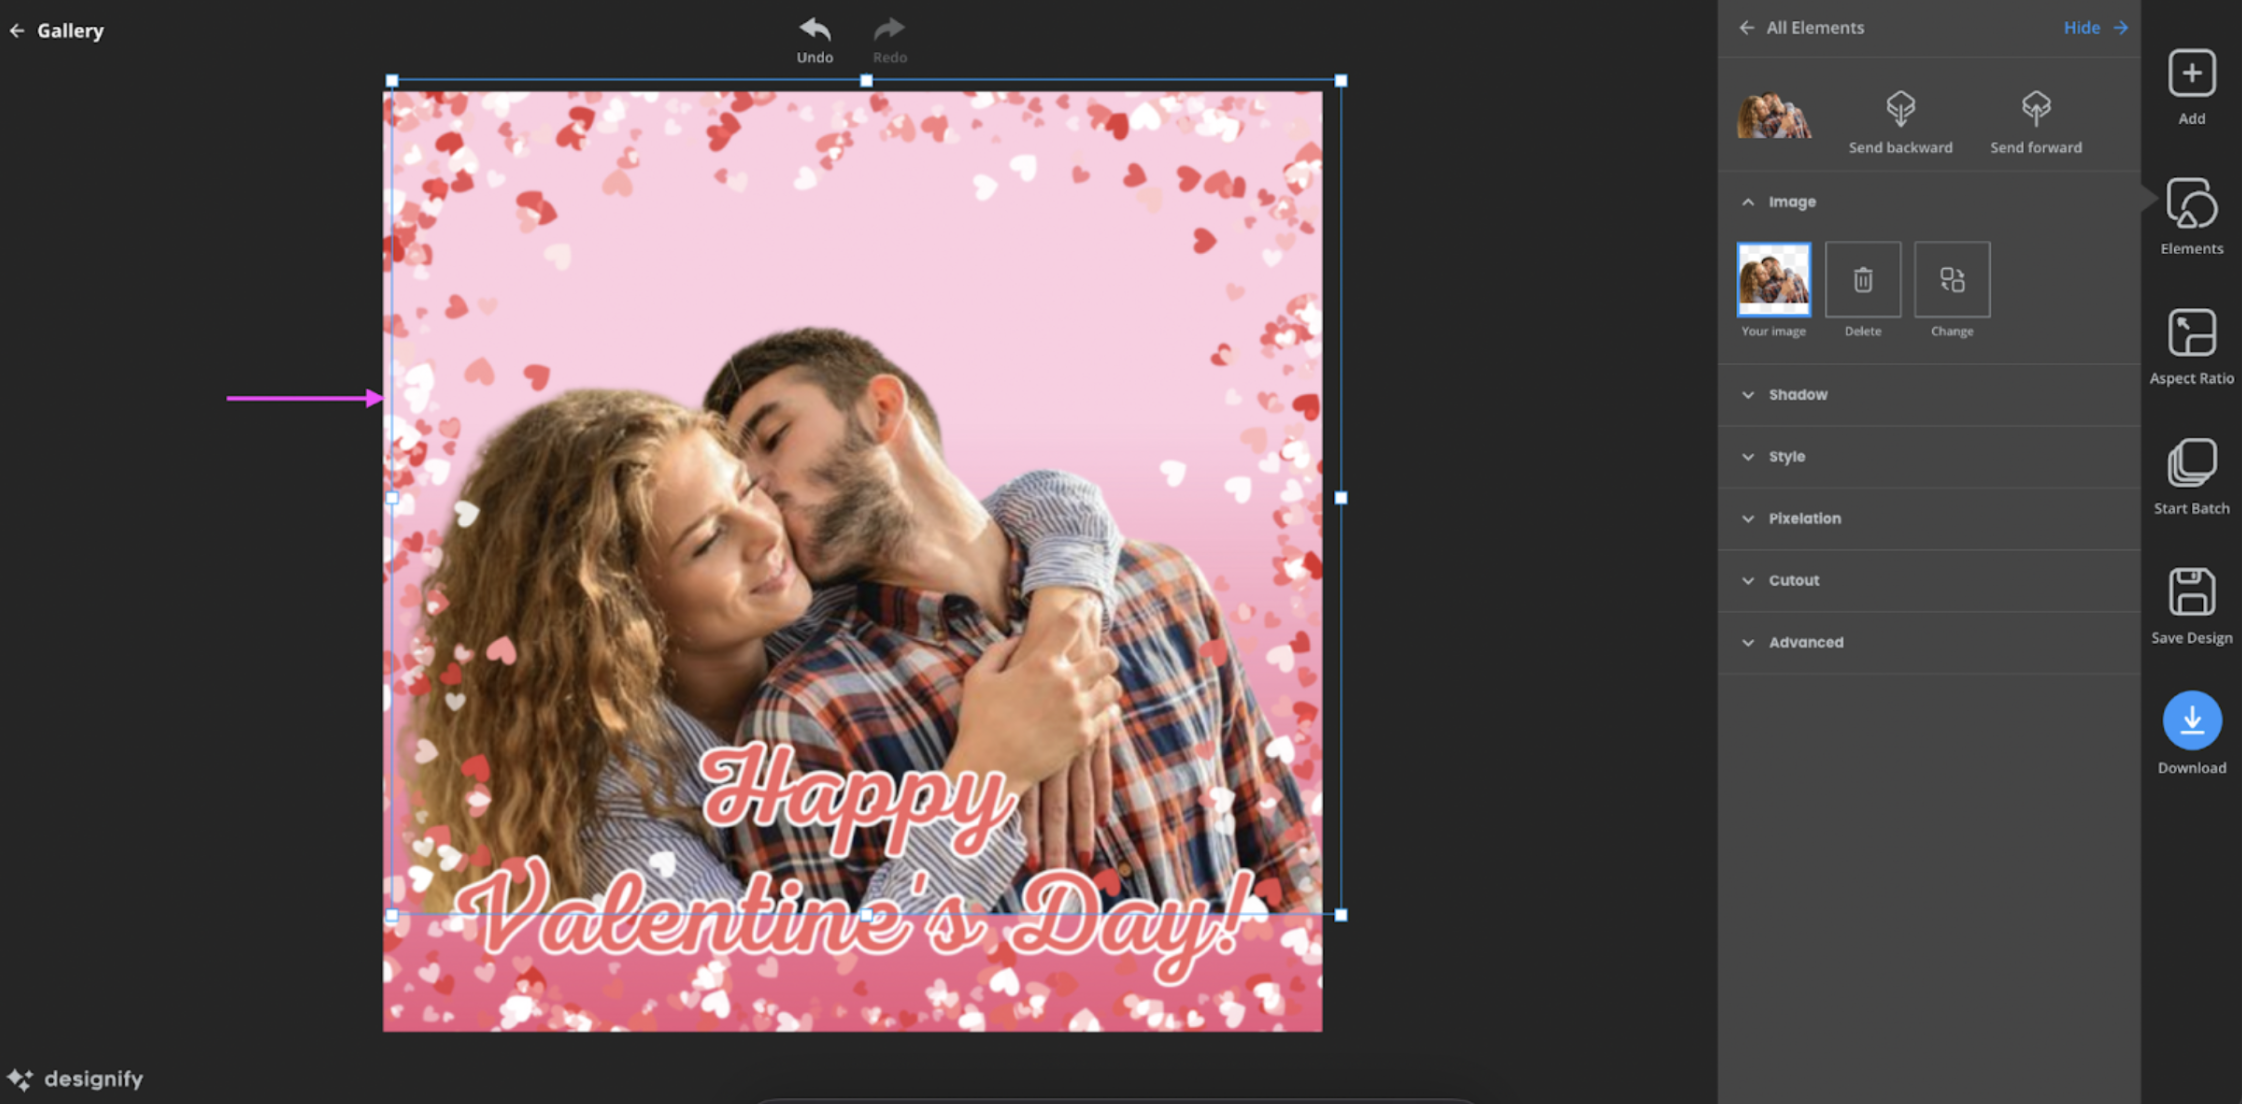
4. Hit the blue > Download button once you're done.
And tada! In only a few steps, you have created a Valentine's Day card — by just using Designify. Perfect for sharing with your loved one straight away.
Now if that seems simple, here's another idea to bring out the romantic big guns: create a Valentine's Day collage on Designify. Let's check it out.
3. Create a Valentine's Day collage on Designify
Got a ton of photos of you and your boo together? Put them together in a Valentine's Day collage! No better way to celebrate your special moments and memories together this season of love.
Here's some inspiration to get you started:

You can create a collage directly on Canva too, but you'll have to subscribe to Canva Pro if you want to remove any of your images' backgrounds. Designify's your go-to editor if you want to switch them up for free. So here's a step-by-step:
1. Pick one of the images you want to add to your collage and drag and drop (or upload) to Designify. Then, select > Edit like earlier.
2. Drag and drop the rest of your photos from your device directly on the canvas. Click on them to resize and shift them around.
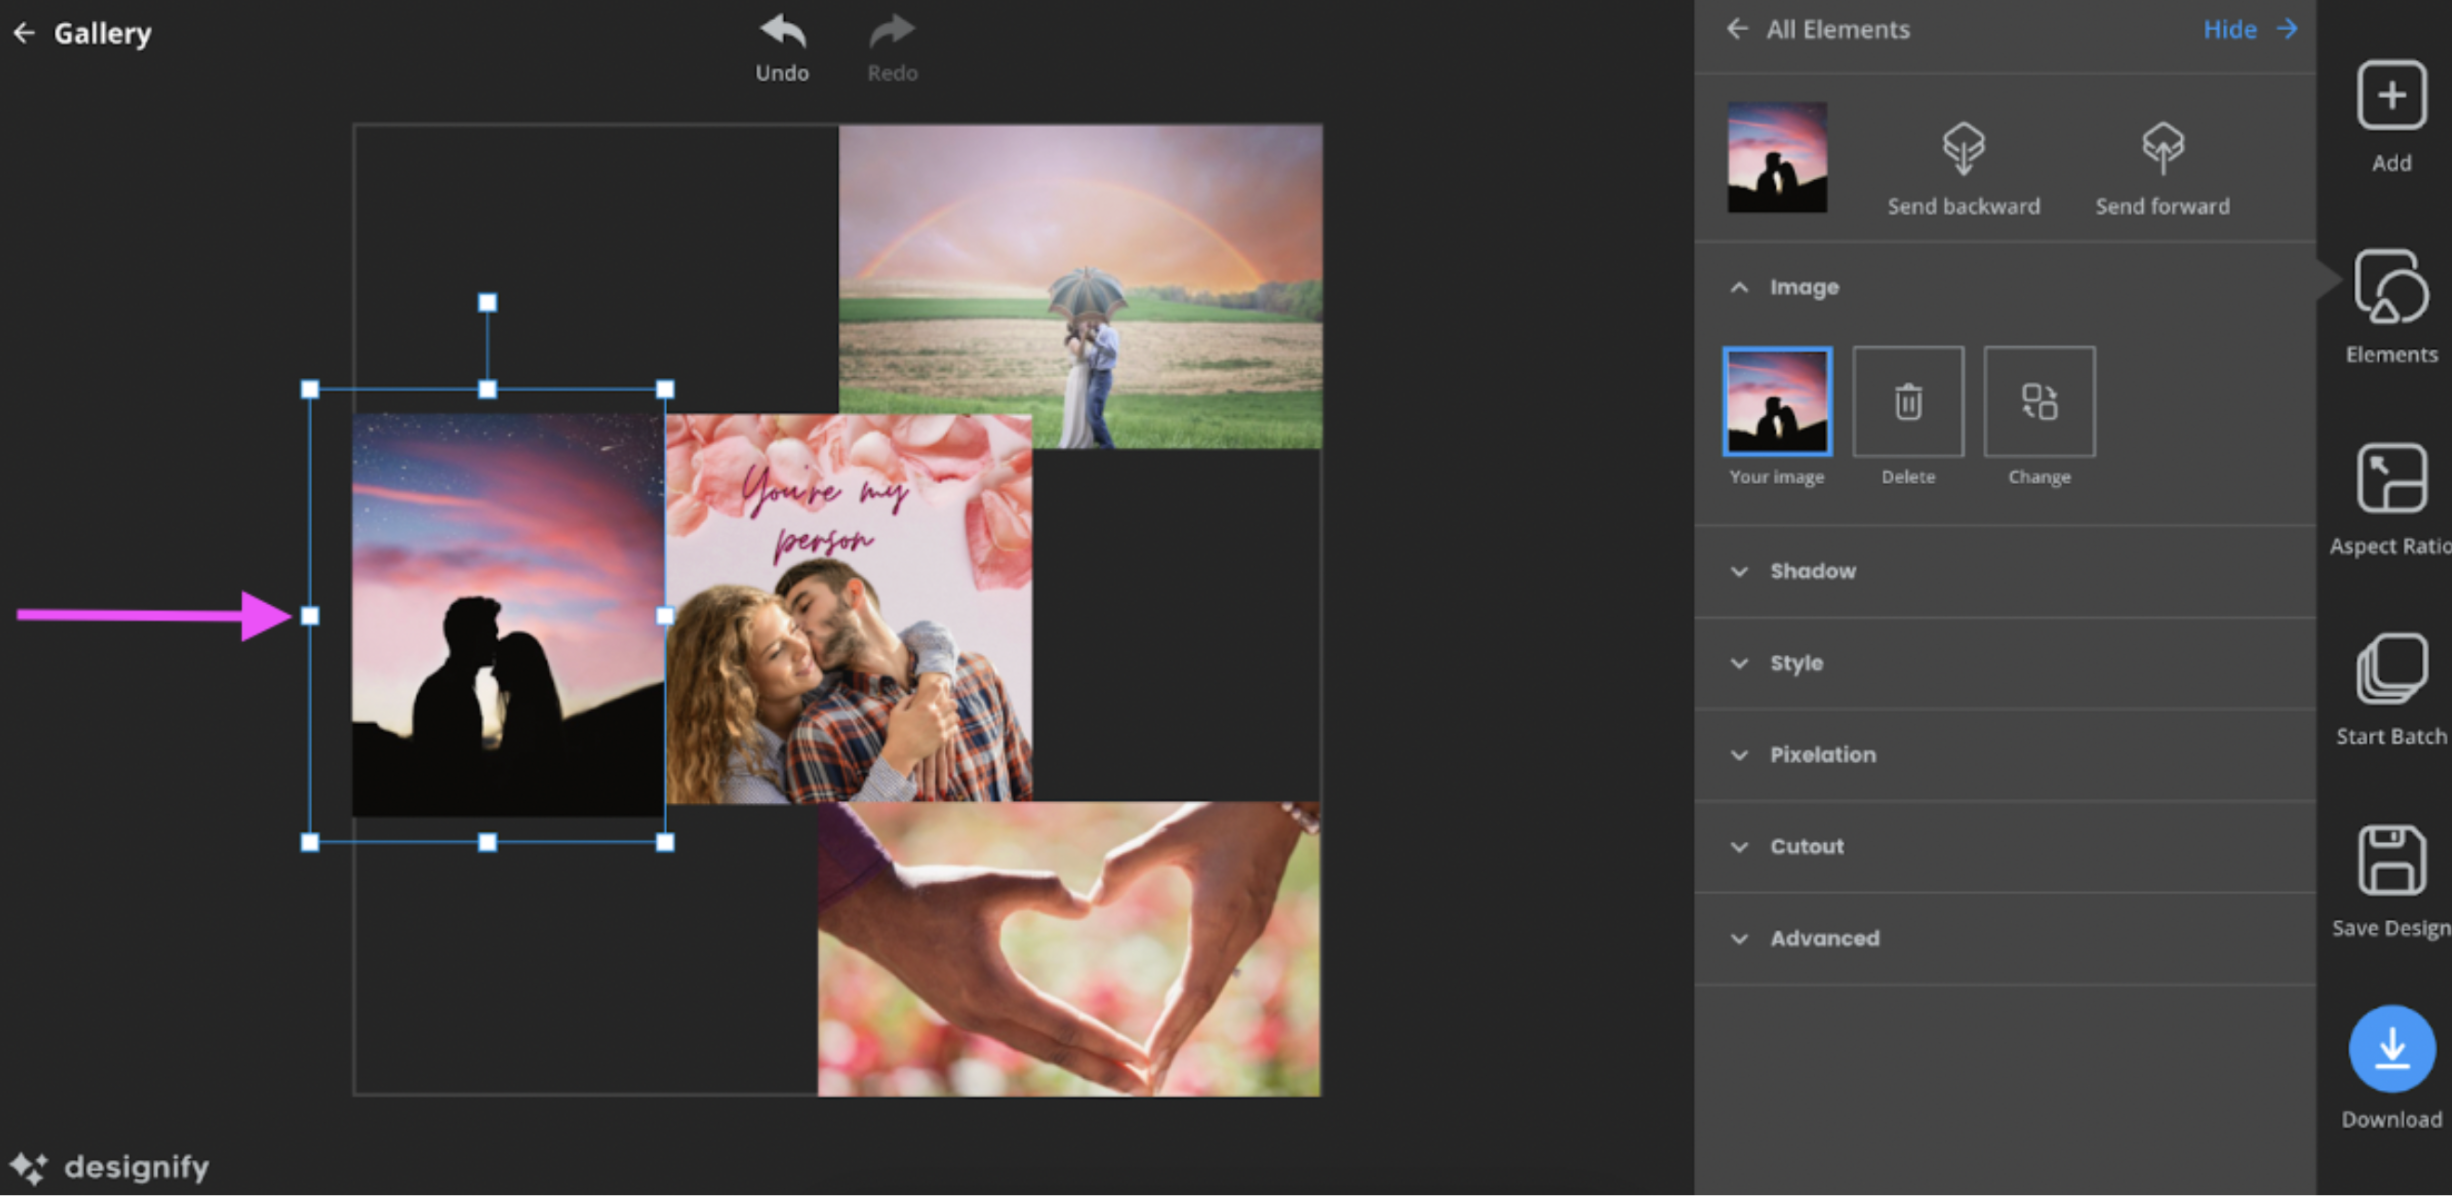
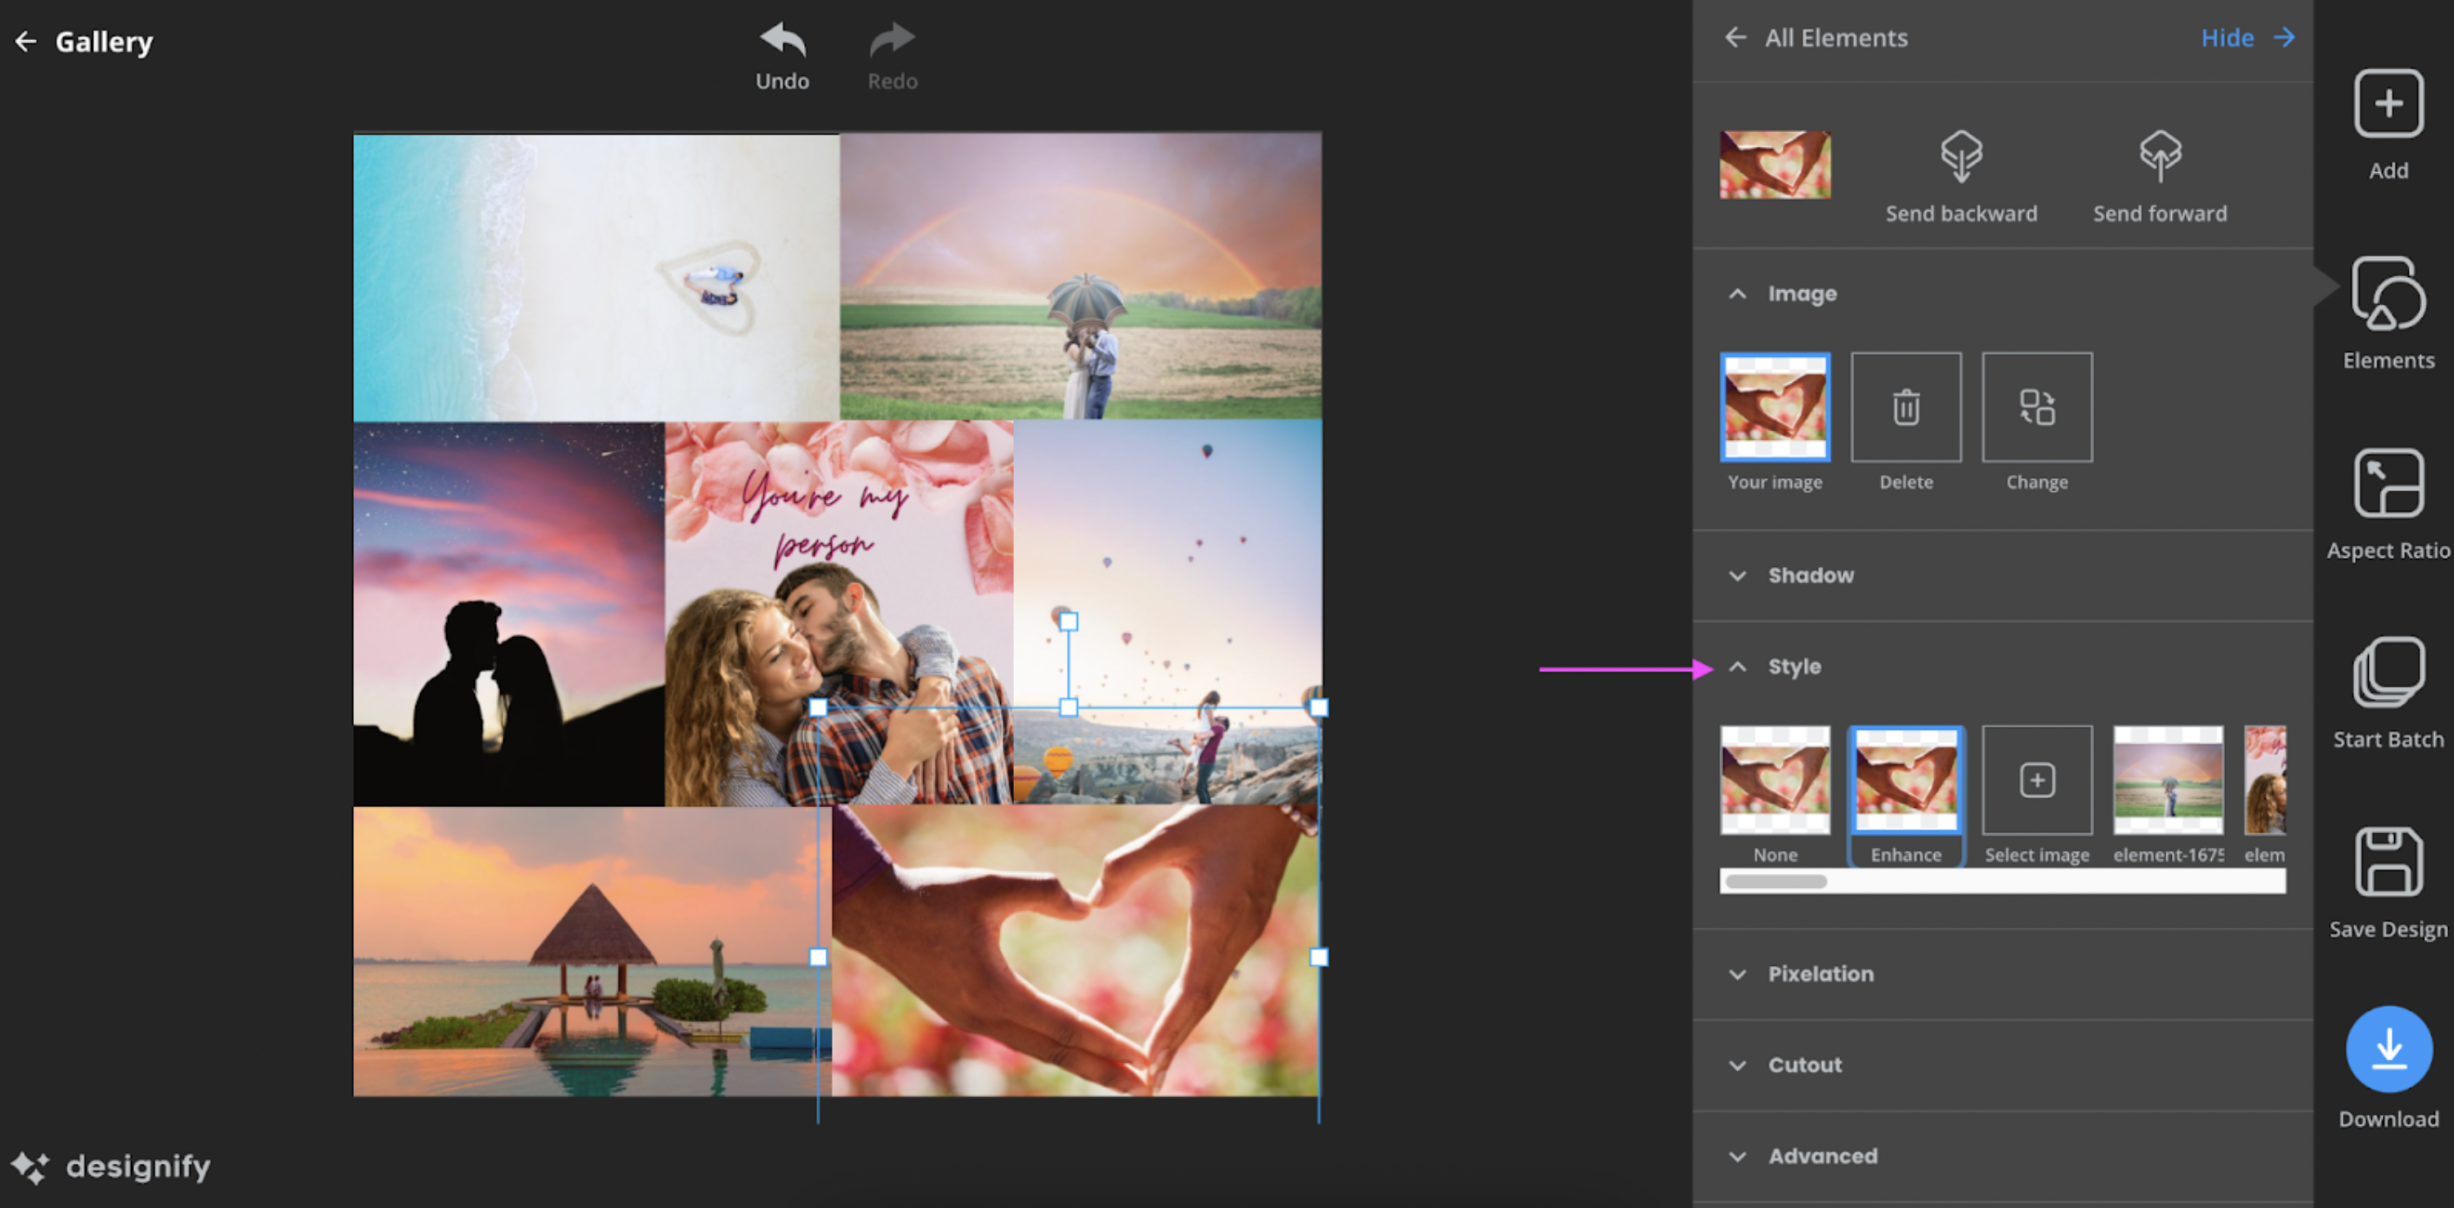
3. You can edit individual photos by clicking on them and exploring Designify's options. Here's an example where we made an image pop by enhancing its contrast with > Style (under > Elements):
4. Want to remove an image background directly? Click on the photo and then on > Cutout > Transparent:
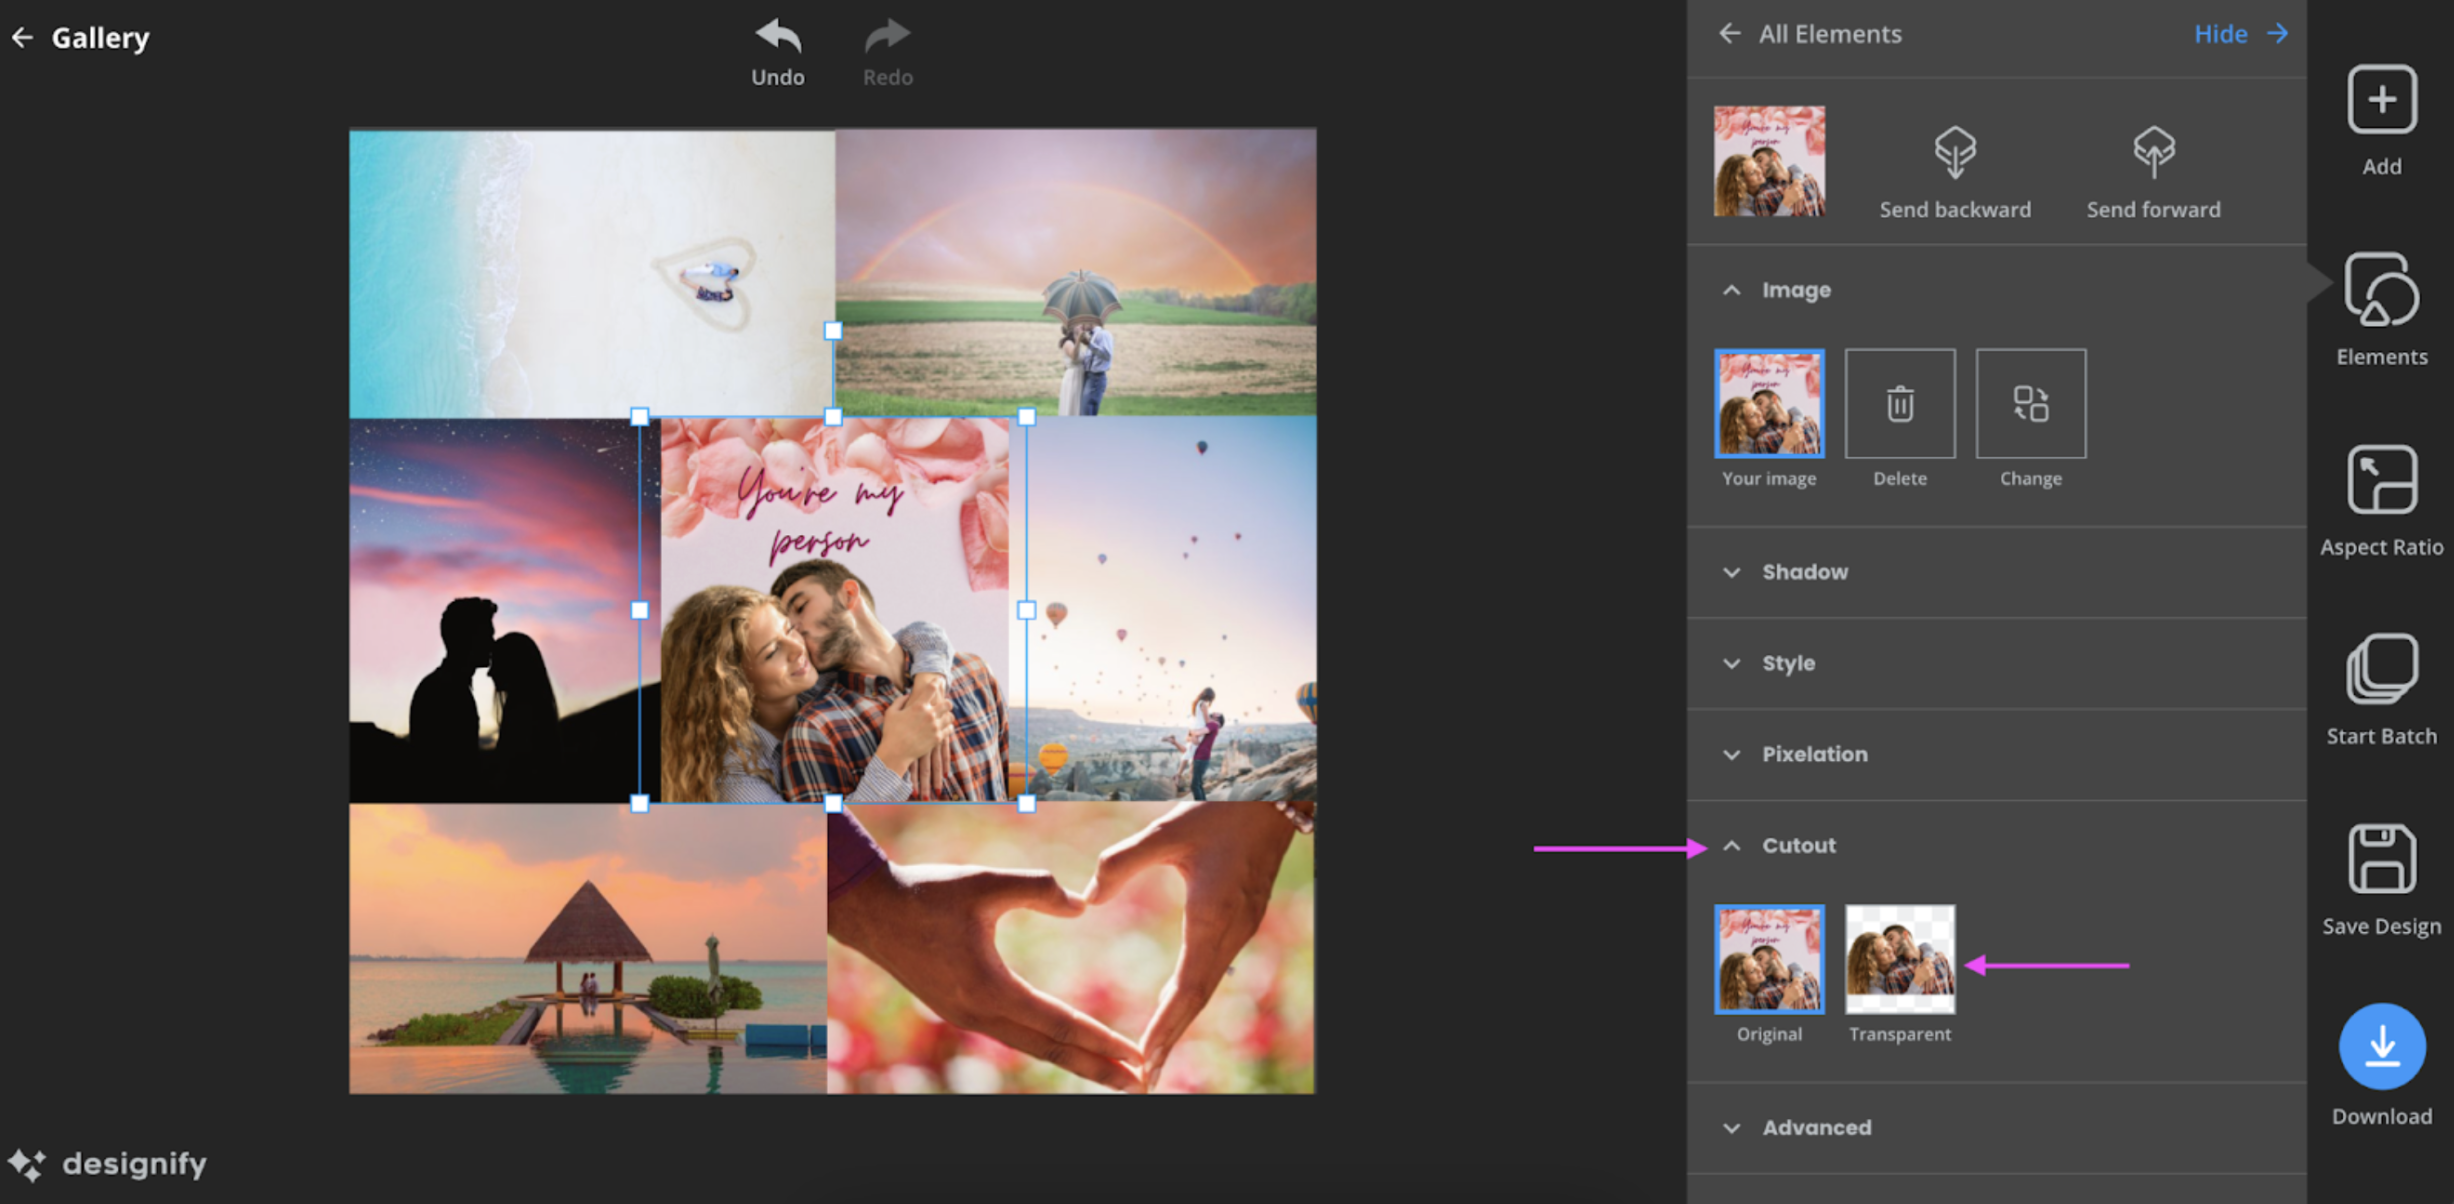
5. Once you're done, hit the blue > Download button to save your Valentine's Day collage:
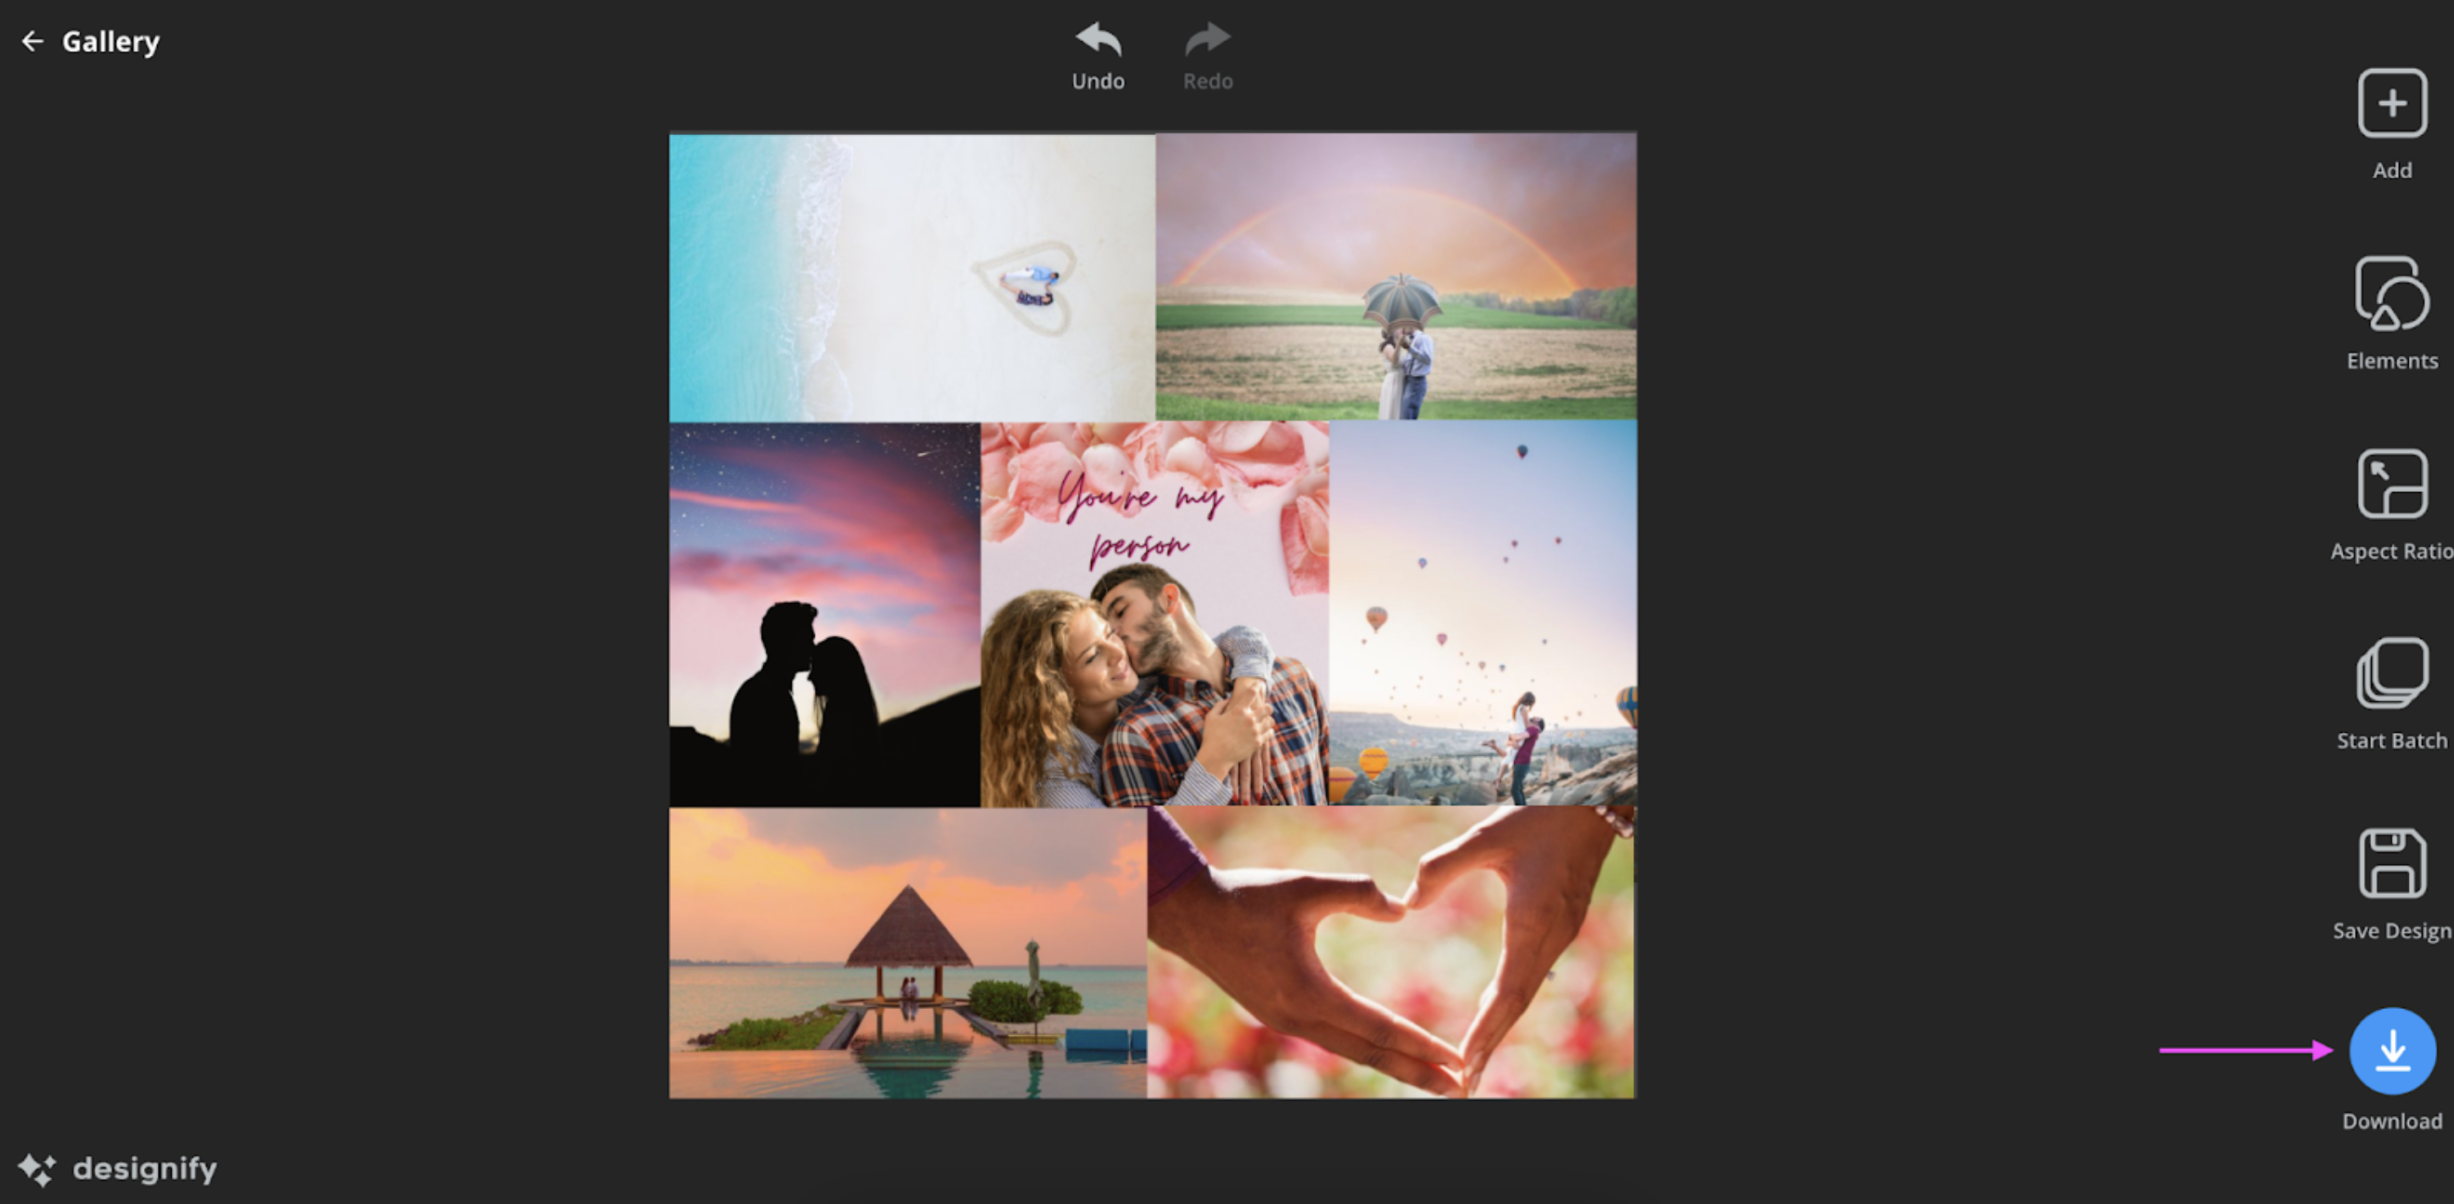
If you want to add text or personalize more, follow the same steps as before — i.e., upload your Designify collage to Canva and write a message or throw in some cute hearts and blurbs to really make it your own. You could even print it as a poster from Canva if you want to let your creative (and romantic) streak loose this Valentine's Day.
4. Use a Canva template for your Valentine's Day card
Here's one last option in case you've got your hands full with gift shopping and outfit planning — use a few of your special photos and a Canva template to whip up a cute Valentine's Day card. Like this one:

Here's how we did it:
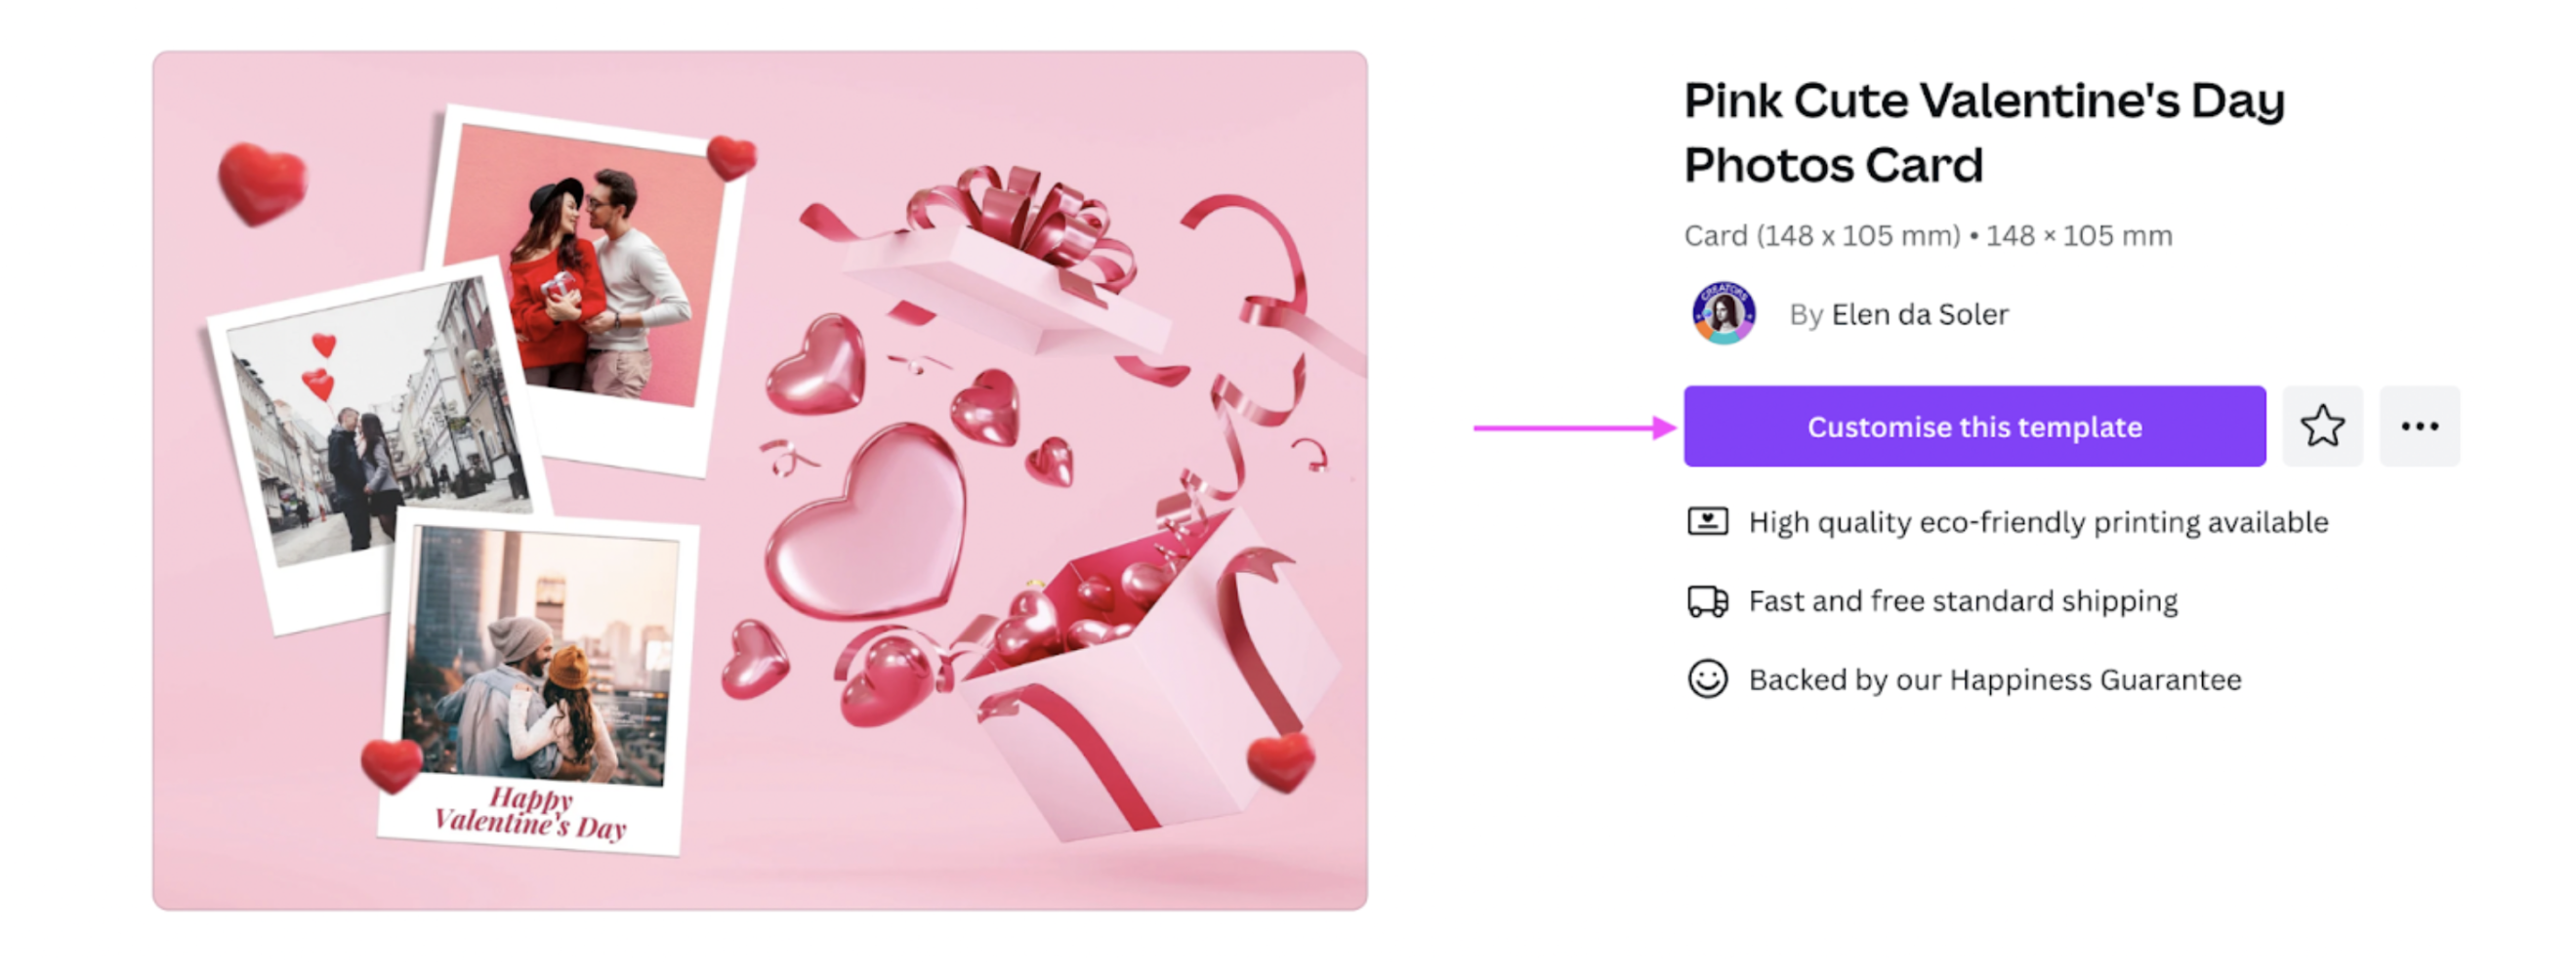
1. From Canva, pick a template that suits you. We chose the Pink Cute Valentine's Day Photos Card template:

Click on > Customize this template to get started:
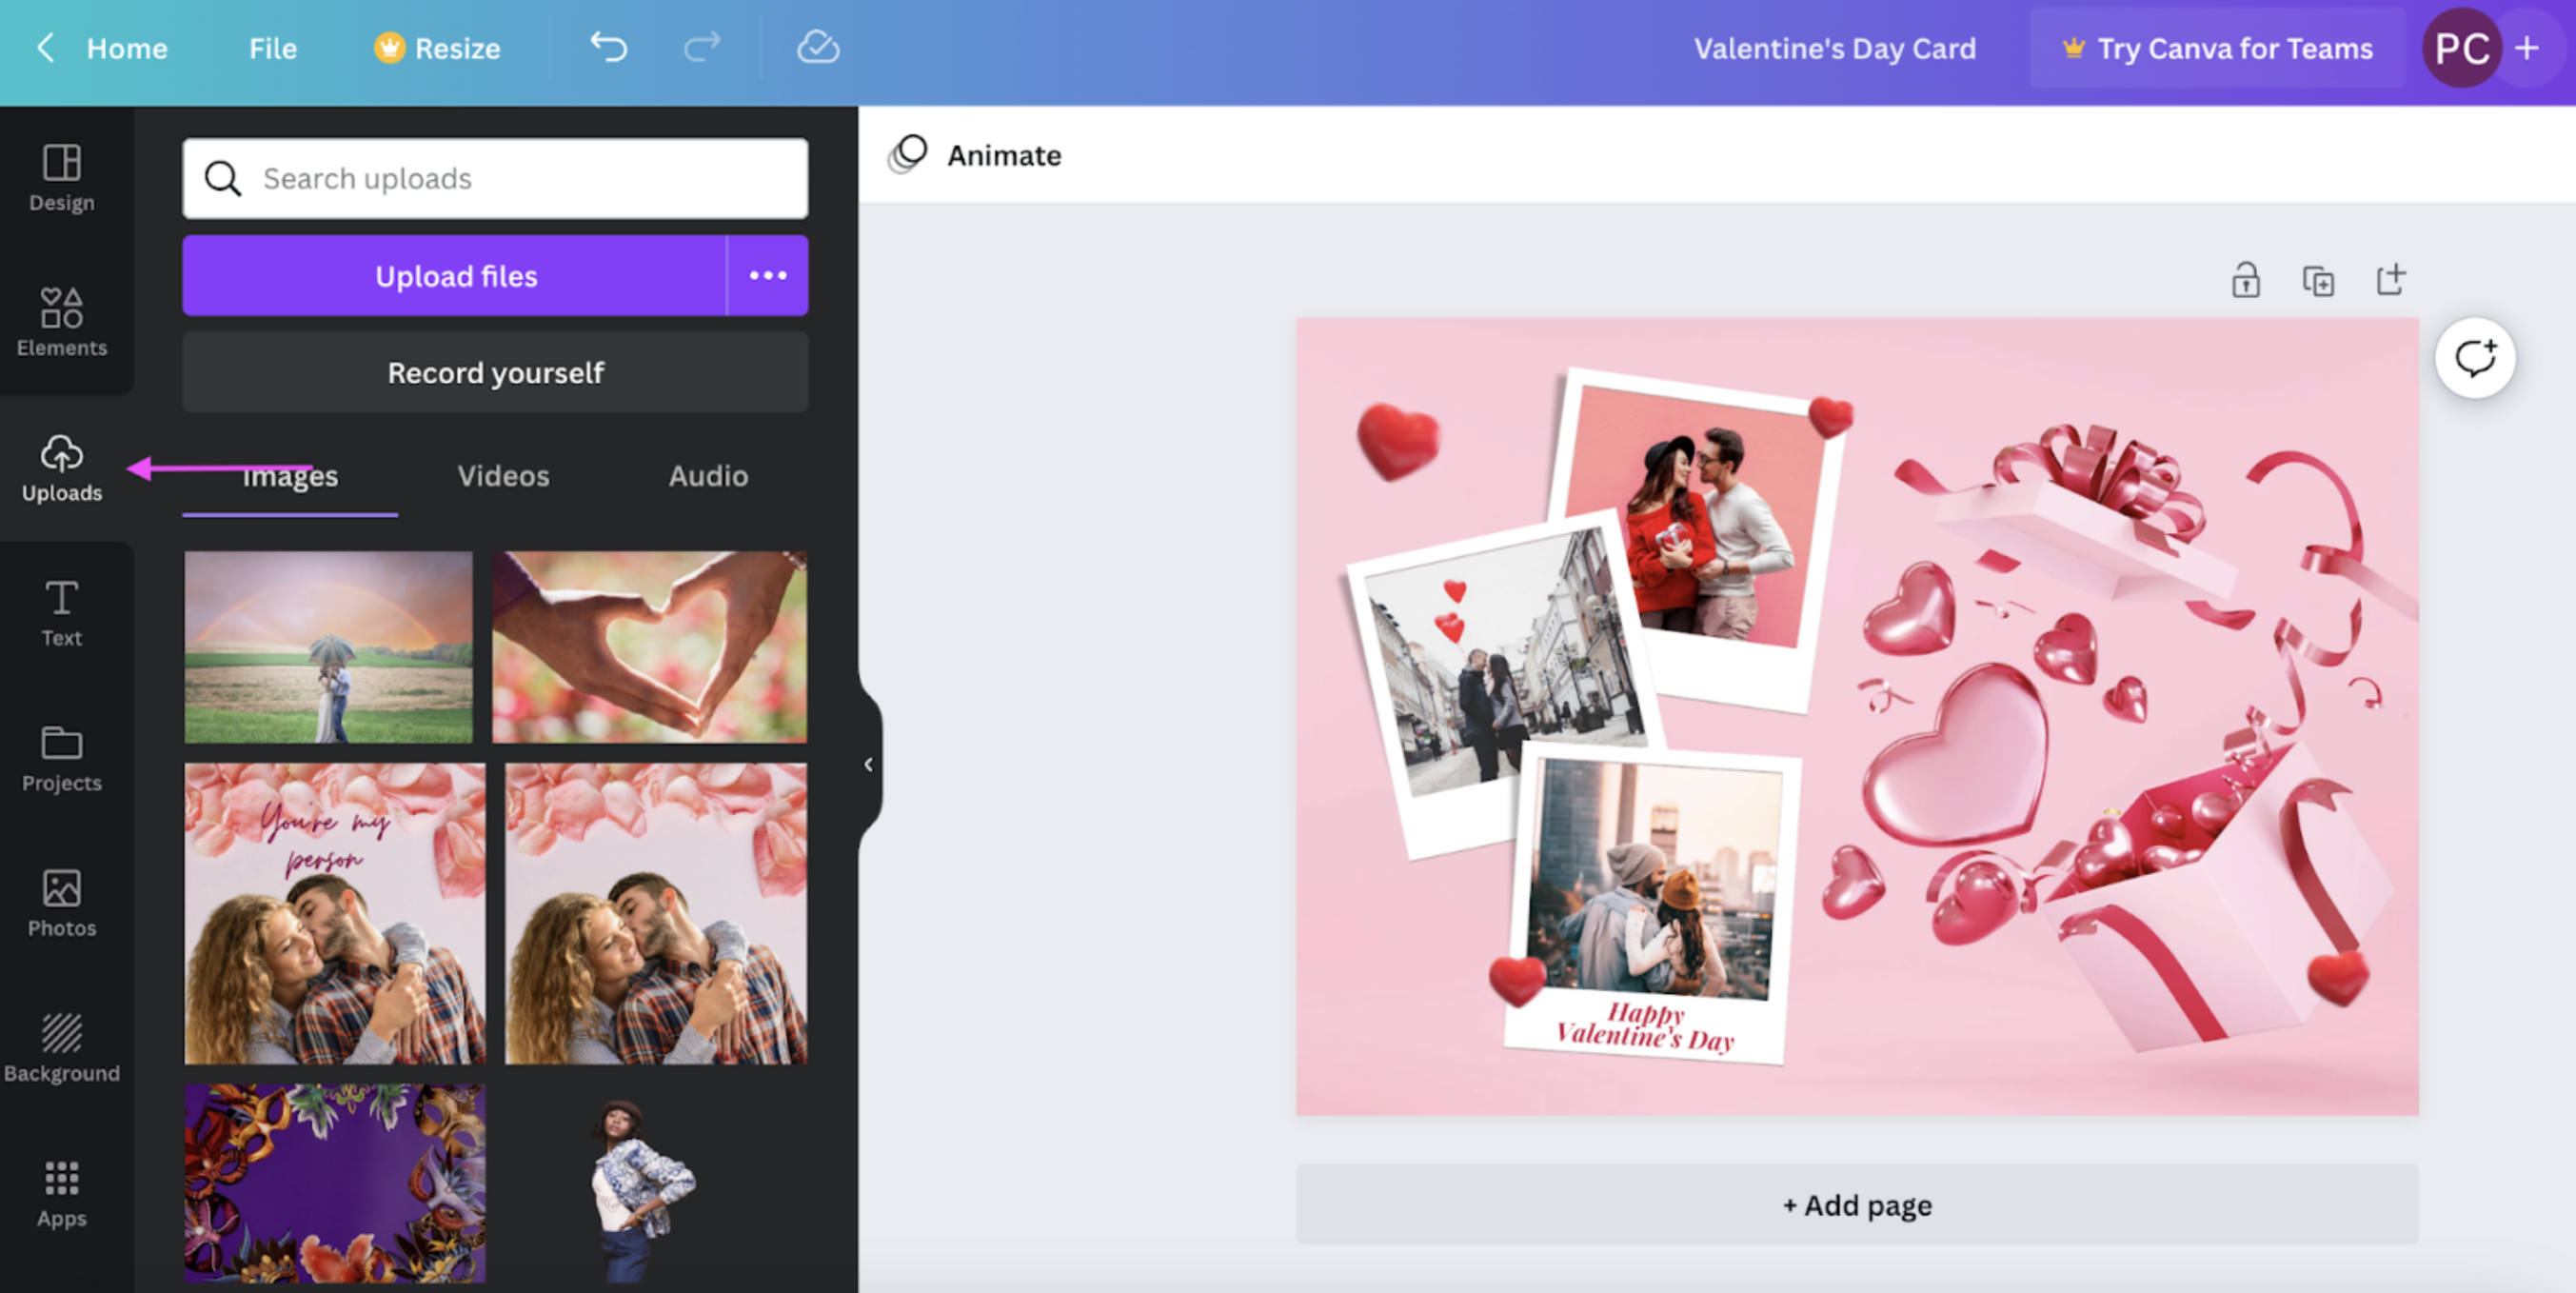
2. Add your special photos from > Uploads:
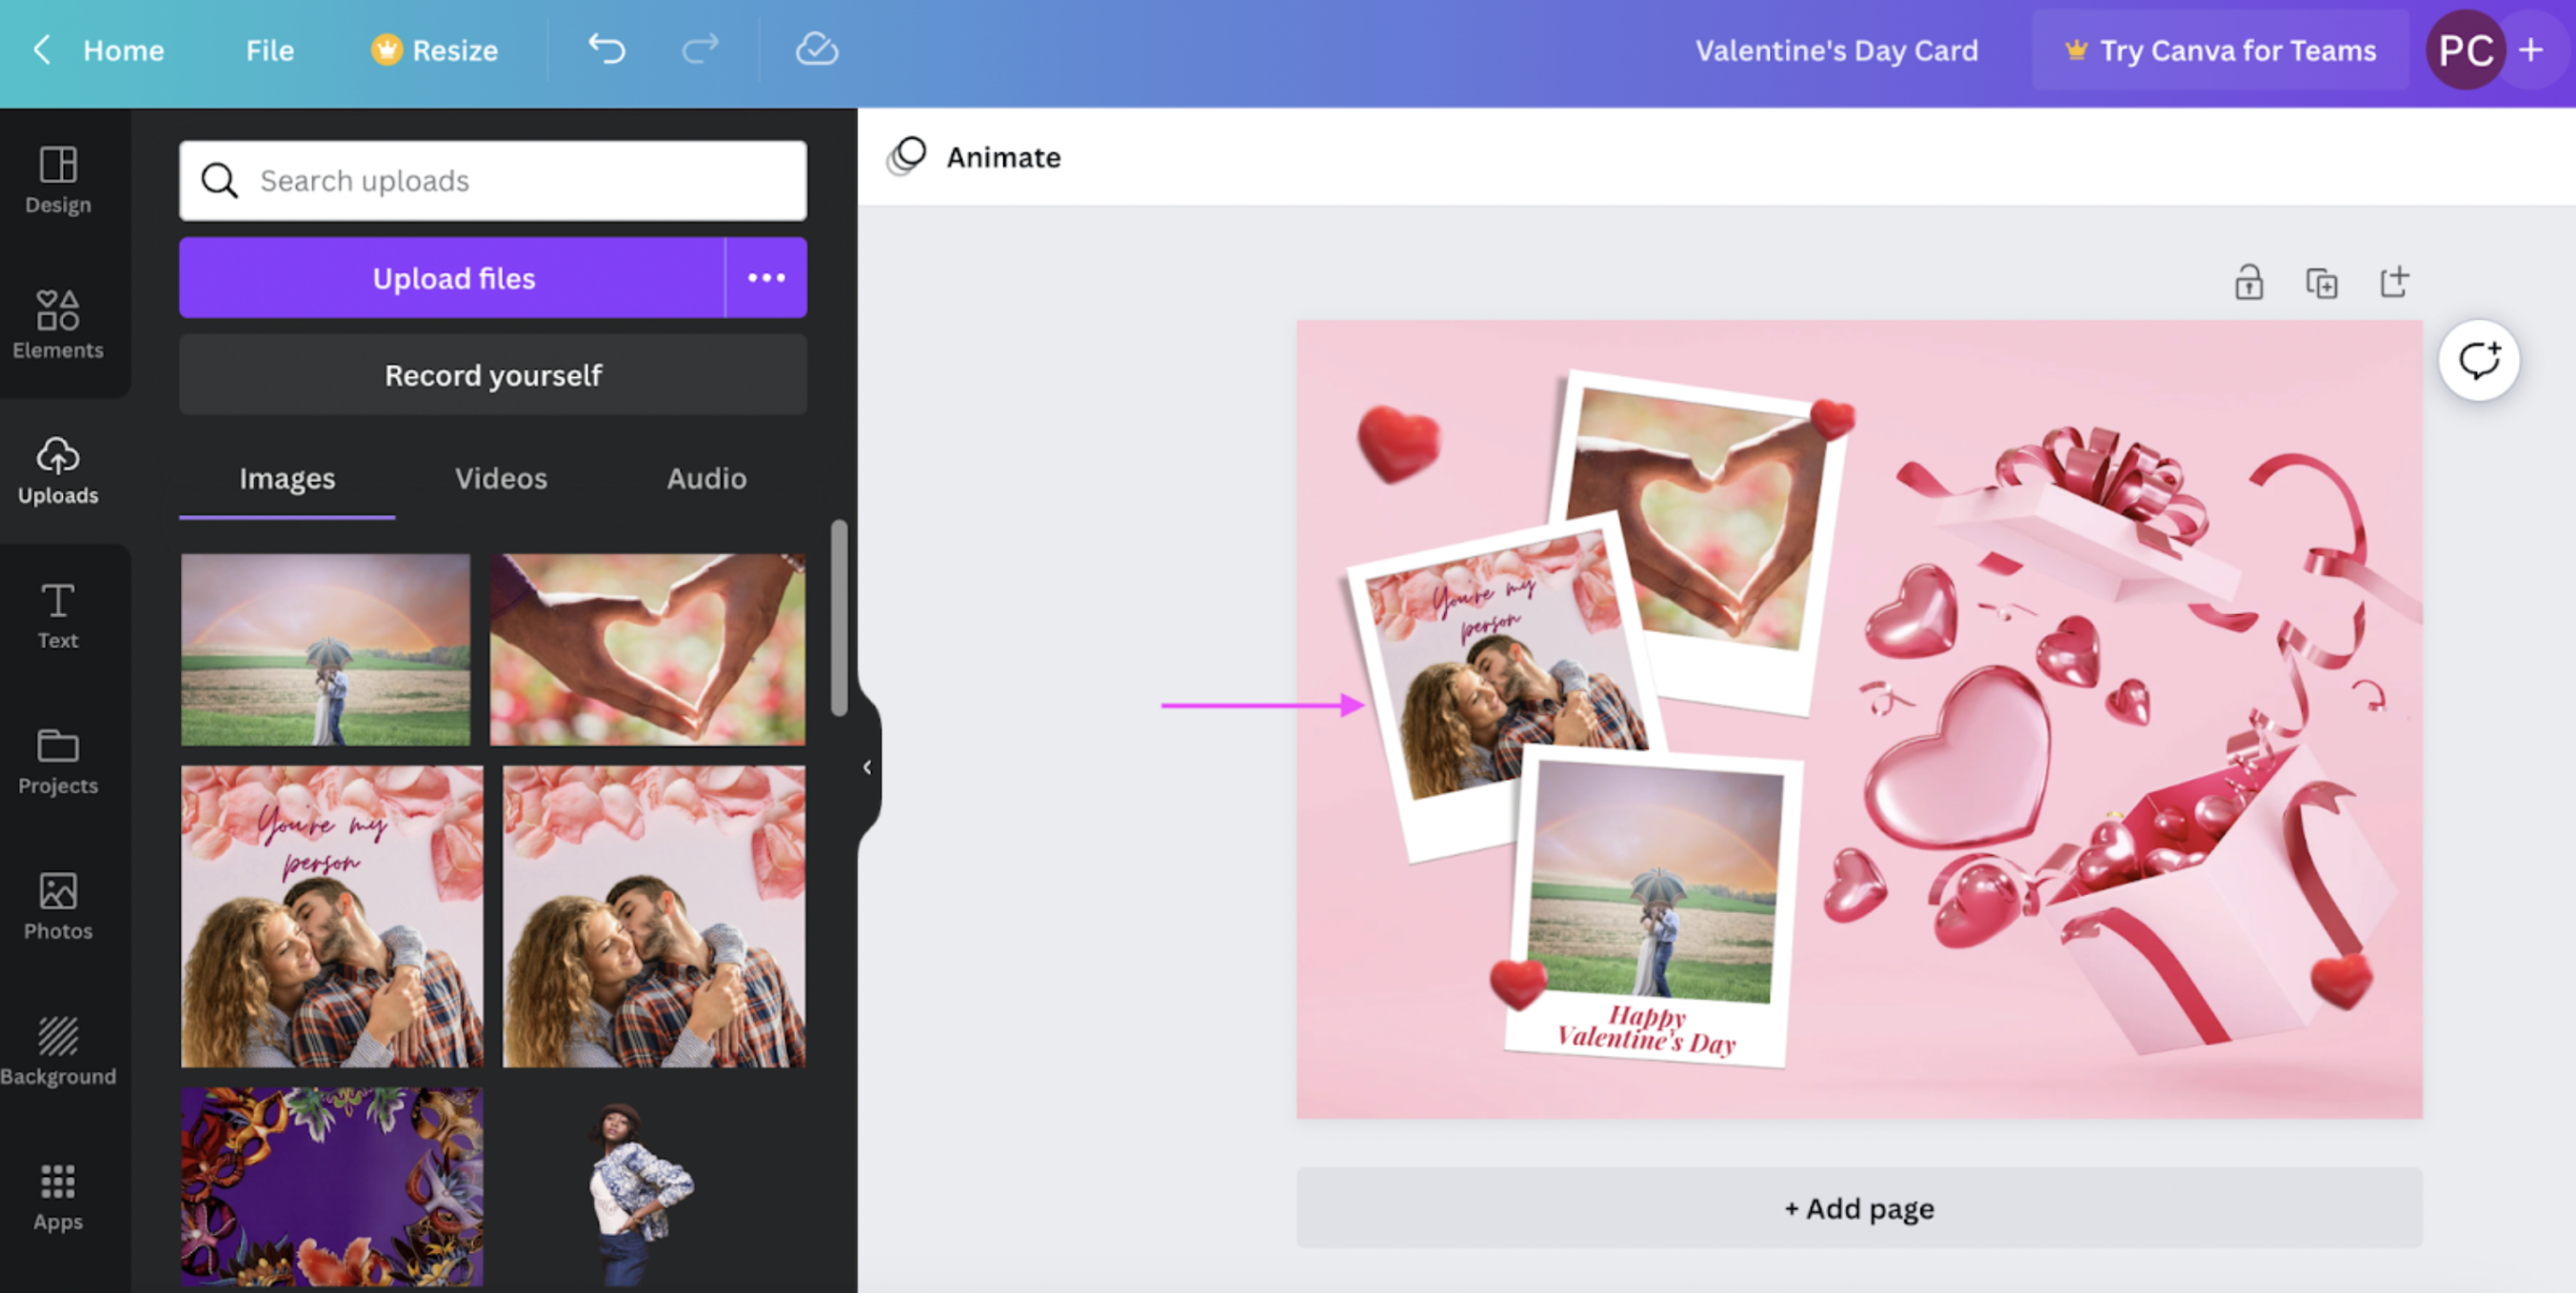
3. Drag and drop them to the canvas to replace Canva's photos:
4. When you're done customizing, hit > Share in the top-right corner and then > Download to save your image.
And there you have it — four fun, easy, and super quick ways to create a cute Valentine's Day card online. So you can show that special someone you're thinking of them, no matter if you're celebrating together or apart.
Bring on the magic this season of love — with a personalized Valentine's Day card

What’s the best way to show someone you care? With something you made yourself. And an online Valentine's Day card is a great place to start. With just two, free, simple tools, you can get designing (and gifting) in no time:
If you've got a little time at hand, take one of your special photos together and add a Valentine's-themed background with Designify. Make sure to add a cute message with Canva.
If you're in a rush, use Designify’s Valentine’s Day Card template or one on Canva to whip up a readymade Valentine's Day card online.
If you've got a little more time at hand, put a couple of your photos into a Valentine's Day collage with Designify. Perfect for celebrating your best moments and memories.
Ready to get romantic? Let's add some Valentine's Day magic to your photos with that perfect background. Head over to Designify, and let's get started.
Komen
Tiada komen setakat ini.