Surprisingly, we heard that quite a few of you are still using Paint — how cool and retro of you. In this article, we’re going to walk you through how you can make the background of an image transparent in Paint, step-by-step and as easy as pie.
Inhaltsübersicht
How to make a transparent background in Paint
Here’s how to make the background of an image transparent in Paint:
Open up Paint.
Now go ahead and click on File > Open and choose the image you’d like to remove the background from.
Once you see the image show up, go ahead and click on > Select > Transparent selection.
Now use the > Free-form selection tool to select the area item you want to ‘keep’ — the rest will become transparent.
Right-click on the area you selected and press > Cut to remove it from the image.
You can now copy and paste the image in another MS Paint window by pressing CTRL + V or right-clicking and selecting > paste.

Make background transparent in Paint 3D
If you’re using the more recent version of Paint — Paint 3D — you’re going to have to follow some pretty different steps to get your end result. Here’s exactly what you need to do:
Open up Paint 3D.
Now go to the menu in the top left-hand corner and click on it.
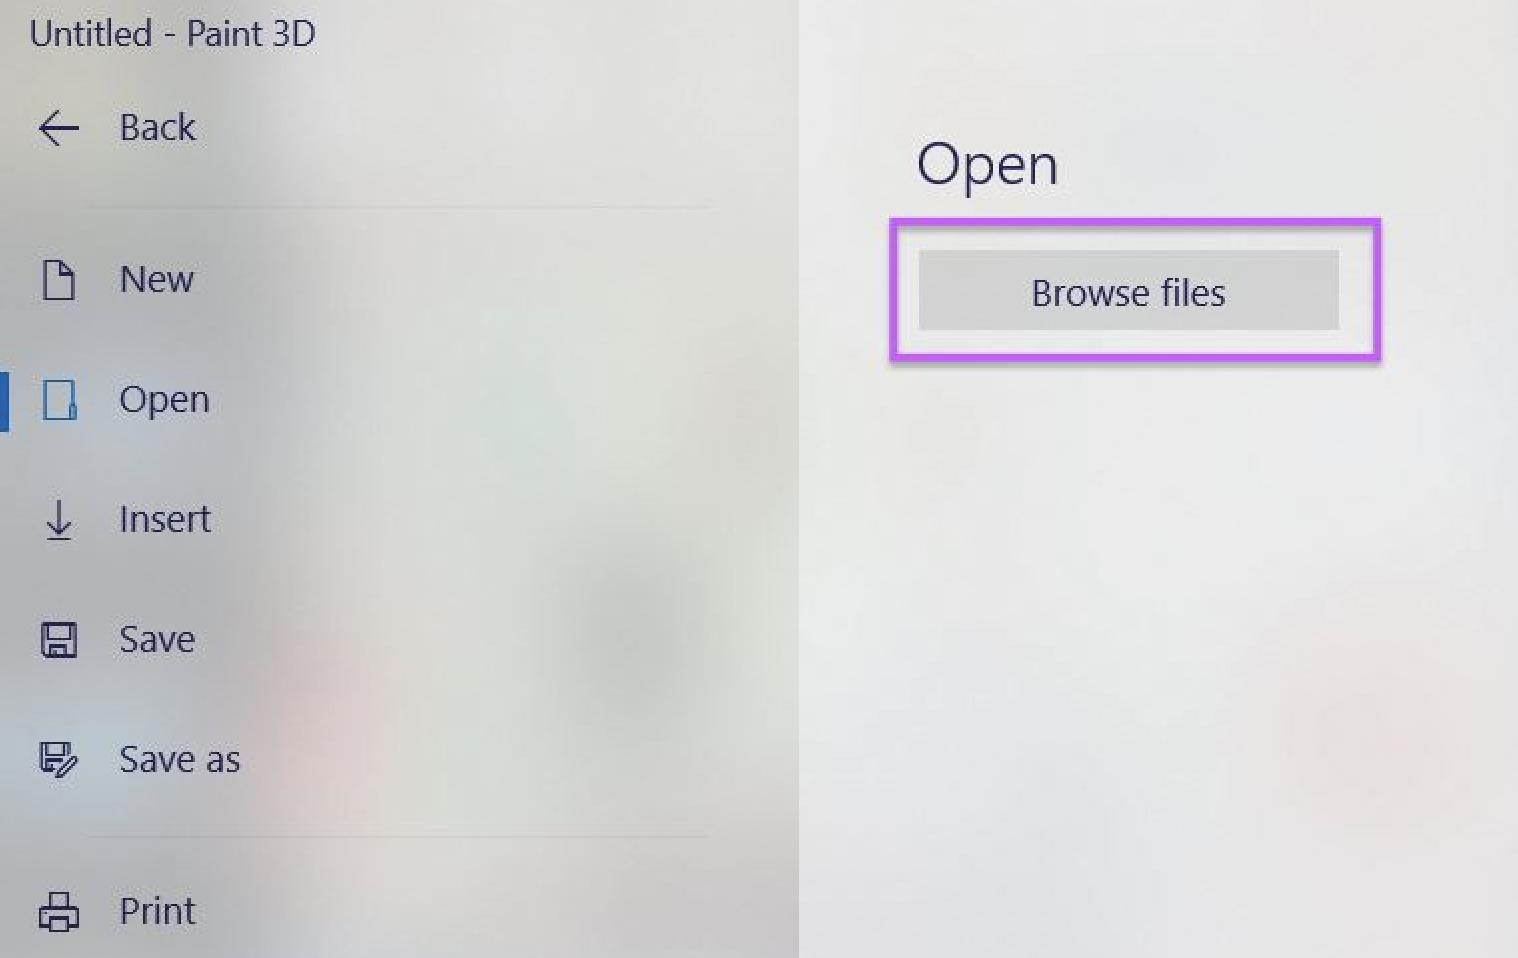
Next, select > Browse files and the file you want to remove the background from.

On the top bar, you can find the selection > Magic select.
Now bring the borders of the selection closer around the image; for example, if the main subject in the image is a cat - like in our case -, and you want to remove the background, go ahead and select very closely around the edges of the cat’s fur.
Now click on > Next. You can use the tabs > Add/Remove to refine your selection. So, if Paint removed too much of your image, you can use the Add function to fix the part that was falsely removed. Whereas if the tool didn’t remove a particular part of the image, which is indeed a part of the image's background, you can select the Remove tab and use the mouse to select those image areas.
Click on Done.
You can now select the object, person, or animal you ‘cut out’ and drag it to the side.
Select the background you want to remove by going to > Select in the top left-hand corner, drag and click over the entire background image, and hit > Delete on your keyboard or in the settings to the right.
Now the background should be gone, and you can drag the main image back into the center.
Next, move on to creating a transparent background. Go to Menu > Save as > PNG Image and make sure that > Transparency is set.
Now you can go ahead and save it — and it’s done!
You can use the image pretty much anywhere now with the transparent background, whether on slides or in a graphic design tool.
Reuse your transparent background image in all of your Paint 3D projects: make it a sticker
We just walked you through how to make the background of an image transparent in Paint 3D; if you didn’t read it — skip back a section ;) But what if you want to use that image over and over again in projects? Well, you can make it a Sticker — that way, it will stay saved, and you can stick it onto whatever you want. To do this, simply follow these steps once you have removed the background/made it transparent:
Select the image with the transparent background.
Now go ahead and hit > Make sticker.
The sticker will remain in the list as long as you keep Paint 3D open; if you want to reuse it later, be sure to save it as a separate file on your desktop.
Want to add the Sticker to your canvas? Go ahead and select the > Stamp icon.
That’s it, your very own DIY Sticker — great for creating a fun and unique yet repetitive pattern based on your favorite photos. Hey, you might even design a bit of wallpaper with your best friend's face all over it.
Make image background transparent with remove.bg: a faster alternative to Paint
Sure, you can make an image background transparent using Paint — but if you want an easier and faster way of doing it, we have an option for you, you’re going to love.
remove.bg makes removing the background of an image easy as pie, and you’ll be done in just a few seconds. Even if you need to use Paint after, it’s worth integrating remove.bg into your workflow to speed up the process big time. Here’s how you can make the background of an image transparent in seconds and then import it into Paint.
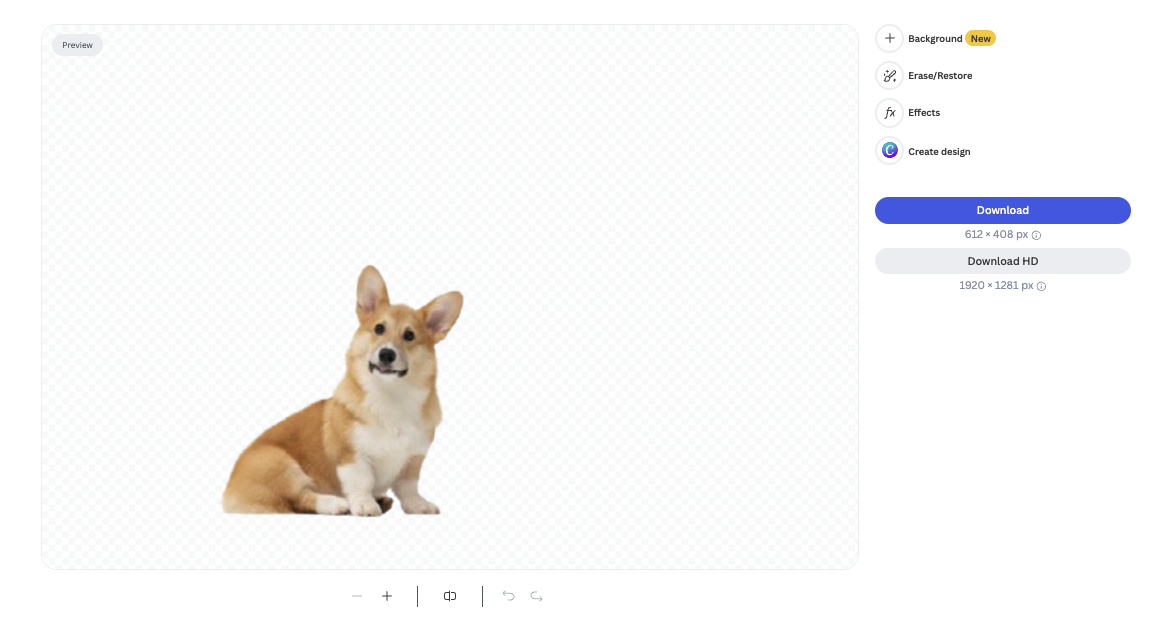
Drag and drop your image onto the site. We used this cutie as an example for you:

Once you’ve dragged and dropped your image, remove.bg will remove the background for you in just a few seconds.

If you want to keep editing the image, you can select > background, and choose among thousands of backgrounds or upload your own.
If not, go ahead and hit > Download to save the image onto your device.
Then, open up Paint again and go to > File > Open and select the image you just downloaded.
Voilà! You’ve got your image ready to go with a transparent background in Paint in just a few clicks.
Want to give remove.bg a try and speed up your workflow big time?
Kommentare
Very helpful
Can you send us a screenshot of what you see at team@remove.bg?